|
-
29th August 10, 05:00 AM
#11
As much as I hate posting over myself, I'm going to do it again 
Updates.
All of the cantle plates are cut, shaped, slicked, cased and marked for stitches. Tooling and hammering is finished on the front plate.
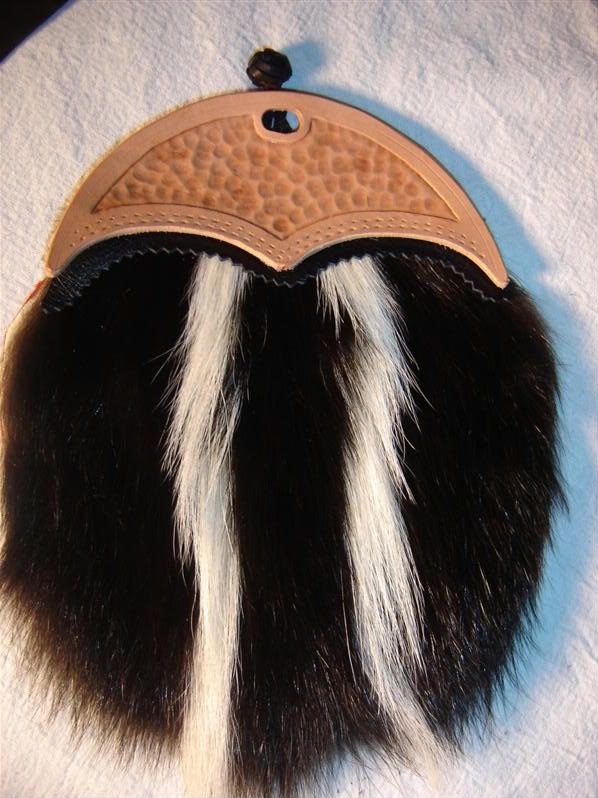
An interesting little development is the potential addition of the small, pinked decorative trim shown edging the cantle (this one is a test piece). This detail may not stay in, but occurred to me yesterday as I was looking at some of the MacLeay illustrations.
I had originally proposed it in red, but the commissioner wanted to stay monochrome.
Back to progress:
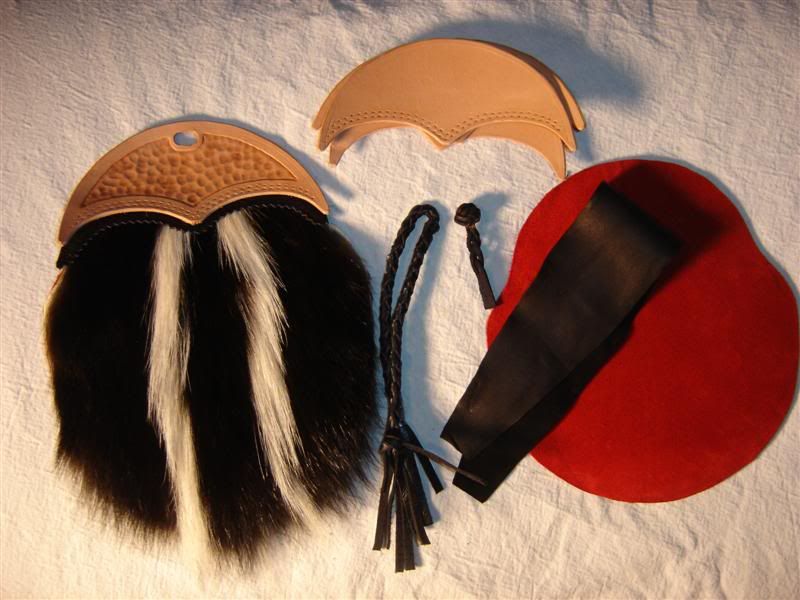
The top-knot is finished and dyed, the gusset is cut, all of the interiors are trimmed in their red suede, and tonight I begin dyeing the cantle plates and cutting miles of lace for all of the braid work.
-
-
29th August 10, 05:09 AM
#12
I know it's a commision piece Artificer and that the cantle, I presume, will be dark brown to match the top knot, but I really like the lighter leather as it is in its undyed state. There is just a "earthy" contrast, if you get what I am trying to say. Again, beautiful work though
-
-
29th August 10, 06:31 AM
#13
 Originally Posted by Downunder Kilt

I know it's a commision piece Artificer and that the cantle, I presume, will be dark brown to match the top knot, but I really like the lighter leather as it is in its undyed state. There is just a "earthy" contrast, if you get what I am trying to say. Again, beautiful work though
Thanks Downunder!
The cantle will end up black. The top knot is also, I'm not sure exactly why it appears brownish in the image- it must be a weird reflection from the flash.
When I originally started designing elements of this cantle, my vision for it was a medium-dark brown, with the hammered elements lightly antiqued in a copper colour. I thought this with red fox or similar would be great. The nice thing about the antiquing is that you still get to see all of the colour variation that comes from the tooling process, so it does retain that organic feel.
-
-
29th August 10, 12:40 PM
#14
Hey, I think the pinked piece in black makes it look more finished, so let's go with that. Thanks for posting the progress to date.
SM
-
-
30th August 10, 06:03 AM
#15
 Originally Posted by ShaunMaxwell

Hey, I think the pinked piece in black makes it look more finished, so let's go with that. Thanks for posting the progress to date.
SM
Excellent! I'll cut it today.
I have a few updates, but no new pix (yet).
Everything is out of the dye vat, and it is BLACK! It took about 40 minutes of buffing to remove the excess surface dye from 6 little pieces. If the humidity isn't too terrible today, they will get their secondary oiling and finish.
Lace cutting progresses slowly.
With a spot of luck I should have pictures of preliminary assembly this evening.
-
-
1st September 10, 06:03 AM
#16
Updates;
Sub assembly is well under way, the front cantle is stitched to the bag front and laced.
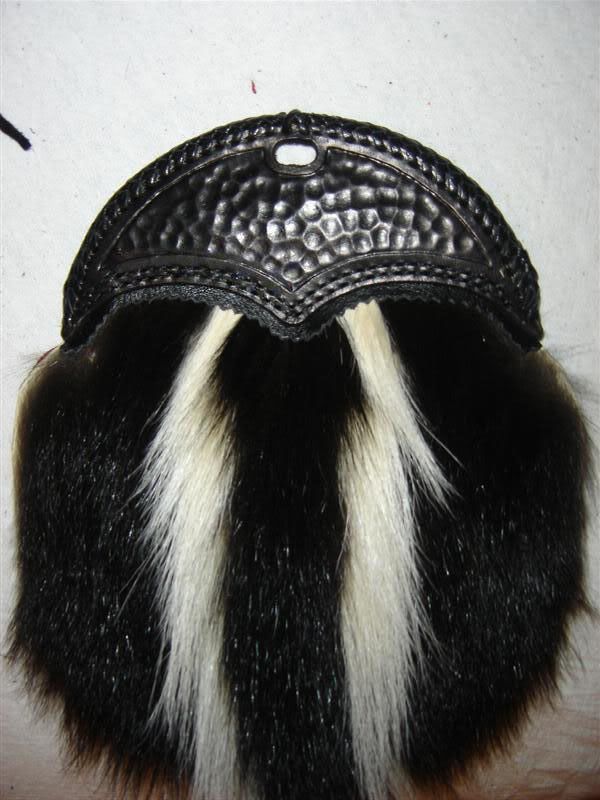
a detail shot of the cantle and lacing
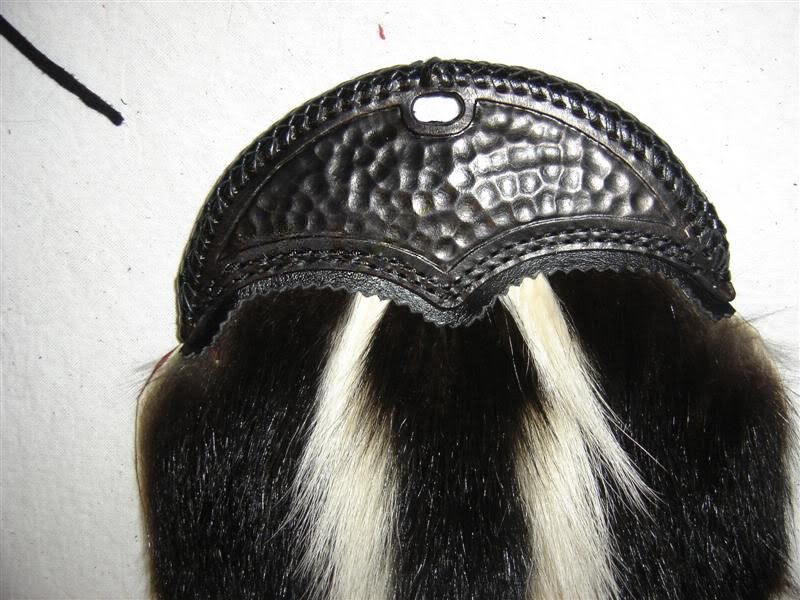
Please ignore the reddish 'shine', it's an artifact of the flash.
Laces are all cut, the central braid is tied (side ties go on later). The 'D' is finished as is it's retainer.
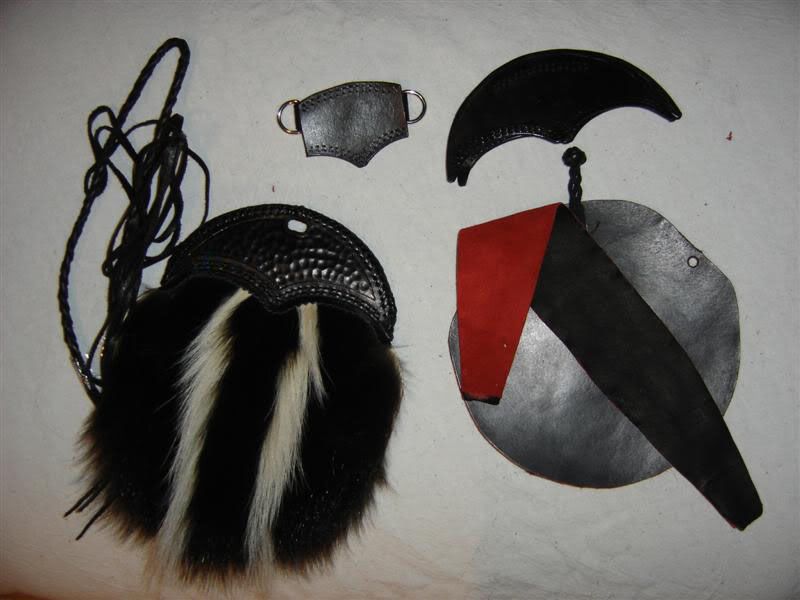
Today will see the gusset attached to the front face, and I'll start assembling the rear cantle plate and back panel.
I didn't end up posting the updates yesterday, as it's pretty dull staring at a pile of laces being cut 
-
-
1st September 10, 09:37 AM
#17
(I may be biased but...) Very nice!!! The dark brown/tan would have been nice too (maybe for the yellow/white stripes?) but the black doesn't distract from the pelt.
-
-
6th September 10, 07:32 PM
#18
THREAAAAAAD! (ala Shatner's Khaaaaaaan!)
Bugger!
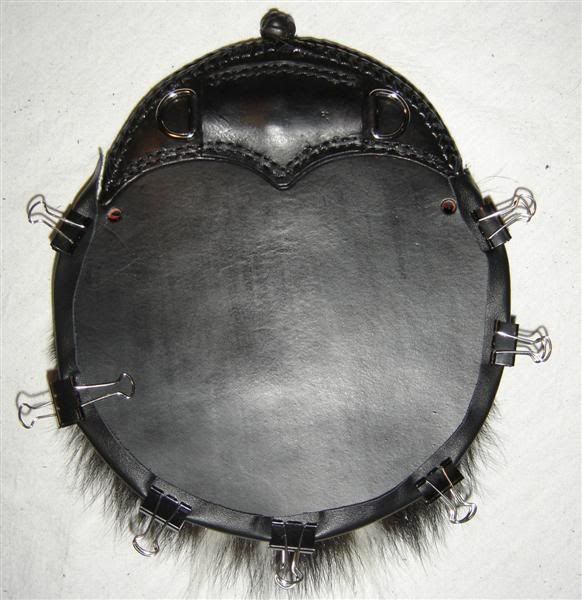
After spending the better part of two day's worth of free time stitching the back cantle together (it's nearly 3/4" thick of veg-tan) and lacing the lip, I ground to a halt when I ran out of black waxed thread.
Of course, my leather shop is closed today (when I have time to labour- please note the irony).
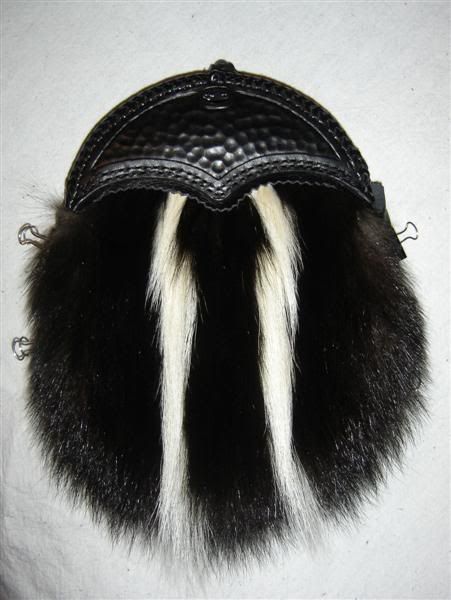
Here's where the update sits:
Front, gusset stitched, only awaiting installation of braids at the end of project.
Rear, awaiting trim and gusset attachment (halted for want of 1.5m of thread)
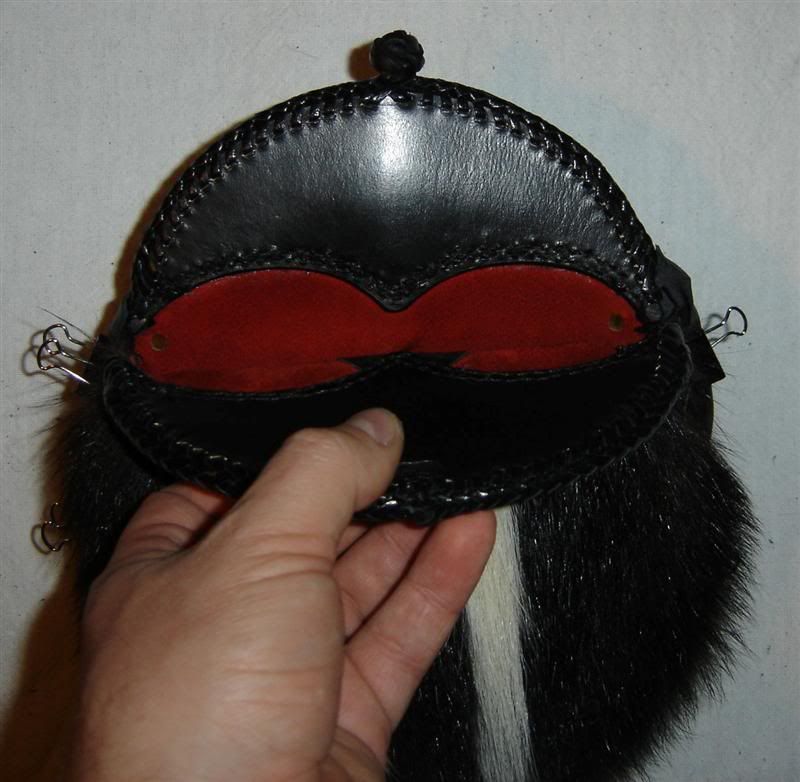
Interior shot, showing the red 'reveal'
-
-
8th September 10, 06:13 AM
#19
Woa!
Scott, that sporran is a beautiful work of art and engineering! I love the silhouette of the bag- very classic, but not the exact shape that you always see, nowdays. And the red interior- fantastic.
You've got the magic touch, sir.
-
-
8th September 10, 01:20 PM
#20
 Originally Posted by Ryan Ross

Woa!
Scott, that sporran is a beautiful work of art and engineering! I love the silhouette of the bag- very classic, but not the exact shape that you always see, nowdays. And the red interior- fantastic.
You've got the magic touch, sir.
Thank you, sir!
I cannot take credit for the bag shape, that was the Commissioner's.
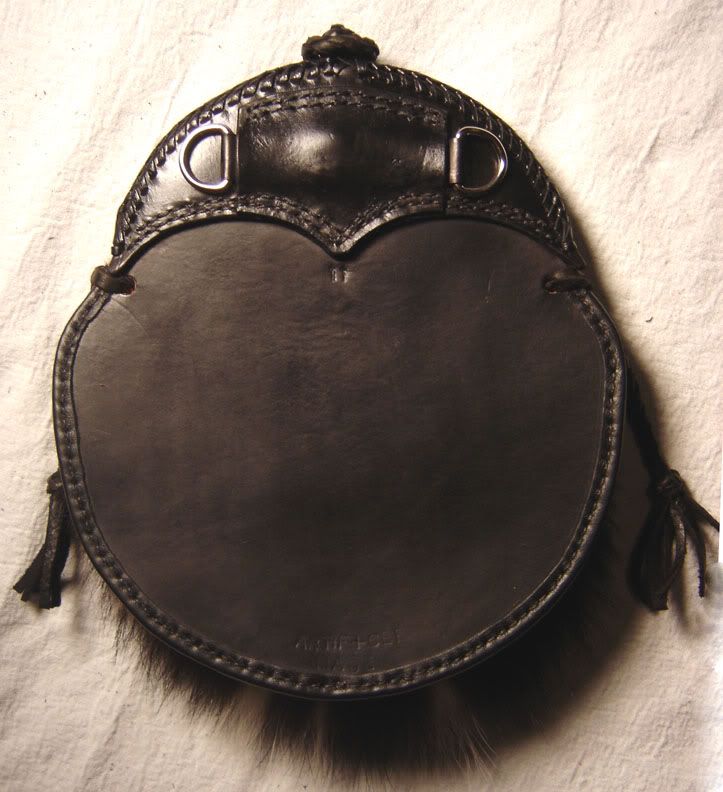
I really like the red interior, too. It's something most people will never see, but when the bag is opened there's a little 'pop' of colour that I think is really surprising and wonderful on the all-black bag.
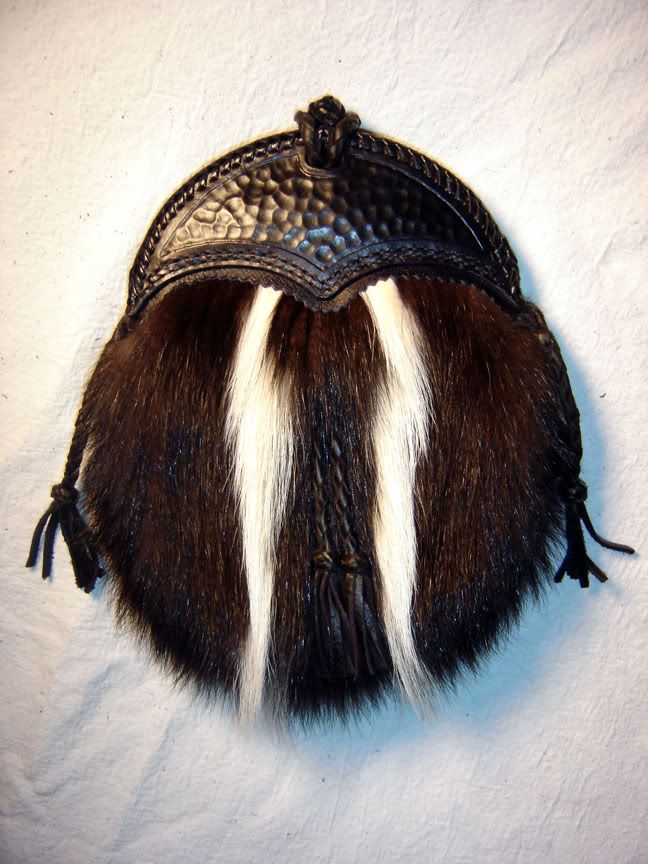
And now, finally - Finished!
The Front - final view
Rear - final view
Packing #11 away for posting to it's new owner
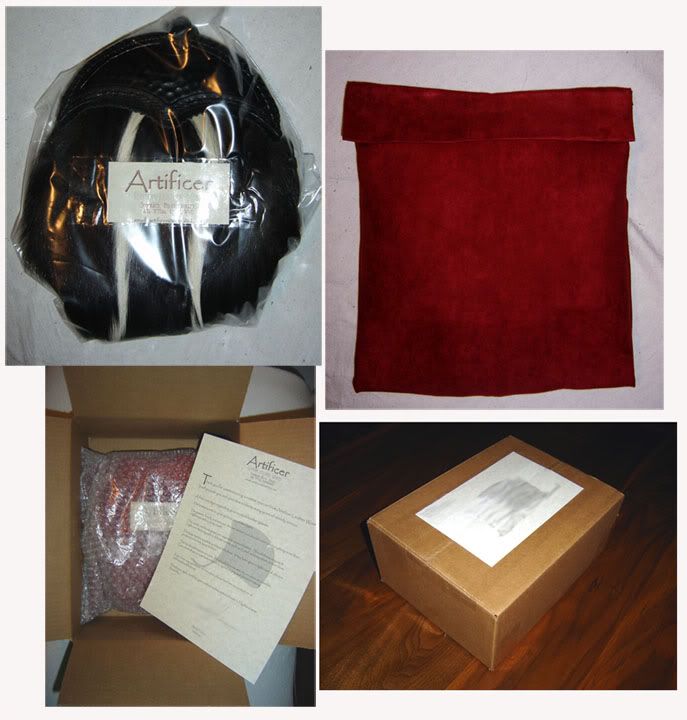
I started to use the crimson microfibre bags for protecting the british tan leather on the #5's and #6, and just loved the look. I think commissioning a custom piece should be something special, and the bag is a nice little touch.
The care and maintenance letter is just plain helpful, since not everyone has experience with a given material.
As always, commentary and critiques are more than welcome.
That's all folks!
-
Similar Threads
-
By artificer in forum DIY Showroom
Replies: 26
Last Post: 1st August 10, 09:24 AM
-
By bricelythgoe in forum DIY Showroom
Replies: 20
Last Post: 3rd March 10, 05:33 AM
-
By OFCJAX in forum DIY Showroom
Replies: 16
Last Post: 25th June 08, 05:09 AM
-
By usndoc in forum How to Accessorize your Kilt
Replies: 23
Last Post: 5th June 07, 05:03 PM
-
By Canuck in forum Miscellaneous Forum
Replies: 2
Last Post: 24th January 07, 03:23 PM
 Posting Permissions
- You may not post new threads
- You may not post replies
- You may not post attachments
- You may not edit your posts
-
Forum Rules
|
|


Bookmarks