X Marks the Scot - An on-line community of kilt wearers.

   X Marks Partners - (Go to the Partners Dedicated Forums )
USA Kilts website Celtic Croft website Celtic Corner website Houston Kiltmakers

User Tag List

Page 1 of 2 12 LastLast
Results 1 to 10 of 15
  1. #1
    Join Date
    15th November 15
    Location
    West Yorkshire
    Posts
    130
    Mentioned
    0 Post(s)
    Tagged
    0 Thread(s)

    Getting the pleat right at the join.

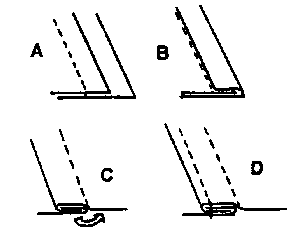
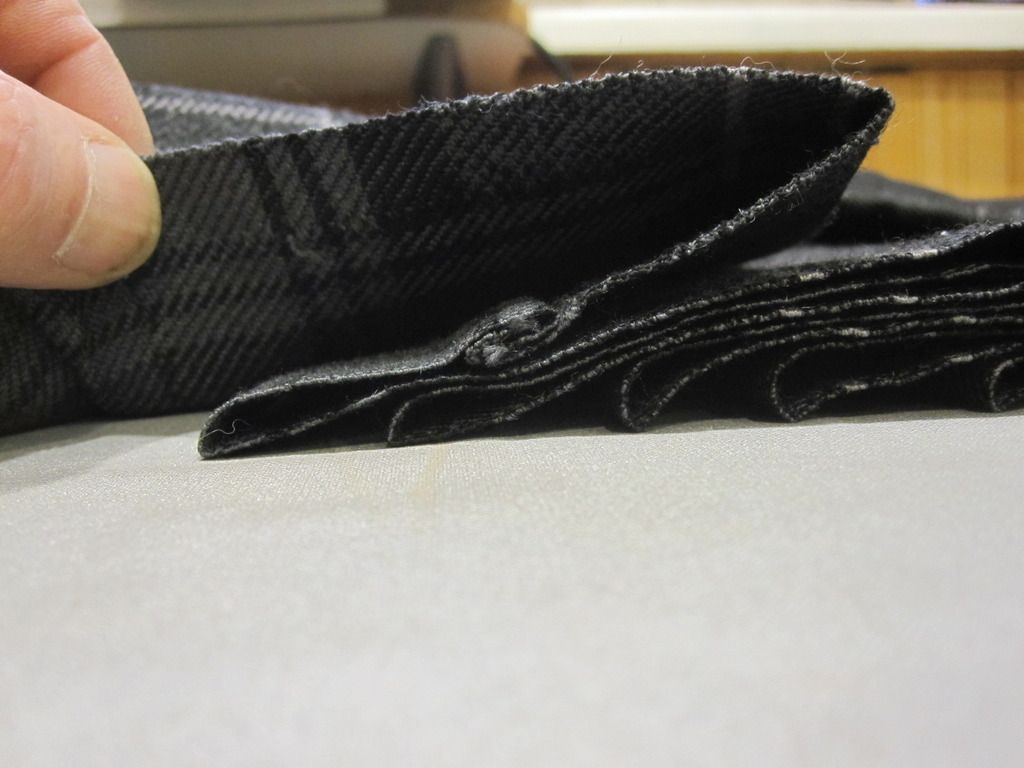
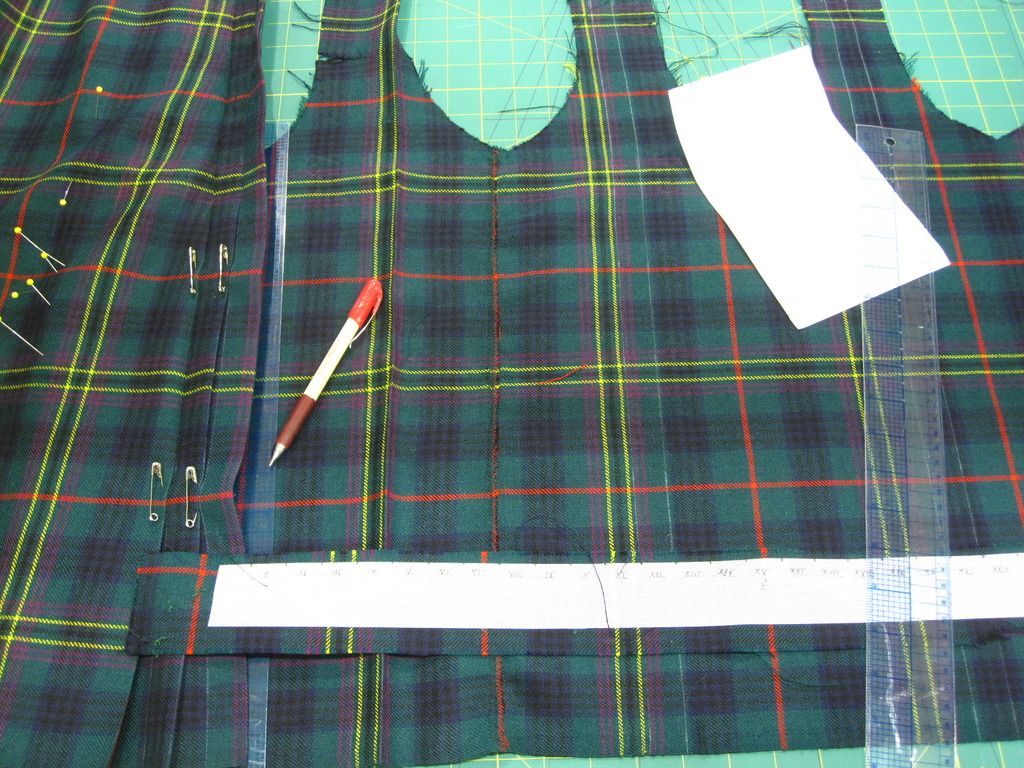
    I've been following the instructions in Barbra's book TAoK and have become stuck on page 82, called stitching the join. Everything has gone ok upto this point, I've even sewn the join as advised 1 inch above the fell (on the wrong side ) down to the selvedge. However I cant see any advice about stitching the two halves together at the pleat.

    Normally the pleat is folded so you sew through 4 peace of material, which I have done for all other pleats. But when joining the two halves I can not see that this is possible.

    Am I correct assuming that the top pleat that is folder back against itself is stitched at the edge to a single piece of cloth, beneath it at the join from waist to fell?

    I can't see any other way...

    Can anyone help?

  2. #2
    Join Date
    25th September 04
    Location
    Victoria, BC, Canada 1123.6536.5321
    Posts
    4,794
    Mentioned
    3 Post(s)
    Tagged
    0 Thread(s)
    When making a kilt IAW TAoK you create what is known as a Flat Fell Seam. Essentially the fabric is folded back on itself. it is the same as the outside leg seam in blue jeans.

    Here is one way to sew a Flat Fell Seam.


    You also create the join deep inside the pleat so that it does not show when walking.


    Here is my Tewksbury kilt showing the Flat Fell Seam join. Please notice that the pattern of the Tartan is maintained.


    And here you can see the join hidden deep in the pleat. You still sew the Fell area just like you did with all the other pleats. You are not sewing at the join.

    Last edited by Steve Ashton; 29th January 16 at 08:03 PM.
    Steve Ashton
    www.freedomkilts.com
    Skype (webcam enabled) thewizardofbc
    I wear the kilt because:
    Swish + Swagger = Swoon.

  3. The Following User Says 'Aye' to The Wizard of BC For This Useful Post:


  4. #3
    Join Date
    15th November 15
    Location
    West Yorkshire
    Posts
    130
    Mentioned
    0 Post(s)
    Tagged
    0 Thread(s)
    Thank you for the quick reply. My attempt looks the same as your diagran and photo from bottom of the fell to the selvedge.

    I've also left the two halves 1 inch higher up from the bottom of the fell to the waist on the wrong side unstiched as shown i tne book.

    However I cant see how to join the two halves from bottom of fell upto waist in the outside of the kilt that can bee see (the correct side)

  5. #4
    Join Date
    25th September 04
    Location
    Victoria, BC, Canada 1123.6536.5321
    Posts
    4,794
    Mentioned
    3 Post(s)
    Tagged
    0 Thread(s)
    Maybe I'm not understanding your question.

    The join is inside the kilt. The reason you don't need to sew the join up in the Fell is because you are going to cut away that fabric anyway. You are saving yourself the time of stitching and cutting that stitching right back out.

    On the outside of the kilt you do not see the join. You stitch the pleats exactly the same way as you have done before and after the join.

    Maybe this photo will help.

    This is a kilt that I had to completely unstitch. You can see one join right near the center of the photo at a red stripe.
    You can also see the pleat edge on the left of the join and see where that would be folded over until it meets the next pleat beyond the cut-away which is marked in chalk.

    Steve Ashton
    www.freedomkilts.com
    Skype (webcam enabled) thewizardofbc
    I wear the kilt because:
    Swish + Swagger = Swoon.

  6. #5
    Join Date
    15th November 15
    Location
    West Yorkshire
    Posts
    130
    Mentioned
    0 Post(s)
    Tagged
    0 Thread(s)
    Please forgive the material and the standard of the pleats, it's simply a cheap practice kilt to be thrown once away once I understand the concept before I buy better material.

    Hope these photos help me explain better. This is the two halves joined and hidden in the pleat as viewed from the correct side. With the pleat between fell and waist un joined.

    20160128_003240.jpg

    The same photo viewed from the wrong side.

    20160128_003628.jpg

    All the other pleats are stitched through 4 layers of material folded prior to having the excess material removed from the back at a later stage. But I can not seem to replicate this when joining the two halves at the top of the kilt.

    Hope this now makes sense?
    Last edited by Sean Wilson; 27th January 16 at 06:00 PM.

  7. #6
    Join Date
    25th September 04
    Location
    Victoria, BC, Canada 1123.6536.5321
    Posts
    4,794
    Mentioned
    3 Post(s)
    Tagged
    0 Thread(s)
    Ah, OK,

    Well the idea is that you are going to sew one pleat on one side of the join to the next pleat on the other piece of your fabric,

    You reach inside and fold the excess fabric out of the way till you have the two layers of one pleat on top the two layers of the pleat underneath.

    It is exactly what you have been doing all along you just have a couple extra layers that you slip your fingers between.

    I suspect that you may be over-thinking this. It's not rocket science. Just sew the pleat that is on the end of the outer apron section to the pleat on the end of the under apron section in exactly the same way that you have sewn all the other pleats. If you find that you have more than four layers of fabric (two layers each pleat) simply fold the extra layers out of the way underneath the kilt.

    You don't have any problem with the pleat edge on the outer apron section. The extra layers will only be on the under apron section.
    Last edited by The Wizard of BC; 27th January 16 at 07:39 PM.
    Steve Ashton
    www.freedomkilts.com
    Skype (webcam enabled) thewizardofbc
    I wear the kilt because:
    Swish + Swagger = Swoon.

  8. #7
    Join Date
    5th August 14
    Location
    Oxford, Mississippi
    Posts
    4,756
    Mentioned
    8 Post(s)
    Tagged
    0 Thread(s)
    Even when the "WIZ" pulls the curtain back and gives tidbits on kilting (just like this thread) I am still in awe of the construction and craftsmanship you folks display. Thanks for the info.

  9. The Following 2 Users say 'Aye' to Tarheel For This Useful Post:


  10. #8
    Join Date
    15th November 15
    Location
    West Yorkshire
    Posts
    130
    Mentioned
    0 Post(s)
    Tagged
    0 Thread(s)
    The fold is too shallow in the material for me to get my hand behind the 4 layers (2 pleats). That being said I figured out my own work around by cutting away the excess fabric at that pleat only (slightly earlier than suggested in Barbara's book), then stitching the two halves together.

    One less piece of material to cut away later in the process - lol

    I'm not sure it was the way Barbara intended but it works and no one will know the difference in the end result, even though I might have gotten there in a slightly different manner.

    Thank you very much for your help. It was much appreciated

  11. #9
    H. Hastings is offline Oops, it seems this member needs to update their email address
    Join Date
    12th June 06
    Location
    Finger Lakes area, NY
    Posts
    127
    Mentioned
    0 Post(s)
    Tagged
    0 Thread(s)
    If I am understanding your description you stitched the join first then the pleats. I don't have my book in front of me and my memory is spotty at best but as I recall the one time I had to join two pieces of fabric I did it in the opposite order, stitched the pleats first and then stitched the join.

  12. The Following User Says 'Aye' to H. Hastings For This Useful Post:


  13. #10
    Join Date
    15th November 15
    Location
    West Yorkshire
    Posts
    130
    Mentioned
    0 Post(s)
    Tagged
    0 Thread(s)
    Neither way worked for me, I guess I must have deviated from Barbara's Instructions somehow.

    That being said I found a workaround solution.

Page 1 of 2 12 LastLast

Bookmarks

Posting Permissions

  • You may not post new threads
  • You may not post replies
  • You may not post attachments
  • You may not edit your posts
  •  

» Log in

User Name:

Password:

Not a member yet?
Register Now!
Powered by vBadvanced CMPS v4.2.0