|
-
21st August 12, 05:38 AM
#1
Waistcoat Conversion - Buttons
I think that we are all agreed that adding a waistcoat (vest) to our wardrobe is a positive thing. We can change the look of any outfit in a moment, just by putting on a waistcoat. With or without a jacket (or with or without a tie) it raises the level of formality a notch. A place to put that vintage pocket-watch. And for those of us with more than enough 'middle', we can wear a bow tie without feeling that we have a monster great gut hanging out.
Yes - win, win all round.
But ...
Having bought the waistcoat, do we feel that we are limited to 1 outfit on 1 type of occasion? I did, so I decided to convert.
Now before we go any further, I must say that we are talking about 'shank' buttons (with the loopy bit at the back) and not 'flat or sew-through' (which do not have a loopy bit)
Here is a picture of both, but the one on the right is the type we are interested in.

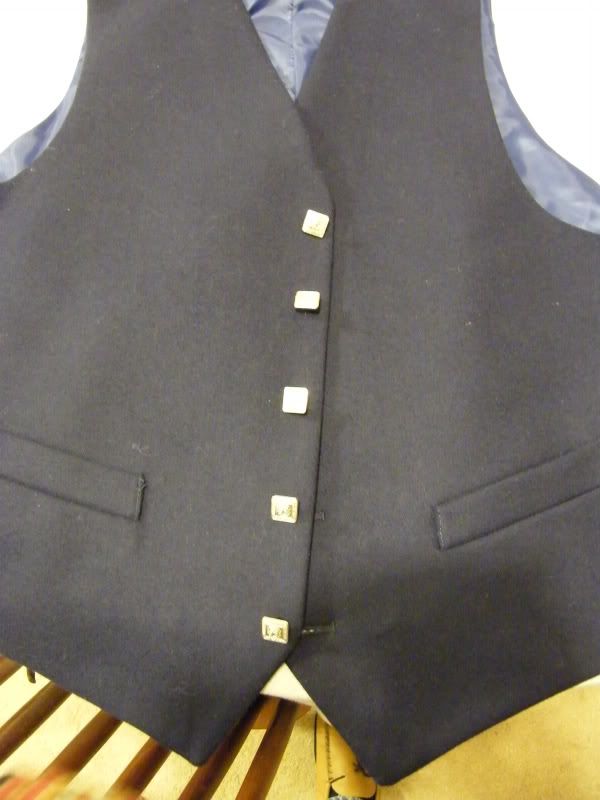
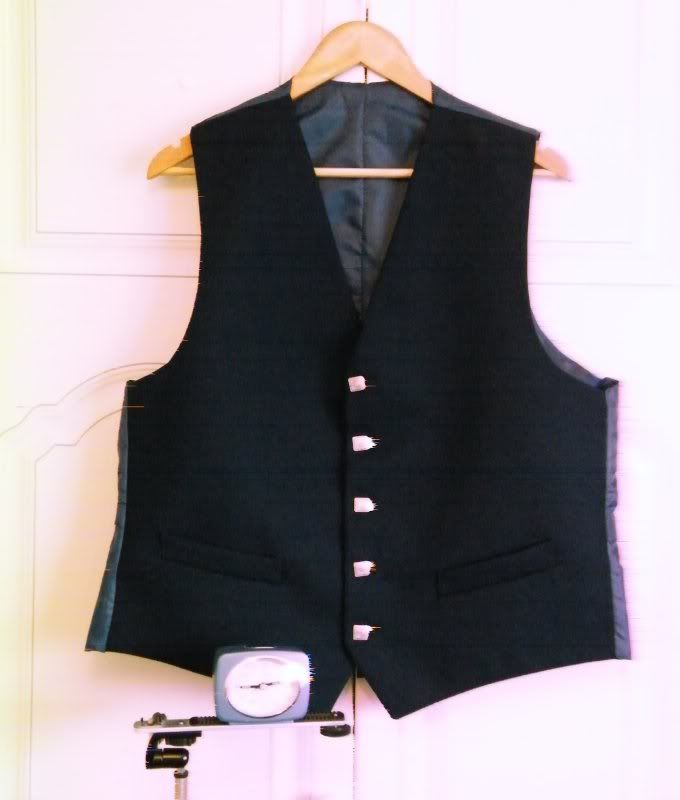
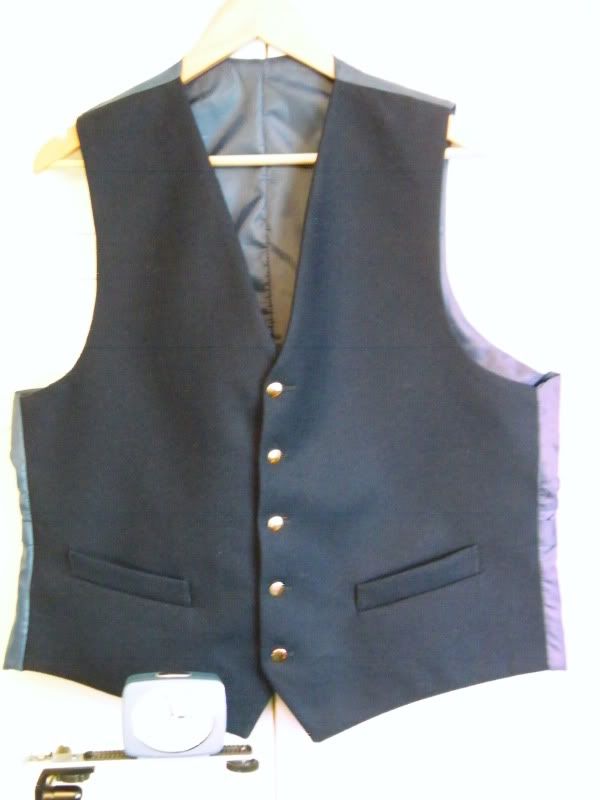
This is the waistcoat in question, navy blue with five square 'Scottish style' buttons.
What tools do we need?
Good thread - polyester. I use Gütermann or Sylko - only a little bit more expensive, but twice as good as cheap. Use the best you can afford.
Sharp scissors - if they are not sharp, you might as well use a blunt axe to cut the thread.
A hole punch - 5mm or 1/4 inch - don't go smaller.
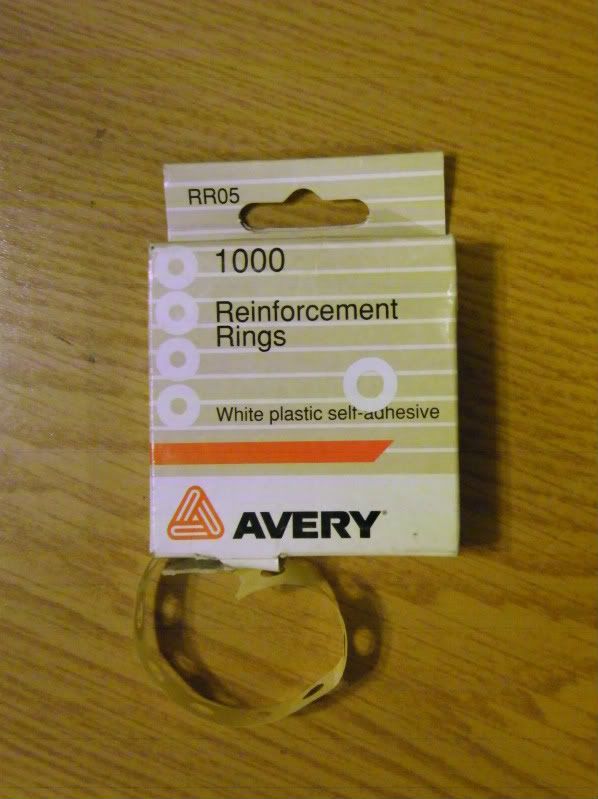
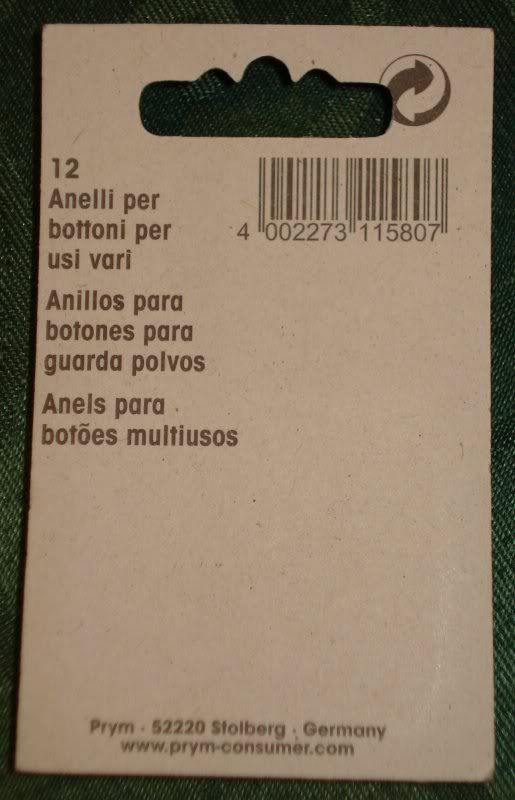
Reinforcement Rings - You will see when we get to it.
Best needles you can afford - I like tailor's needles, they're short.
Five buttons - your choice.
Button Split Rings - We will come to this as well.
Good light - daylight is best
Are you sitting comfortably - then we shall begin ...
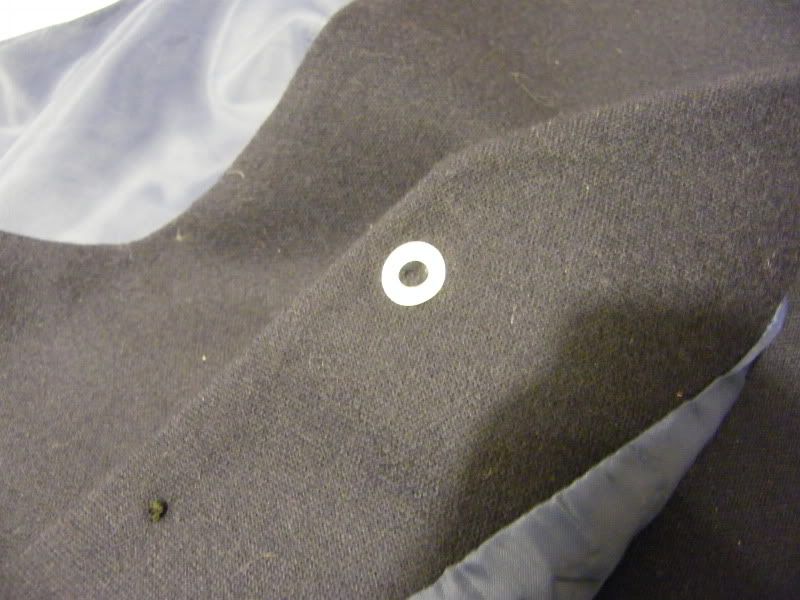
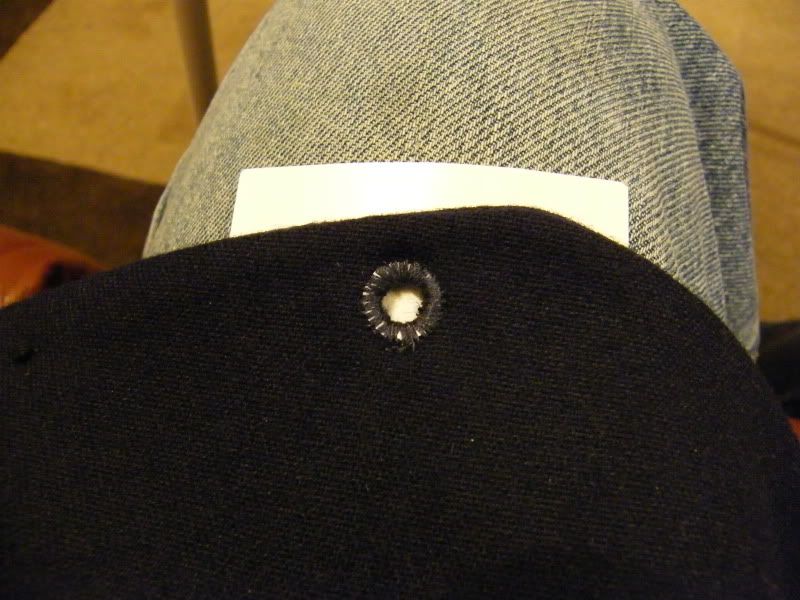
Firstly, cut off your first button - do not unpick the threads. You need the stubby threads as a marker.
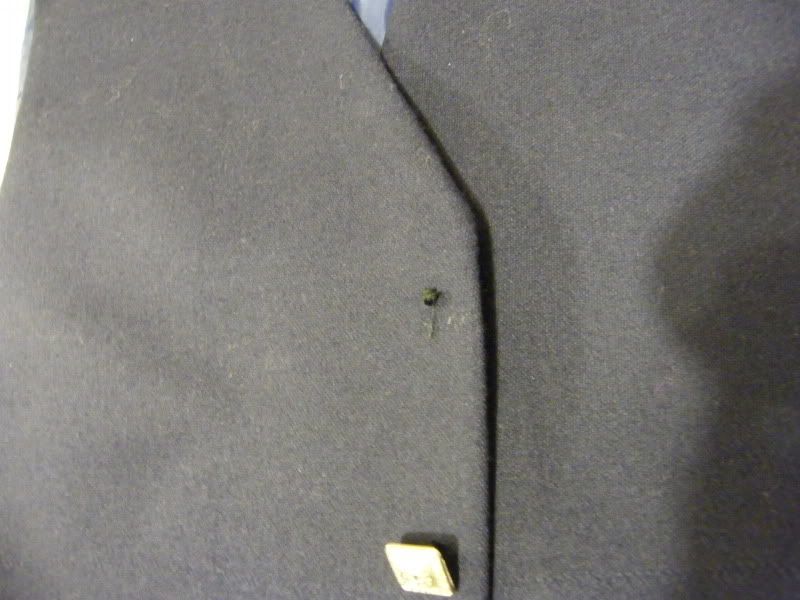
Using your hole punch, centre the threads and make your hole.
It will not be perfect - it does not matter, we will soon make it right.
If your hole punch left an extreme ragged edge, you may trim with your sharp scissors. If in doubt - don't do it! What ever you do, do not make the hole any bigger!
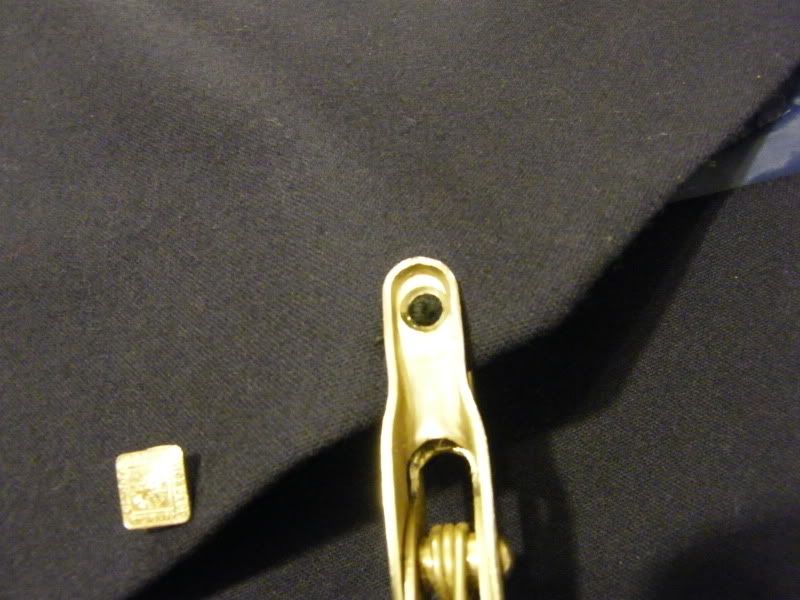
We now use our secret weapon - reinforcement rings. The type we use for sheets of paper in ring binders. The old fashioned ones were lick and stick - not so good. The shiny plastic ones are the best as we will see.
This is the type I use, but any from your local store will be fine:
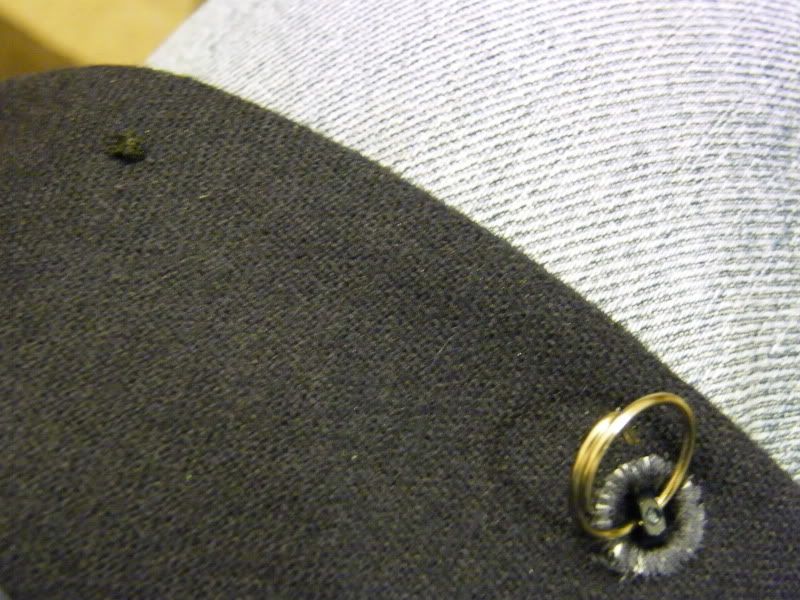
Stick a ring on the inner side of the hole you have just made. Try and get it as centred as possible.
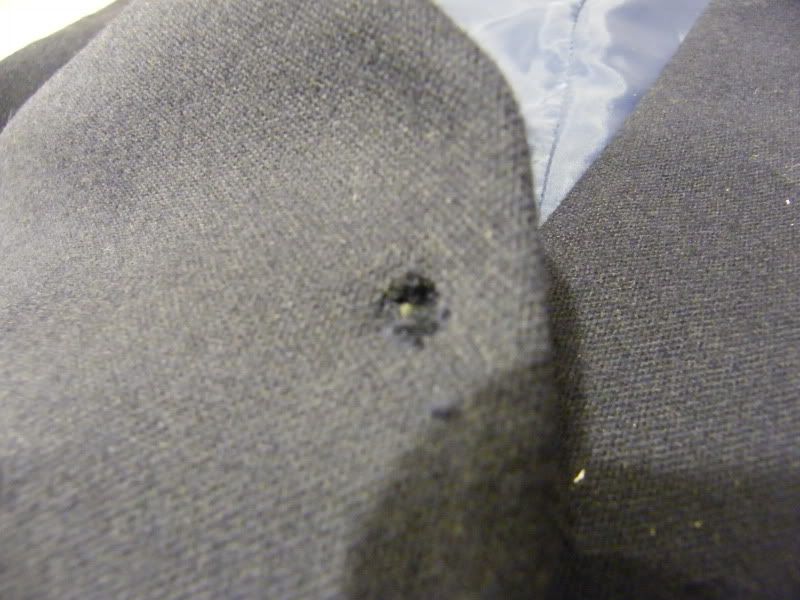
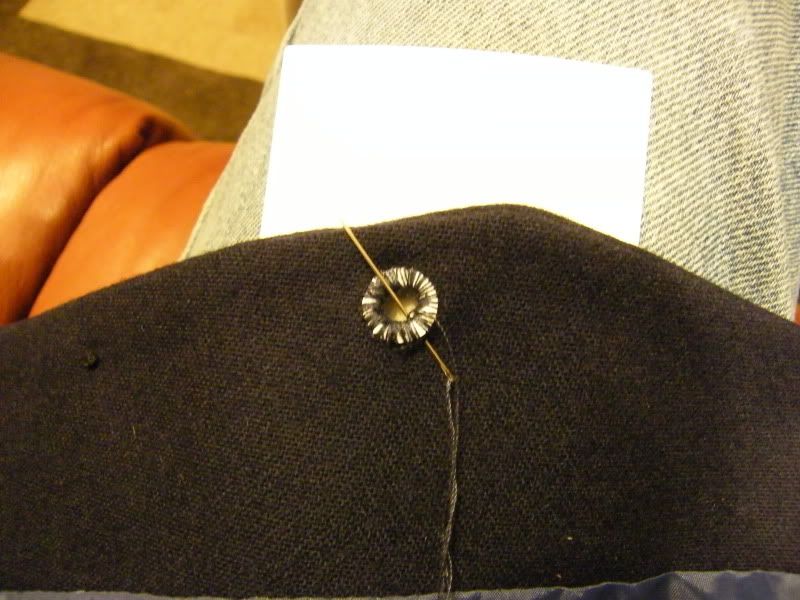
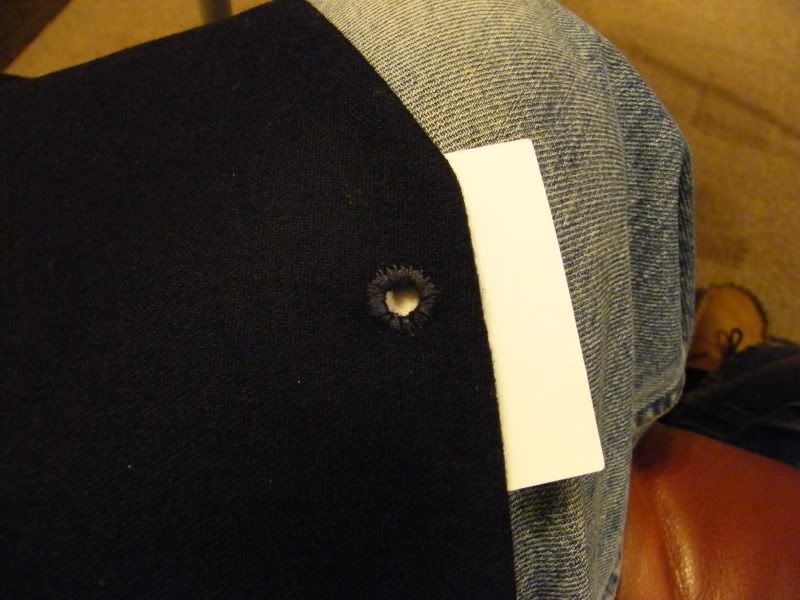
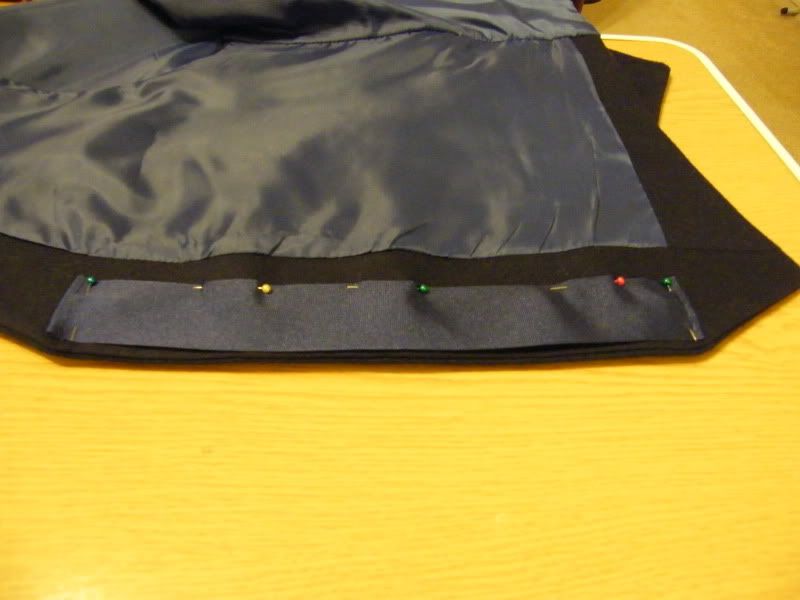
We now come to the actual sewing. You will all have your own way of doing this, but this method has some advantages. The stitching is done from one side only - none of this working from both sides at the same time or working blind. The other advantage is that there is no guesswork as to where the stitches should go.
So, thread your needle (3 ft of thread is more than enough at a time). Cut off any excess thread after the knot.
Choose any spot on the ring - slide the point of the needle to an outer edge and push straight down - 1/2 inch or less - bring the point up through the hole in the middle and in one movement, pull the needle up through that hole - start the next stitch 1 mm away from the first.
Look at the picture, it shows far better how it is done.
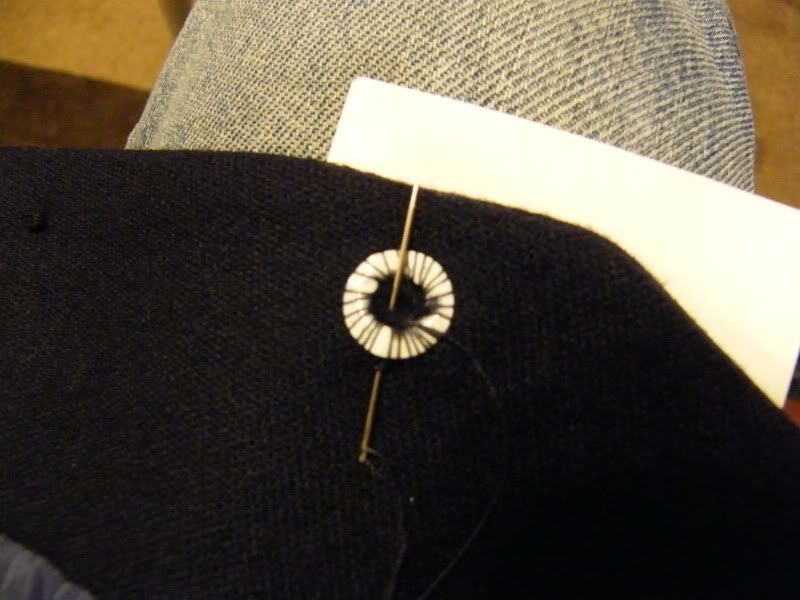
It takes far longer to explain it, than to actually do it.
You just keep going round and round - filling in the gaps. You will never fill them all, but you can get close.
10 picture limit reached - More to come in part 2
Regards
Chas
-
-
21st August 12, 06:09 AM
#2
So how does it look from the outside, I hear you cry? I am glad you asked that. It will look like this:
I know what you are going to say - The stitching looks very raggedy!
So it might - Does it matter? - NO!
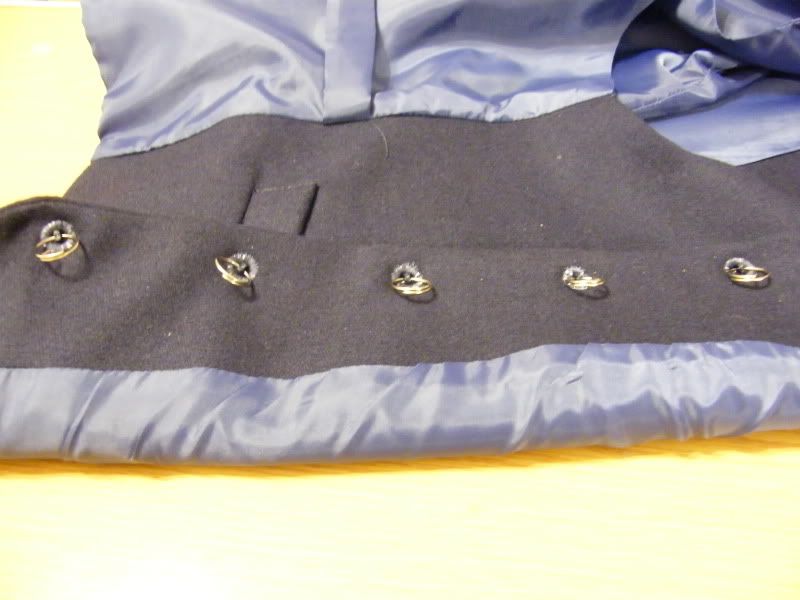
Here is the same hole with a button:
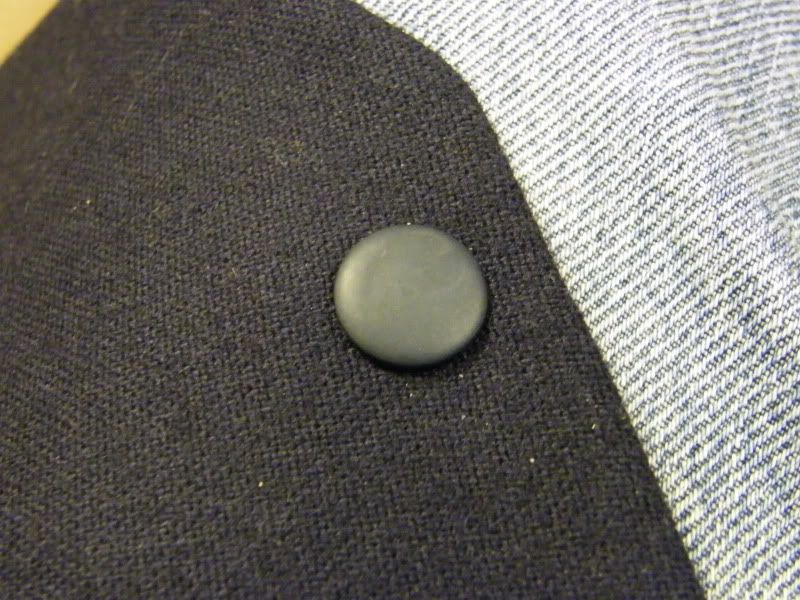
Can you see the stitching? No? Neither can anyone else.
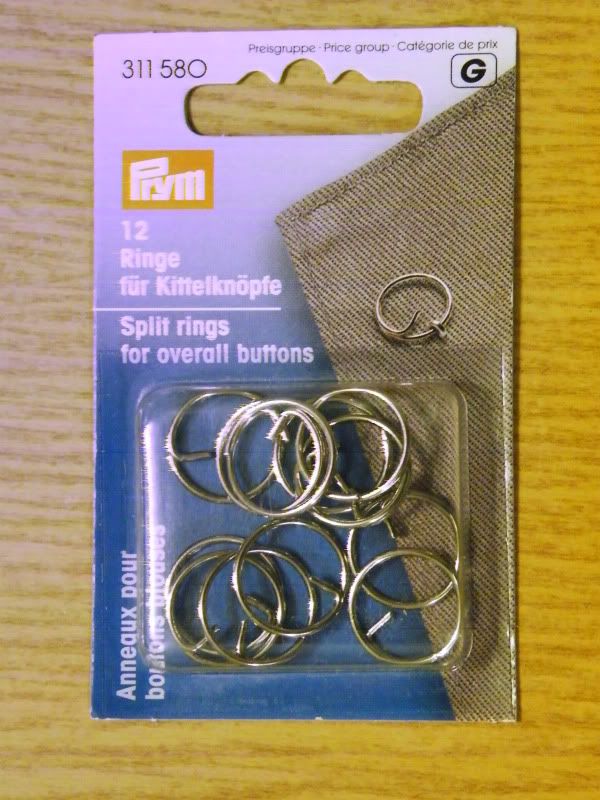
Attach a split ring. These are the ones I use, but the split pins would also work.
Repeat another four times.

You could leave it there, but there might be a danger of damaging your silk tie on the split ring. So I have added a cover for all the split rings.
This is 1 1/2" wide grosgrain, but any good ribbon will do, as long as it is wide enough.
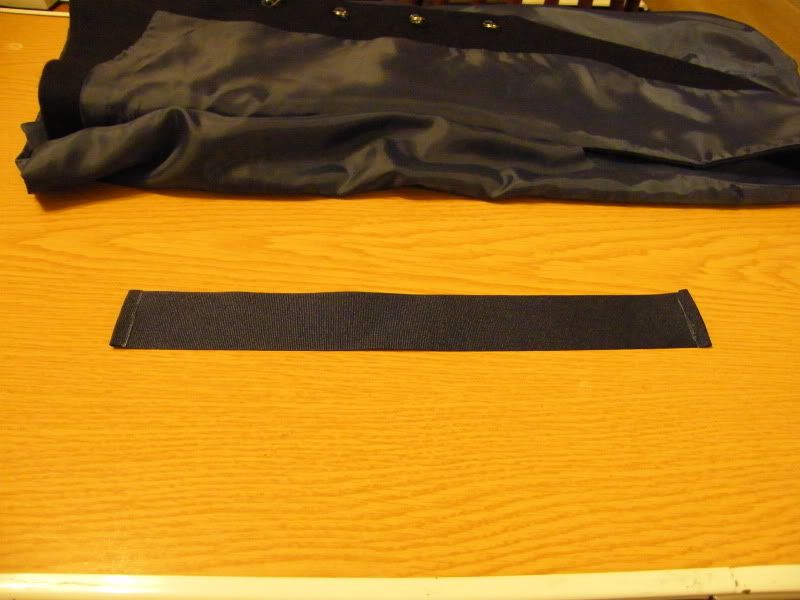
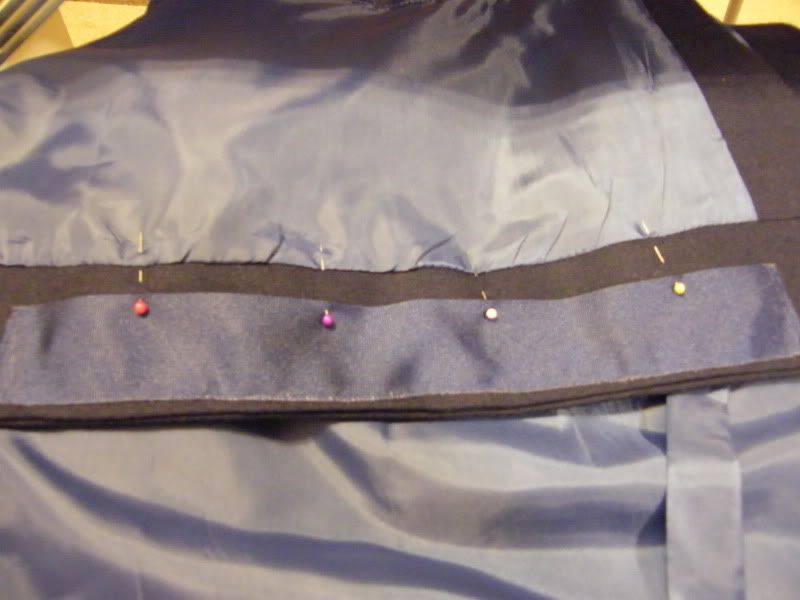
You will note that I haven't said a lot about this stage of the proceedings. This is cosmetic on the inside and not really part of the conversion. All I can say is do lots of pinning to get it fixed in the exact position and use small stitches.
The outcome is in Part 3.
Regards
Chas
-
-
21st August 12, 06:20 AM
#3
So having done the job, is it worthwhile?
Six pictures and judge for yourself.

Within the space of 12 minutes, three button changes - square cut steel, to blue plastic, to gold.
The spare set of buttons could be kept in a pocket on a safety pin ready for a quick change. Members of a your family could give you a set of buttons for Christmas or birthdays or whatever. Button changes can be done, while the garment is still being worn.
The only limit on your wardrobe, is the limit of your imagination.
I am preparing to give a jacket the same treatment.
Regards
Chas
-
-
21st August 12, 06:26 AM
#4
Thanks, Chas, that was very informative.
- Justitia et fortitudo invincibilia sunt
- An t'arm breac dearg
-
-
21st August 12, 06:30 AM
#5
Probably the best DIY tip ever given on XMTS. Well done Chas.
[SIZE=1]and at EH6 7HW[/SIZE]
-
-
21st August 12, 06:30 AM
#6
Thanks Chas for this great thread. I've been wondering where to get a vest with enterchangeable studs. This a very effective and inexpensive way to change the formality of a vest and add variety to your kitt. I look forward to the jacket thread.
Kevin Cernoch
Kilted with a Czechered Ancestry.
-
-
21st August 12, 07:48 AM
#7
If you put some loops of thread on the inside you can use them to hold the ring and limit rotation of the buttons... Useful with square buttons or those with patterns
-
-
21st August 12, 08:58 AM
#8
Interesting technique, I've toyed with the idea of swappable buttons but never gotten this far. A buttonhole stitch (where you are "knotting" the thread with each stitch) might work even better. I also wonder if a small metal washer would take the place of plastic ring, and give the button better support. But you'd have to make sure the edges were smooth enough to not abrade the thread. All in all a great tutorial, thanks!
Proudly Duncan [maternal], MacDonald and MacDaniel [paternal].
-
-
21st August 12, 10:02 AM
#9
I'm looking at getting a tartan waistcoat now and was thinking of going with tartan-covered buttons to avoid all the hassle - I may end up going this route now. Thanks!
-
-
21st August 12, 10:04 AM
#10
Great Idea , Thank you so much for shareing , Good job
Pro 3:5 Trust in the LORD with all thine heart; and lean not unto thine own understanding.
-
Tags for this Thread
 Posting Permissions
- You may not post new threads
- You may not post replies
- You may not post attachments
- You may not edit your posts
-
Forum Rules
|
|


Bookmarks