|
-
23rd July 10, 09:23 AM
#17
Thanks again, all.
 Originally Posted by Nighthawk

Thanks for all the detail on the construction process. I'm working on my first sporran right now. That thing is beautiful! As are your others. Hope mine turns out half as well. I'm now having to go it alone, so I have to teach myself that braided stitch. Any suggestions or tutorials?
HERE is a good website that will give you the basics.
For a single width of leather, you can get away with a single or double loop braid (which is linked to on the bottom left of this page). I like the triple loop, which will cover the thickness of a 5-6oz veg tan plus a 4oz chrome tanned face (which is what BoldHighlander's has).
A few other tips;
1) get a good flat-nosed pliers to help fish the lacing needle through. You don't need special ones from a leather craft store, anything from a DIY store will suffice.
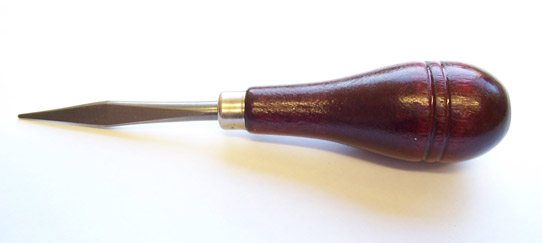
2) Use a lacing fid, or something similar.

This will help you keep the braid tight and straight.
3) DON'T assume the braid will simply lay where you want it. I make sure the lie of each wrap is exactly where I want as I tighten individual loops. Otherwise loops can drift a bit depending on tightness and the underlying work. It's a TON easier to get it right the first time than it is to try and fish back through 3-5" of already set lacing.
4) Good quality lace- A good top grain lace is WORLDS better than something with a vinyl face or worse. Good lace is expensive, with good reason. It's better to work, lays better, and has a much cleaner edge than cheaper lace. It's also important that the 'invisible joints' used when they make laces don't split while you're working.
50 yards of lace can easily go for $30-40. 50yds sounds like a lot, but you use a LOT more than you think you will. For a triple braid I usually calculate 8 times the measured distance of the edge you're lacing for material usage. A day sporran like #6 will take just over 4 yards.
5) Practice piece. I cannot stress this enough.
When making big changes to thickness, material or shape, make a sample edge a few inches long. 'Waste' a few feet of lace to make sure your distance from the edge, braid pattern, and lace spacing/thickness will all work.
It sure beats having to scrap a project after it's punched, dyed, glued, etc, etc, just because the final lacing detail looks bad.
Also, post pix 
Shoot me a PM if I can help out more.
Last edited by artificer; 23rd July 10 at 09:31 AM.
Reason: additional info
-
Similar Threads
-
By DWFII in forum DIY Showroom
Replies: 26
Last Post: 30th August 08, 03:09 PM
-
By Tahshar in forum DIY Showroom
Replies: 2
Last Post: 13th February 08, 06:37 AM
-
By Nick in forum Show us your pics
Replies: 17
Last Post: 18th June 06, 06:33 AM
-
By Freedomlover in forum Kilt Nights
Replies: 5
Last Post: 5th April 06, 09:41 AM
-
By Hamish in forum Show us your pics
Replies: 14
Last Post: 23rd February 05, 11:10 AM
 Posting Permissions
- You may not post new threads
- You may not post replies
- You may not post attachments
- You may not edit your posts
-
Forum Rules
|
|


Bookmarks