X Marks the Scot - An on-line community of kilt wearers.
|
-
6th January 12, 01:40 AM
#3
Re: Less wrinkly not cadadh WIP
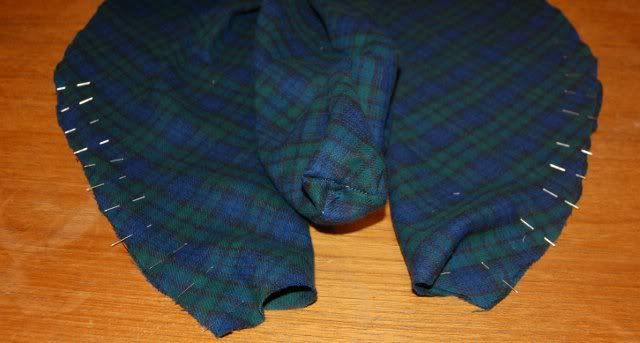
Now I am ready to sew. First, close the foot:
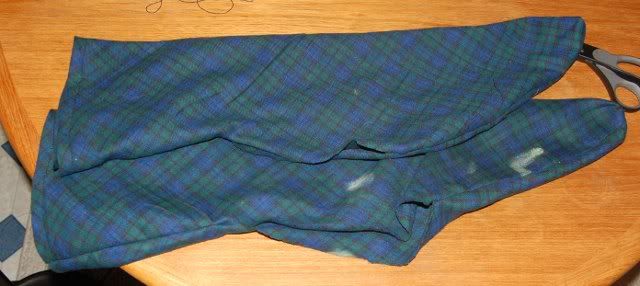
These are my two beta units pinned up for the sewing machine, with the toe end seam on my prototype visible in the middle.
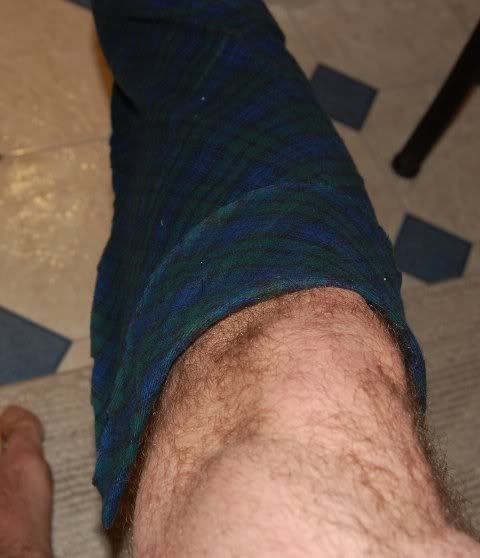
With the foot end closed, next up is to set the height of the hem at the top. For this part make sure you have the left sock on the left foot and right sock on the right foot, but inside out. Also be sure the cloth on the front of your leg is touching your skin from the toe all the way up your foot and over your ankle and all the way up your shin. If you pull it to tight it will lift out of that corner and never look right later. You might be rudely suprised to find your knee caps are different heights off the floor. Just saying, you are not a machine, you are an organism. I have had fine results using four pins on each side at this stage.
Next, iron that pinned in crease down. This will eventually be the visible top edge of the garment. Next fold it open, trim back the scrap as needed and fold the scrap into two, leaving enough space to fold both layers of that back over the crease you already ironed in.
When you are ready to fold it back shut to sew it down, it should look about like this. Once folded closed, the top of the sock will be three layers thick, but the cut/fraying edge at the "end" of the cloth will be trapped inside the hem by the other two layers. I will replace this picture with the same image edited in MSPaint using circles and arrows. I can see what I am talking about, and I am sure experienced tailors can too, but it isn't clearly illustrated.
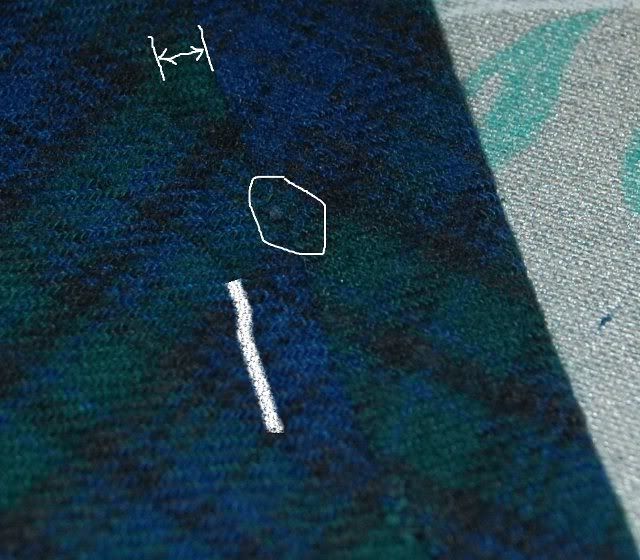
NB: the thick white line above lies on the crease ironed into the fabric where the top of the hose was pinned up on my leg a few minutes prior. Then I unfolded it and ironed in a second crease (far right edge, that will be the bottom of the hem inside the sock. The white circle shows a bit of the cut edge of the cloth. The white distance marker shows a gap between the cut edge and defind pressed in hem. I left a bit of space there so when I fold it back shut everythign can lay flat.
Once the top hem is put to bed, pin it down and sew it shut.
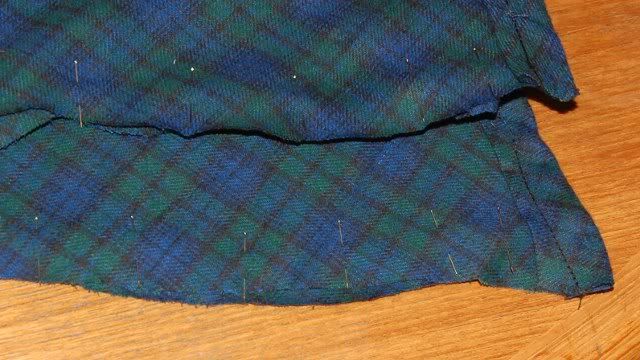
next up is to pin up and sew down from the hem at the top to the point where your heel will just barely fit through:
Once that is done, you should be to about here with the socks finally turned right side out. I chalked an L on the sole of the foot of the left one so I coudl tell them apart:
Last edited by AKScott; 6th January 12 at 08:08 PM.
-
Similar Threads
-
By Alan H in forum Show us your pics
Replies: 11
Last Post: 19th December 09, 07:34 AM
-
By Rick in forum How to Accessorize your Kilt
Replies: 32
Last Post: 18th March 09, 08:34 PM
-
By orangehaggis in forum How to Accessorize your Kilt
Replies: 6
Last Post: 9th March 09, 03:31 PM
Tags for this Thread
 Posting Permissions
- You may not post new threads
- You may not post replies
- You may not post attachments
- You may not edit your posts
-
Forum Rules
|
|


Bookmarks