|
-
-
The Following 4 Users say 'Aye' to The Wizard of BC For This Useful Post:
-
Sorry about the delays, I have not forgotten about all of you. Given the current status of the world, it took quite a bit longer to get the kilt to me than anticipated. I also needed Woolite and basting thread (all I had was nylon).
I have also watched a plethora of videos and read tutorials on cleaning, basting, altering, and pressing kilts, so I am feeling more confident.
That said, the kilt is here and currently getting a wash, and I will certainly document and share what I am doing.
Bath time:

Rob
-
The Following User Says 'Aye' to WalesLax For This Useful Post:
-
First, I let my kilt dry out in the shade on clean Trex decking

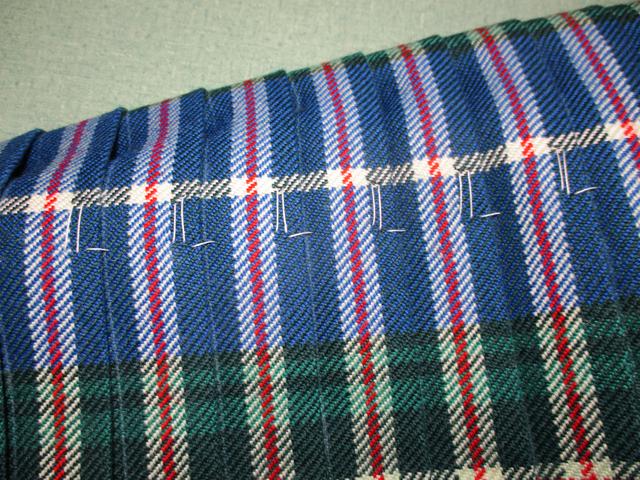
I started basting the pleats above where the material was folded under...

...going from right to left, I think I got better at basting as I went along...

Whomever it was who put the invisible stitch in was fantastic, because it was a nightmare to remove. Maybe not a nightmare, but it was tedious, and I was impressed with how well it was done.

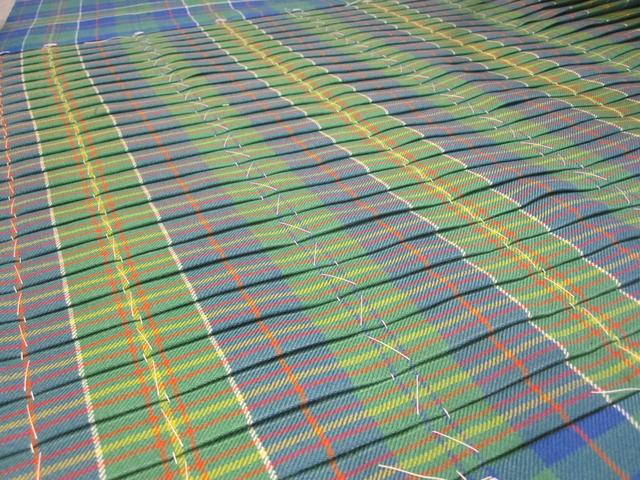
When opened, I could see that the invisible stitch was actually holding the reversed pleats in place:

Once I got the invisible stitching out, I was left with tons of little strings that I will have to go back and meticulously remove later:

The kilt at full length. You can see where I basted was just above where the original/my new bottom of the kilt was affixed via the invisible stitching. You can also see how I tried to re-line-up the pleats to get ready for pressing with my iron:

A closeup of my (poorly) aligned pleats, just in case any of you were worried about me taking your jobs in kilt making/repair/alterations, you should be able to rest easy once you see this:

Post ironing, the front looking nice and clean and pressed:

Last edited by WalesLax; 9th June 20 at 01:59 PM.
Reason: Photos uploaded from phone; editing to commentary on computer.
-
-
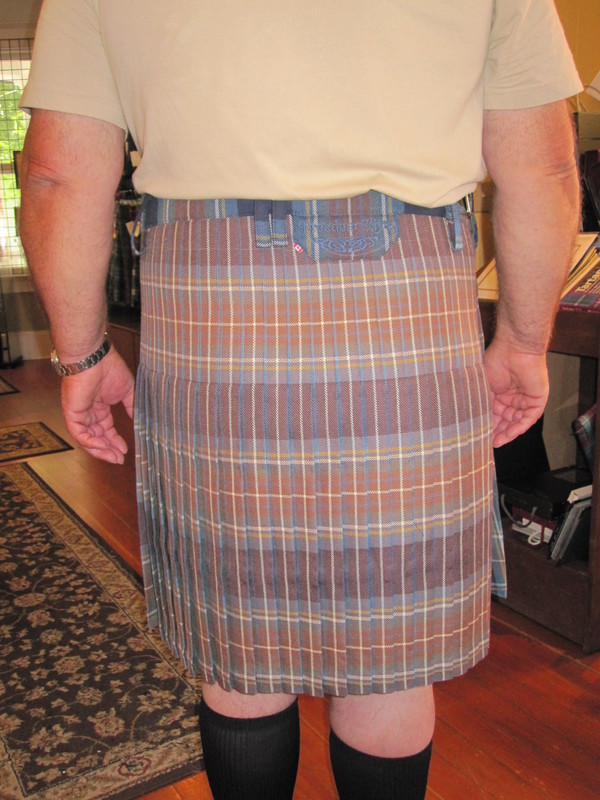
Post pressing, the back looking OK as it hangs. All of my kilt hangars are spoken for AND it is windy out today, so I don't think this picture does it justice:

Last edited by WalesLax; 9th June 20 at 02:00 PM.
Reason: Added commentary
-
-
Another view of the kilt laid out nicely so you can see my handiwork:
(after posting this picture, I went back and corrected the yellow line just to the left of center that appears to have disappeared. I think it was just because of the way I put the kilt down, but I made sure and reapplied heat to that area to "lock it in.")

Last edited by WalesLax; 9th June 20 at 02:18 PM.
-
The Following 2 Users say 'Aye' to WalesLax For This Useful Post:
 Posting Permissions
- You may not post new threads
- You may not post replies
- You may not post attachments
- You may not edit your posts
-
Forum Rules
|
|


Bookmarks