|
-
4th February 14, 01:51 AM
#21
-
-
4th February 14, 01:56 AM
#22
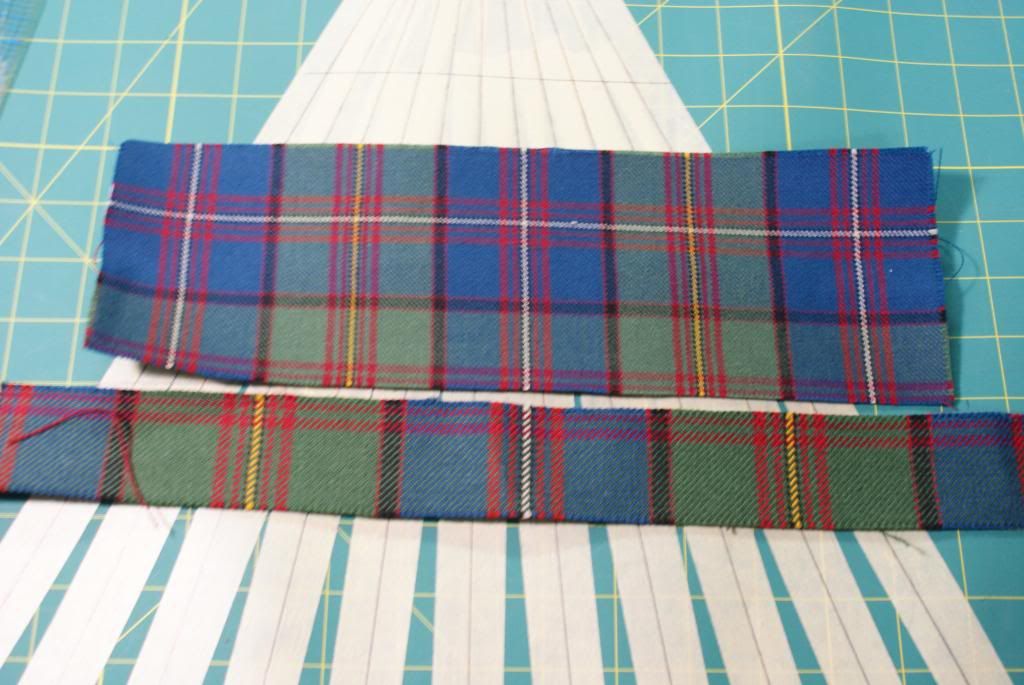
Why the heck is the new piece of Tartan so much longer and why is it marked with Roman Numerals?
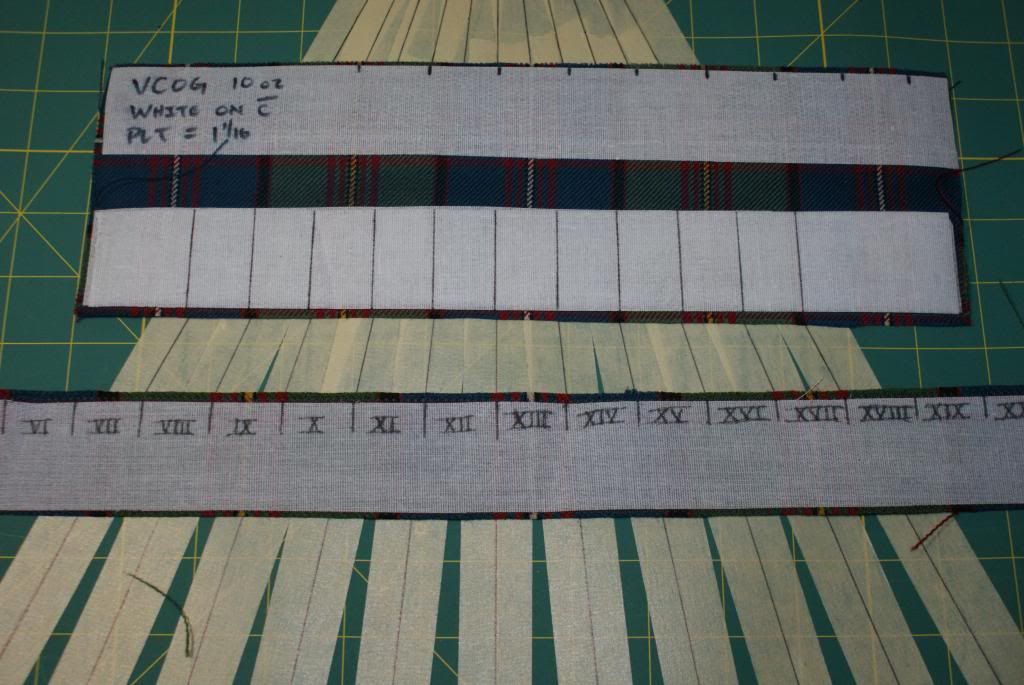
I'm glad you asked.
This question brings up another thing I wanted to point out.
If you are new to kiltmaking, or have a customer with an unusual or difficult shape, there is another way to look at how you would measure that person.
This idea is also a good way to backup or confirm that your "TAoK" measurements are correct and that your "TAoK" splits are OK.
We have brought up this idea before on X Marks when talking about measuring a Gentleman of Substance or one with a predominant stomach.
There are some cases where your original measurements indicate that there would be no taper because the hip and waist appear the same. We know that this is seldom true. Almost everyone is slightly bigger in the butt than they are at the waist if you look at their back. There should be some taper but our measurements don't show it.
What we have done is split the measurements in two, front and then back. We use the side seam of the wearers trousers as a guide because when the kilt is worn the edges of the aprons should be vertical lines about where the trouser side is.
You take a set of measurements by measuring around the back of the waist, from the side seam to side seam, and then in the front, side seam to side seam.
Then exactly the same thing at the level of the hips. In effect, this give you the"TAoK" splits.
Now I am going to take that idea one step further.
If you think about what a kilt looks like from the back - if pleated to the Sett - You should see a perfect replica of the Tartan pattern across the back, as is used in the aprons.
Why not just take a strip of the Tartan you are working with and drape that right across the person's butt?
Well, here I am in trousers doing just that.
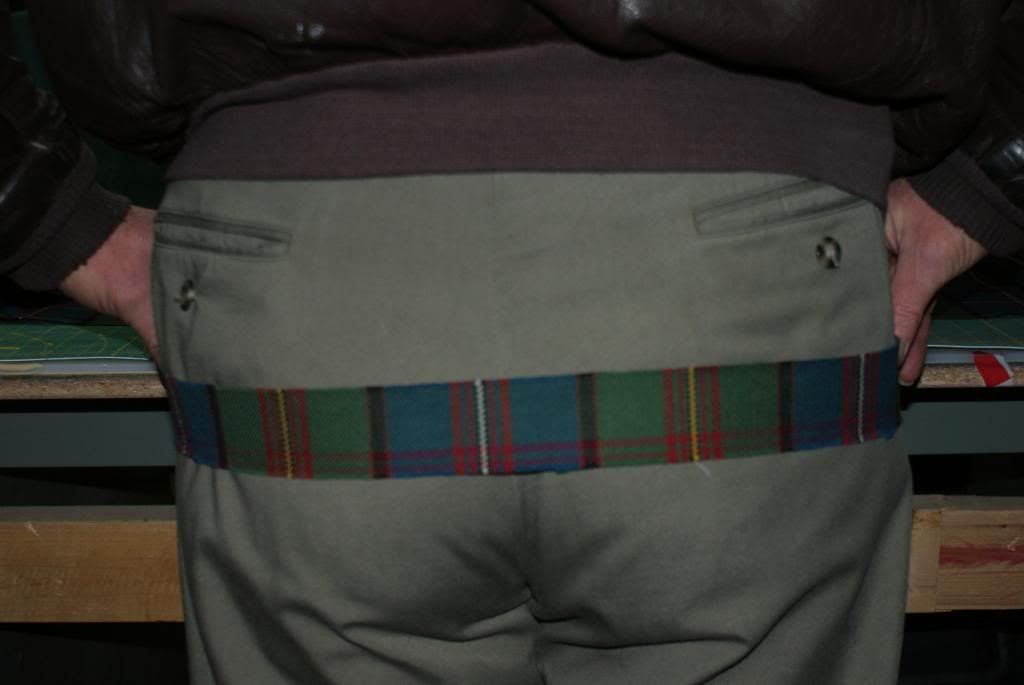
When the kilt is done, this is what you hope you will see in the pleats across the back. Well, at least that is the idea.
Flip the strip of fabric over and OH, WOW, there are your pleats.
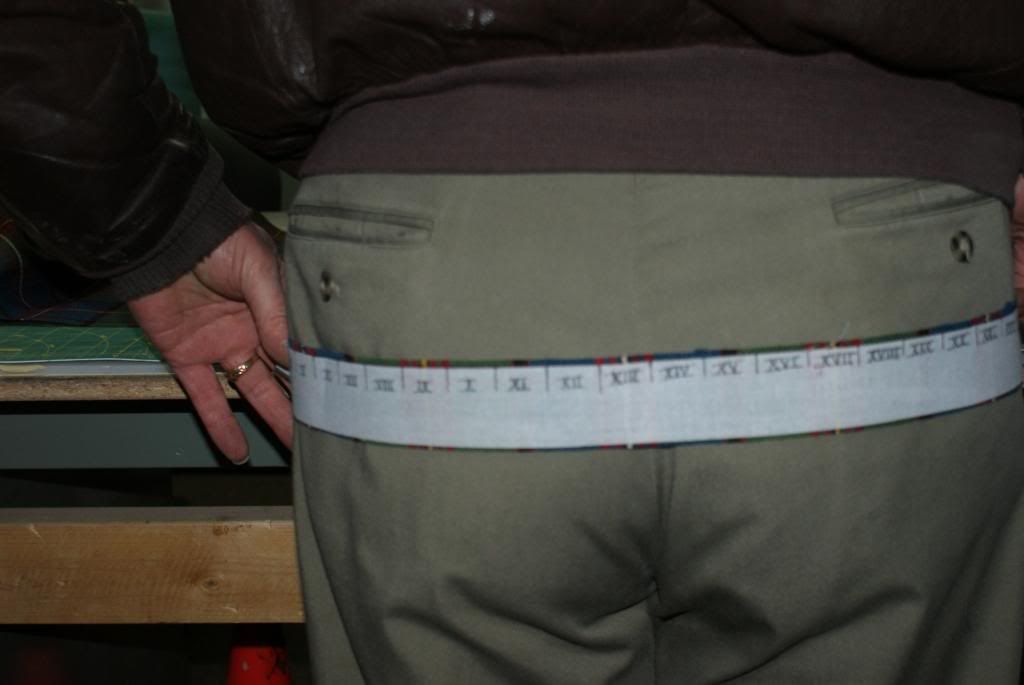
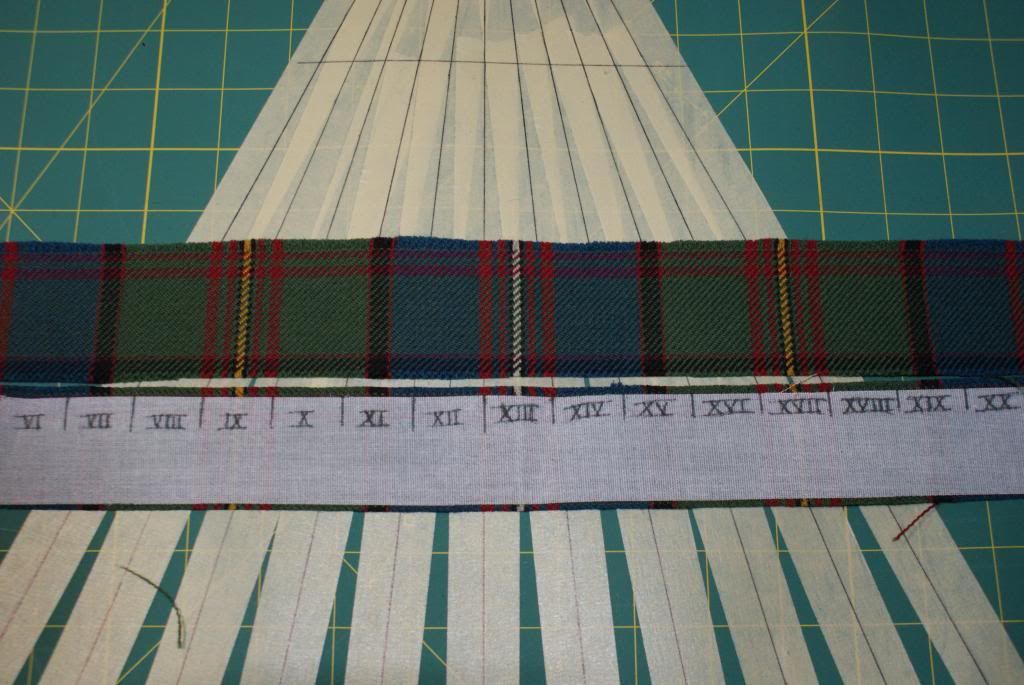
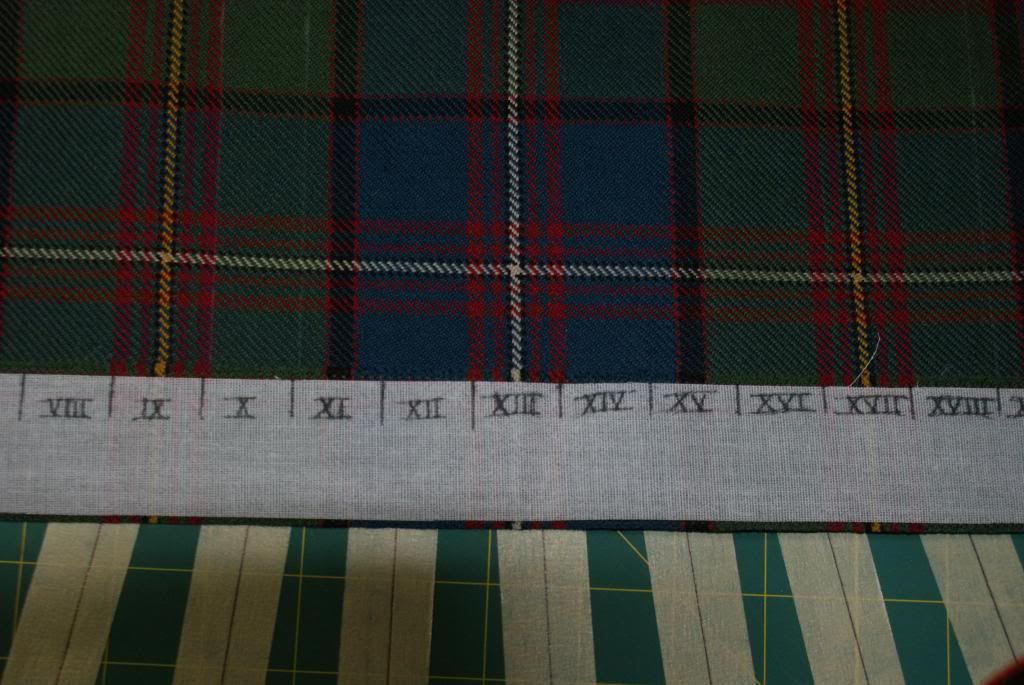
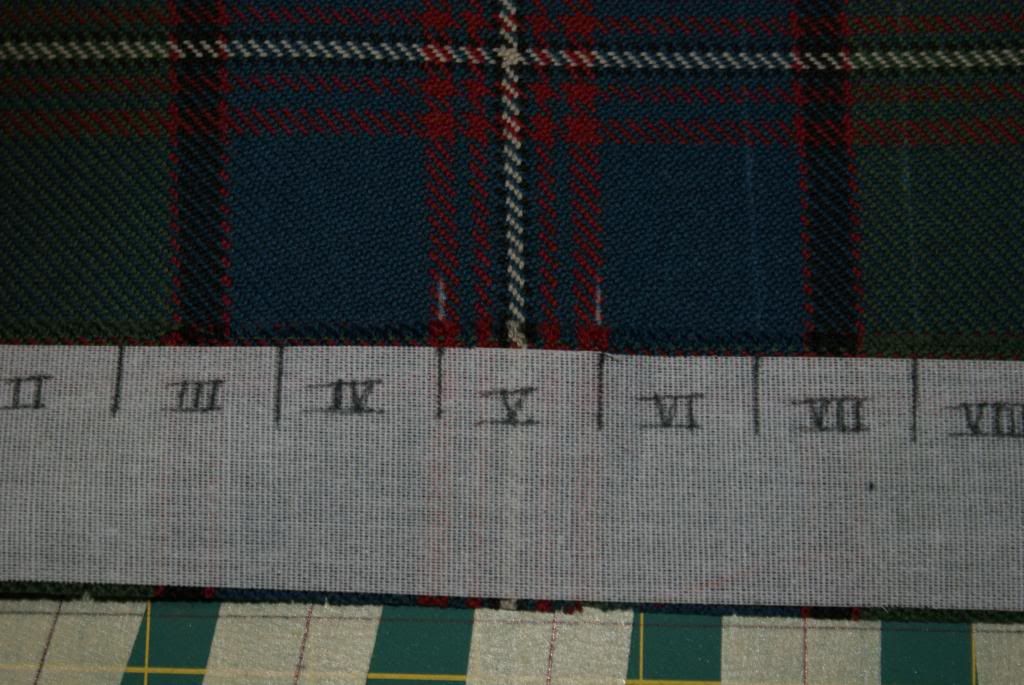
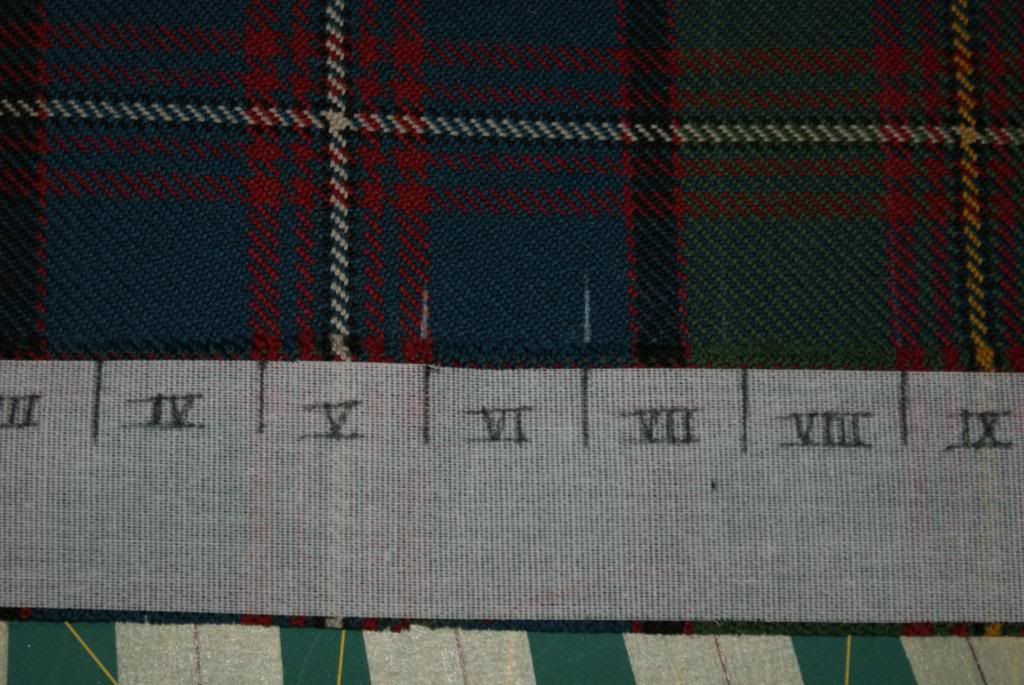
Using this long strip will tell you how many pleats there will be in the kilt and give you the pleat layout for the entire length of fabric.
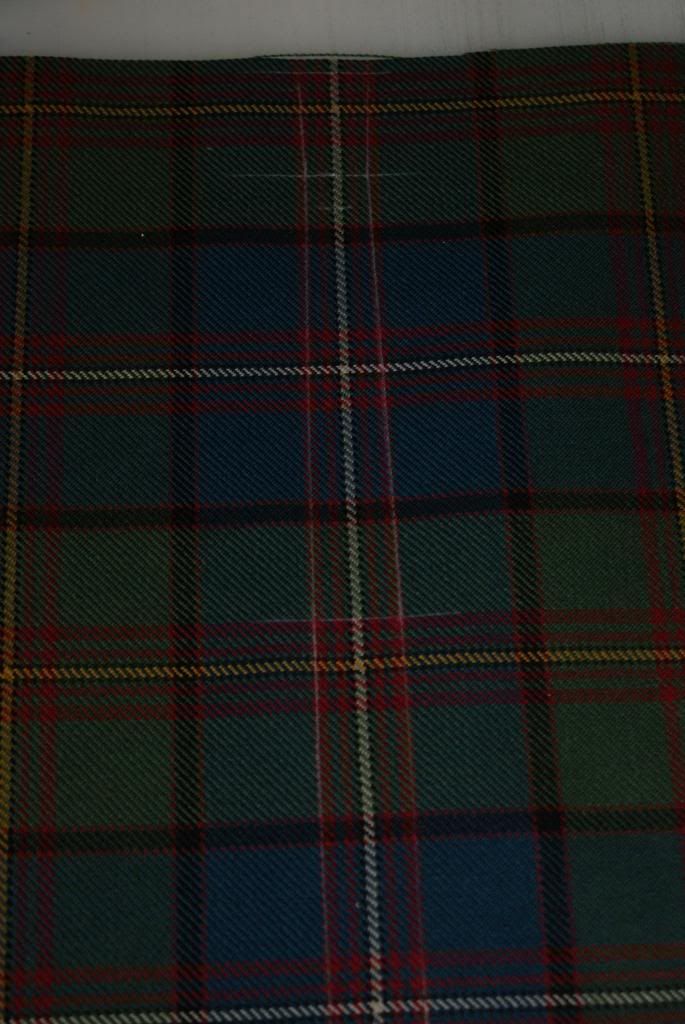
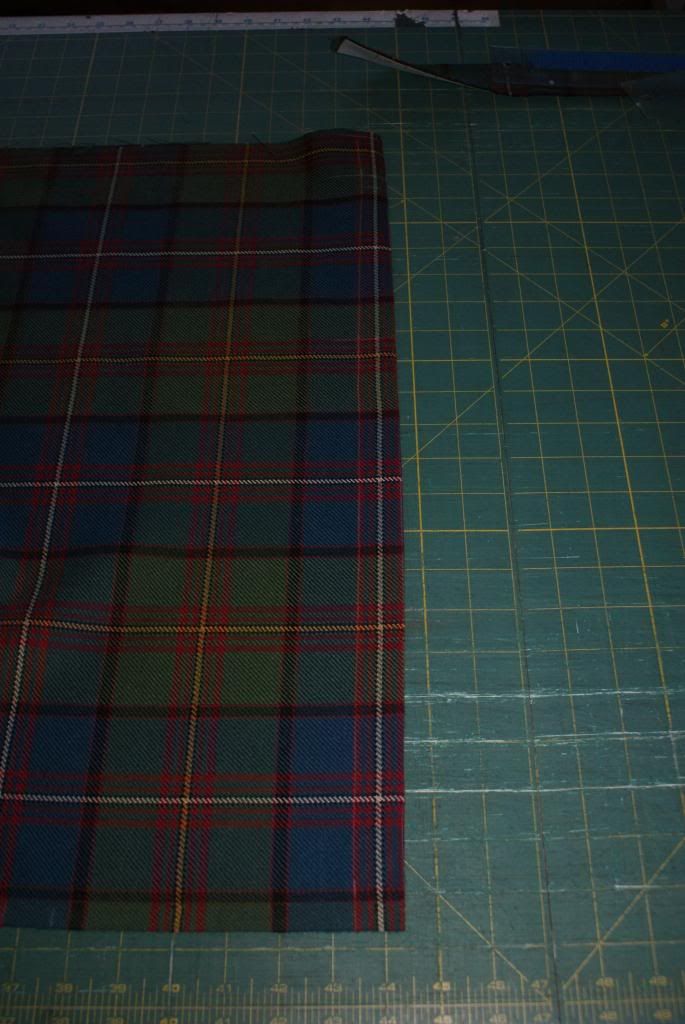
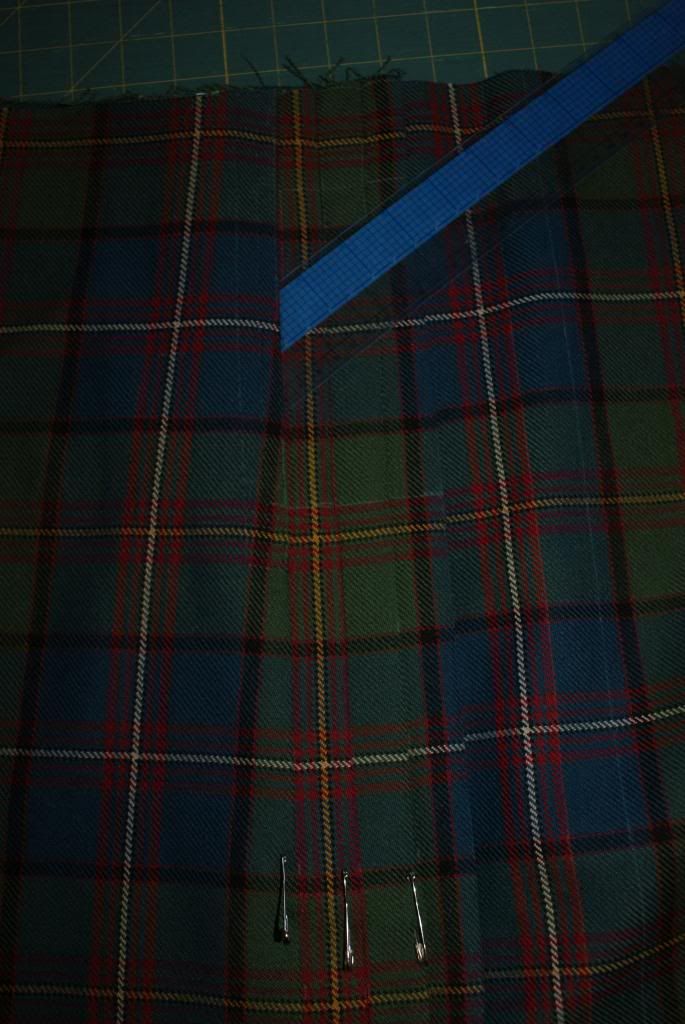
Let's start marking some pleats on fabric.
Last edited by Steve Ashton; 4th February 14 at 12:49 PM.
Steve Ashton
www.freedomkilts.com
Skype (webcam enabled) thewizardofbc
I wear the kilt because: Swish + Swagger = Swoon.
-
-
4th February 14, 01:59 AM
#23
And to answer the question about the Roman Numerals --- I think they look cool.
They are easier to make when marking your fabric with chalk.
And they make a cool conversation piece with your customers. "That's how we did it way back then."
Steve Ashton
www.freedomkilts.com
Skype (webcam enabled) thewizardofbc
I wear the kilt because: Swish + Swagger = Swoon.
-
-
4th February 14, 02:01 AM
#24
-
-
4th February 14, 02:06 AM
#25
-
-
4th February 14, 02:08 AM
#26
Well, that's it folks. An Engineer laying out the pleats for a kilt.
The Art of Kiltmaking is still the authoritative guide and method to traditional kiltmaking. But even Barb will admit that it is only one way to skin the cat.
I approach things a little differently but the goal is the same. To create a kilt that fits the wearer perfectly, hangs and swishes well, and will last for a lifetime.
My system is just my way of getting to the goal.
This is exactly the same way I made my Dress Blue Kilt. It is pleated to the Stripe.

But the same system was used. I still had to know how many pleats the kilt would have and I still needed to know how wide each pleat would be.
The only difference was when pleating to the stripe I use the same part of the layout template. When pleating to the Sett I use the entire layout strip.
Anyone who wishes to try my method, please feel free.
I will of course be teaching this method in full detail at Kilt Kamp. If anyone is still fuzzy about this method or wants more detail I'll now open this thread to your questions.
Steve Ashton
www.freedomkilts.com
Skype (webcam enabled) thewizardofbc
I wear the kilt because: Swish + Swagger = Swoon.
-
The Following User Says 'Aye' to The Wizard of BC For This Useful Post:
-
4th February 14, 08:15 AM
#27
Thanks for the detailed photos and instructions.
It's interesting to see a different method. I especially like how you press the pleats before sewing. I was wondering if that was an option.
-
-
4th February 14, 12:56 PM
#28
 Originally Posted by The Wizard of BC

The only difference was when pleating to the stripe I use the same part of the layout template. When pleating to the Sett I use the entire layout strip.
Thank you Steve for taking the time to show us all this method,
You had me right until the end but i got lost at the above quote. I understand the layout template, but the entire layout strip, does thant mean aprons included or am i way off the mark.
Gavin
-
-
4th February 14, 04:29 PM
#29
The Layout strip you make stretches from the left side seam of trousers, across the butt, to the right side seam of trousers. It does not include the apron.
The center element used in the outer apron is in the center of the layout strip.
When pleating to the stripe you may have an even number of pleats or an odd number of pleats. It depends on how big your hips are.
When pleating to the Sett you will (almost) always use an odd number of pleats.
In my example The narrow white stripe of the Tartan is centered in the outer apron. So I cut my layout strip using a corresponding white stripe in its center and long enough to reach from side seam to side seam. In this example the layout strip is approx. 30" long.
To pleat to The Stripe: Please look at the first pic in post #25 to this thread. Can you see that I am laying out one pleat to The Stripe? For the next pleat move the same portion of the layout strip over to the next part of the Tartan that contains the same vertical stripe. (The small white one.)
The width of each stripe is already calculated by the marks.
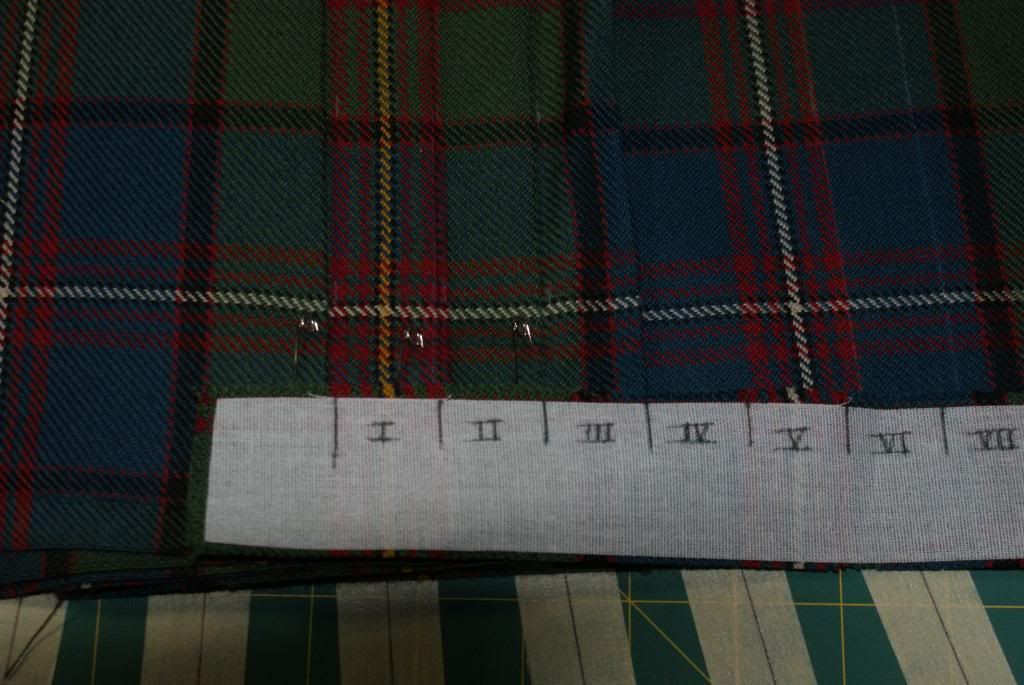
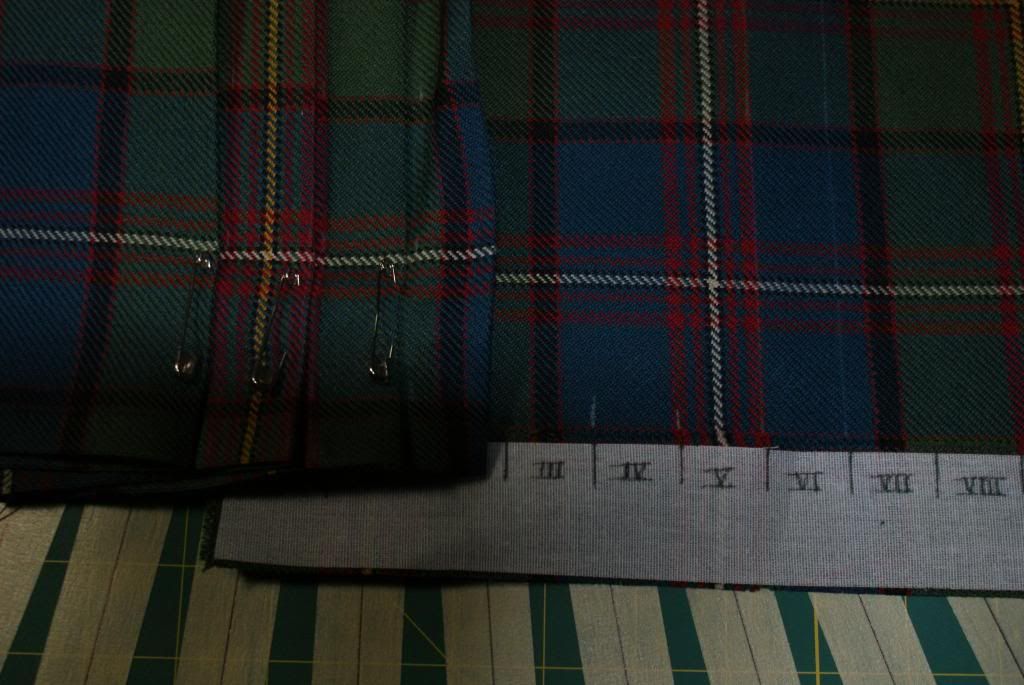
To pleat to The Sett: Please look at pics 2-5 of Post #24 of this thread.
You should be able to see that pleat #1 on the layout strip is the same as the first pleat to the wearers left (right in the photo) of the apron edge. (The distance from the apron edge to the first pleat is determined IAW TAoK.)
For the first pleat align, in this example, the white stripe labeled "V" with the white stripe of your Tartan, the correct distance away from the apron. Make marks corresponding with "I" on the layout strip.
To continue pleating to the Sett move the layout strip along the fabric to your right till it again aligns up with the same part of the next Tartan pattern. (Again, the white stripe labeled "V") and mark the pleat numbered "II" on the layout strip.
Continue aligning and marking each successive pleat as you move right along your kilt fabric. When you get to the last pleat on the layout strip (which should be the same part of the Tartan pattern as you marked for pleat #1) you are done.
You can now layout the underapron IAW TAoK.
Steve Ashton
www.freedomkilts.com
Skype (webcam enabled) thewizardofbc
I wear the kilt because: Swish + Swagger = Swoon.
-
-
4th February 14, 05:09 PM
#30
 Originally Posted by Deesquared

Thanks for the detailed photos and instructions.
It's interesting to see a different method. I especially like how you press the pleats before sewing. I was wondering if that was an option.
I find that being able to work on just one fold makes a really sharp crease, far more easily than once the kilt is sewn - though it needs to be in the right place, measure twice press once.
Anne the Pleater :ootd:
-
 Posting Permissions
- You may not post new threads
- You may not post replies
- You may not post attachments
- You may not edit your posts
-
Forum Rules
|
|







Bookmarks