|
-
23rd July 09, 12:10 AM
#21
On canvas, denim and other tightly woven fabrics, if you don't have an overlock seam on your sewing machine, you can simply bind the raw edge by zig-zagging the edge so that one side of the seam (zigs or zags, up to you ) is just outside the fabric (less than 1/32 inch). If the fabric is very coarse, do that twice with different seam widths. The lighter your fabric, the narrower you want your zigzags, so as not to curl the edge. ) is just outside the fabric (less than 1/32 inch). If the fabric is very coarse, do that twice with different seam widths. The lighter your fabric, the narrower you want your zigzags, so as not to curl the edge.
Or you could do a rolled seam as seen on some commercial jeans: Place fabrics together with both pieces right side up, sligtly overlapping. Sew a straight line down the middle of the overlap. Roll the seam to hide raw edges and top stitch on both sides (or with a twin needle). This is has to be done before you pleat the kilt, though, and you need a very sturdy sewing machine. Kind of cheating a flat felled seam. Thanks to Barb T. for teaching me the "true" flat felled seam.
Vin gardu pro la sciuroj!
-
-
29th July 09, 02:10 PM
#22
 Originally Posted by Heming

On canvas, denim and other tightly woven fabrics, if you don't have an overlock seam on your sewing machine, you can simply bind the raw edge by zig-zagging the edge so that one side of the seam (zigs or zags, up to you  ) is just outside the fabric (less than 1/32 inch). If the fabric is very coarse, do that twice with different seam widths. The lighter your fabric, the narrower you want your zigzags, so as not to curl the edge.
Or you could do a rolled seam as seen on some commercial jeans: Place fabrics together with both pieces right side up, sligtly overlapping. Sew a straight line down the middle of the overlap. Roll the seam to hide raw edges and top stitch on both sides (or with a twin needle).
I've not had good luck with zig-zags or overcasting stiches on single needle machines. (my machine has a special foot and stich for overcasting raw edges. I'm less than impressed with the results on anything heavier than shirting.)
I haven't had a chance to work on this kilt this last week. I screwed up putting in the first pocket, and have had to redo it. Twice. So I've got one done, need to finish the other, and then cut out the waistband, and decide about closing it.
-
-
4th August 09, 09:00 AM
#23
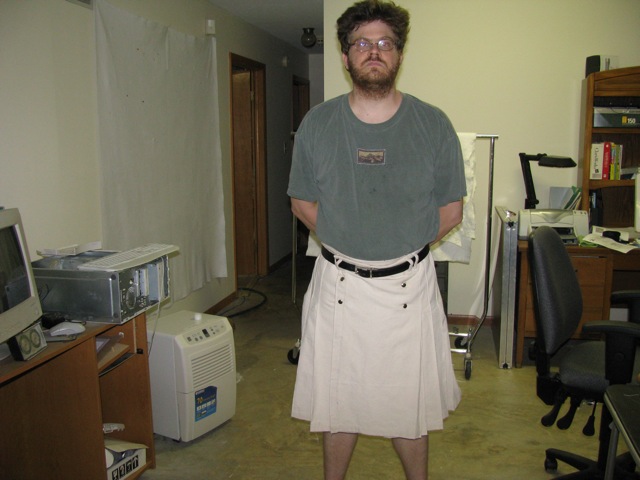
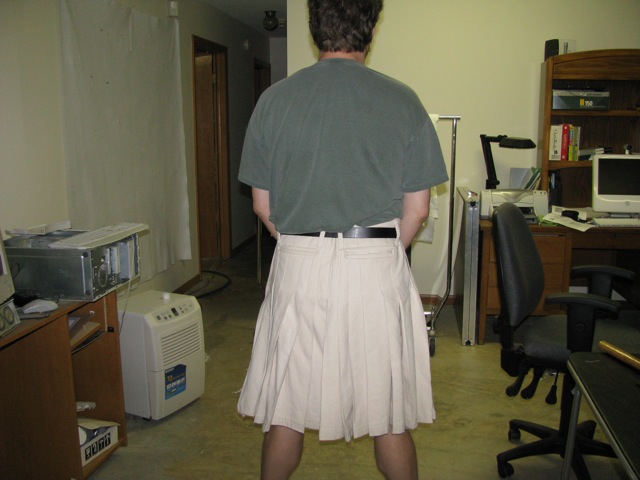
I'm nearly done. I've got the waist band on, know how I'm going to do the closure. Just need to make and install belt loops and then locate the snaps.
Here are some pictures of installing the second pocket. First, a jig I use for making pocket welts. this isn't actually the jig for the welts on this kilt, it's for something else. It's simply two pieces of tag stock, some folds, and a staple.
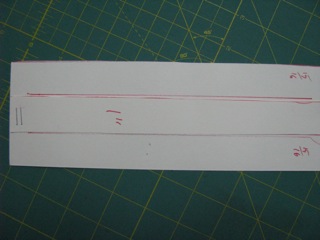
The bottom piece should be the height of the pocket piece, and at least an inch or two wider. This one is three by ten, the actual pocket pieces on the kilt are seven by nine. (Three inches is enough of a welt on something like a pair of trousers, were there's only one or two layers of fabric. On a canvas kilt, where there are a larger number, you need bigger welts.) The top piece is one inch, by the width of the jig. Measure from the top of bottom piece to the middle, then back off 9/16". draw a line across the bottom piece. Do the same thing, measuring from the bottom of the bottom piece. You'll have two lines, 1 and 1/8" apart. Center the inch wide top piece between the lines, staple it in place and then fold on the lines.
To use the jig, put the pocket piece in the jig, line the top and bottom up. fold one of the folds, and press. Unfold, fold the other and press.
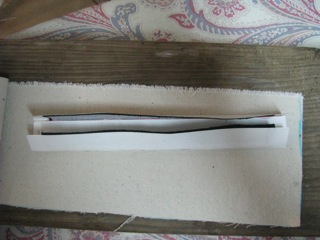
You'll probably want to press again once you take it out of the jig, to firmly set the creases.
here's how I locate the pocket on the kilt. There are four blue dots in a line.
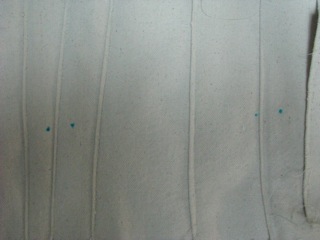
The outer two are six inches apart, and are the center of the ends of the finished pocket. The inner two are 3/4" from the outer, and are the ends of the cut down the center of the pocket. Meanwhile, I mark the pocket piece.
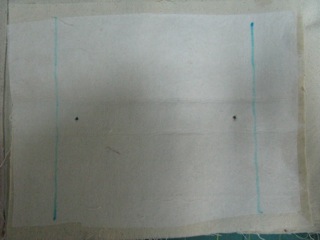
The two lines are six inches apart, and show where to stop stiching. The two dots are actually holes (made with a gasket punch, since I don't have a fabric drill.); the holes line up with the inside dots (It's actually on them in the photo, but it's hard to see that.) It gets stiched and turned in the usual fashion, but I didn't take pictures of that.
-
-
4th August 09, 01:00 PM
#24
Those jigs seem to work out well.
I tried to ask my inner curmudgeon before posting, but he sprayed me with the garden hose…
Yes, I have squirrels in my brain…
-
-
5th August 09, 02:48 PM
#25
-
-
5th August 09, 03:02 PM
#26
That makes sense. I need to make some special jigs to use with hand sewing that actually to the holding and streching, as well as, act as a guide etc.
I tried to ask my inner curmudgeon before posting, but he sprayed me with the garden hose…
Yes, I have squirrels in my brain…
-
-
5th August 09, 03:22 PM
#27
Something about kitties and kilts! Nice looking (both of them)!
Proudly Duncan [maternal], MacDonald and MacDaniel [paternal].
-
-
5th August 09, 10:37 PM
#28
Sometimes my cats try to get involved with sewing, too. 
I need to make a clamp, kind of like the wooden pants hangers, that will hold the two sides of the pleat together and also be a guide for where to hand sew. I think I could sew a pleat from the inside without the stitches showing... The clamp might need little teeth or something.
I tried to ask my inner curmudgeon before posting, but he sprayed me with the garden hose…
Yes, I have squirrels in my brain…
-
Tags for this Thread
 Posting Permissions
- You may not post new threads
- You may not post replies
- You may not post attachments
- You may not edit your posts
-
Forum Rules
|
|
) is just outside the fabric (less than 1/32 inch). If the fabric is very coarse, do that twice with different seam widths. The lighter your fabric, the narrower you want your zigzags, so as not to curl the edge.




Bookmarks