X Marks the Scot - An on-line community of kilt wearers.
|
-
WIP Sporran #3 & #4 Rob Roys
Hi all,
I again promised myself that I'd shoot a few pix during the making of sporrans #3 and 4. I'm somewhat reluctant to log this process, as I'm trying to finish at least one of these for our local Highland games on Saturday. 
Both are Rob Roy styles again. Both are using the same leather as #1, which can be seen HERE.
I did make some pattern alterations for this series. I changed slightly the shape of the lid (although I didn't throw the original out, as I do like it).
The location of the cabochon is altered slightly for this set (downward toward the bag) and I'm planning a different shape as well for at least one of the two.
The gusset will be a little deeper on the newer one and slight increase in the overall bag size has been made as well.
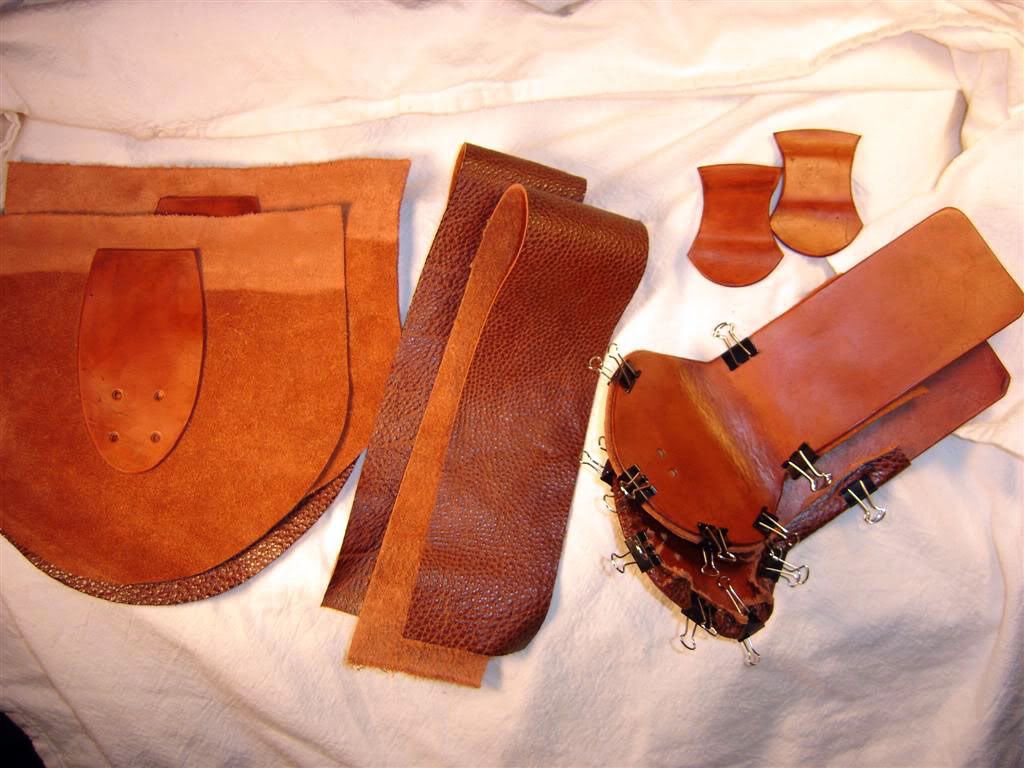
Here are the cutting for the new pieces. Reinforcing panels have been cut, dyed and are glued to their facings.

You can see that the top flaps are formed already. I do the shaping right after edging while the leather is still very wet and pliable. When the facings are glued on, they are glued with most of this shape maintained. They are then stretched on and clamped. This is important because if they were glued onto a flat flap it could cause extra stretching to the face panel in use.
Also of note, on the upper of the two flaps you'll see there is no leather to fully wrap the edge. Once the glue has fully set I will be lacing this edge. I really liked the effect on #2 - seen HERE, and will be doing a similar treatment with a slightly smaller braid (and obviously in a complimentary brown rather than black  ) )
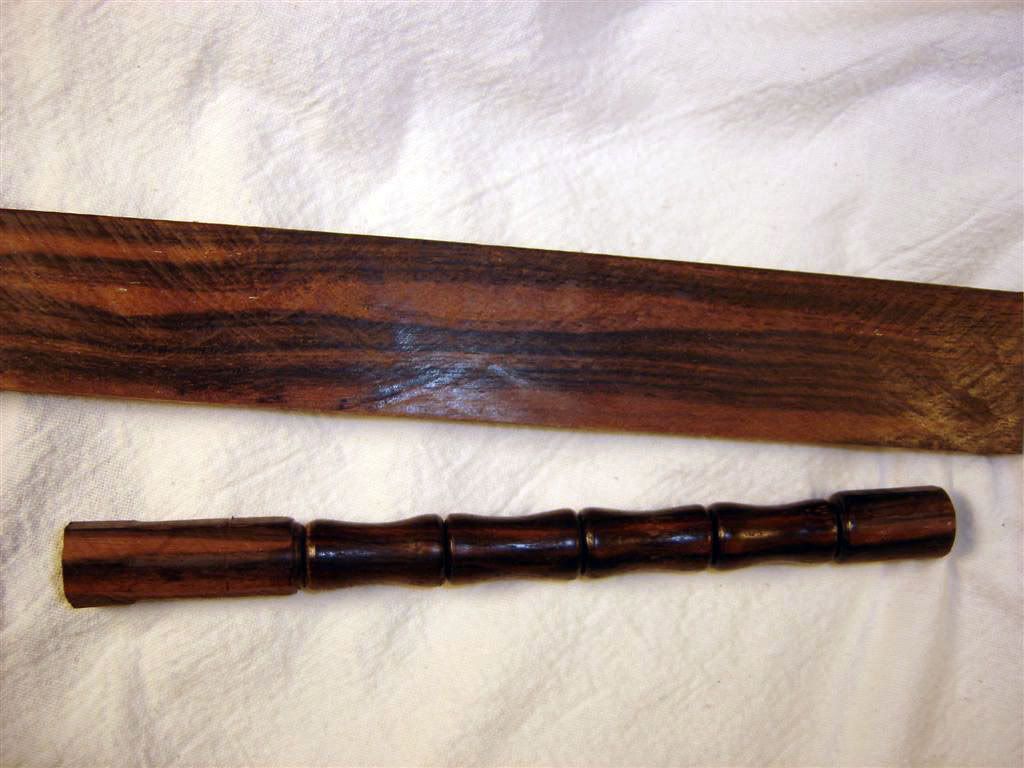
Last night in the shop while I was waiting for the glues to fully set I broke out the table saw and lathe again. After some wood selection and a bit of work we have the toggles for one of the new lot, as well as a slab cut for the cabochon. The wood is Ebony Macassar.

This set of toggles is a slightly different shape than on #1 and are a bit smaller.
They are just waiting to be cut from their mates, have their edges finished and be drilled for the thong.
As always, constructive critique and general commentary are welcome.
Thanks for looking - hopefully I'll have some updates this evening.
***BTW I'm hoping to fully document #5 (jacobite) from pattern design through completion. But that won't begin until these are finished (and hopefully out the door)
Last edited by artificer; 3rd June 10 at 05:55 AM.
Reason: speelin mitsakes
-
Similar Threads
-
By bricelythgoe in forum DIY Showroom
Replies: 25
Last Post: 2nd December 09, 04:24 AM
-
By Bart_In_A_Kilt in forum DIY Showroom
Replies: 14
Last Post: 9th March 09, 10:17 AM
-
By Ancienne Alliance in forum Kilt Advice
Replies: 36
Last Post: 7th December 08, 11:16 AM
-
By Giraffe in forum Kilt Advice
Replies: 56
Last Post: 27th March 08, 07:39 PM
-
By phil h in forum How to Accessorize your Kilt
Replies: 16
Last Post: 12th December 04, 10:51 AM
 Posting Permissions
- You may not post new threads
- You may not post replies
- You may not post attachments
- You may not edit your posts
-
Forum Rules
|
|
)


Bookmarks