|
-
25th February 17, 03:22 AM
#1
Pressing before stitching pleats
Hi Steve,
You mentioned in your engineer's guide to pleat marking that you press your pleats before stitching. I also note that a major kiltmaking company near Glasgow also does that. How do you keep your pleats exactly
in place to the nearest mm/32nd" for pressing? Do you just press the fell before stitching or the whole pleat?
I am having trouble with wandering pleat width (Strathmore 13Oz) despite using a gazillion perpendicular pins all along the fell. I thought that if I could press them first, that problem might be minimised.
Cheers,
Michael
-
-
25th February 17, 12:04 PM
#2
Michael,
One of the reasons that 16oz has become the standard for kiltmaking is that it is simply the best stuff out there for the job. It is a property of 13oz fabric that being lighter and thinner it will not take a fold as easily and as straight as 16oz fabric.
But getting any pleat to lay flat, and the edge to be arrow straight, is a matter of experience, practice and attention to detail.
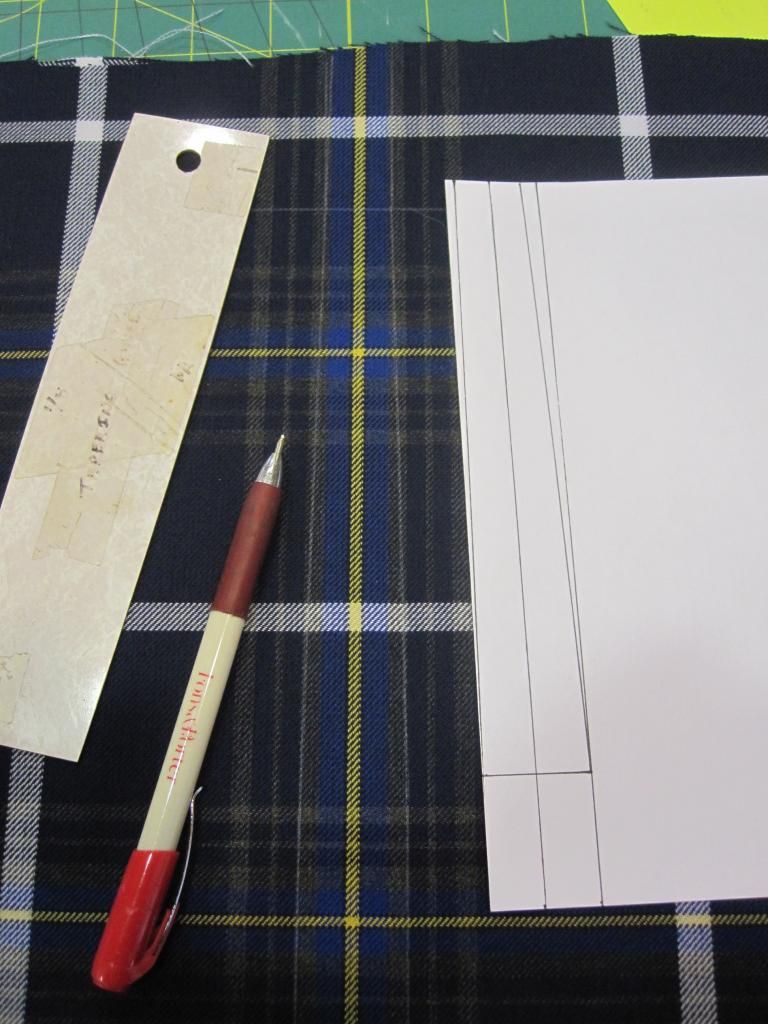
One thing that can help is to make chalks marks that are as thin as possible. I personally use a tailors chalk sharpened to a knife edge, a chaco wheel marker or my favorite marker, a .5mm chalk pencil.
A commercially available mechanical chalk pencil can be seen in this photo.

Please note how thin and sharp the lines are.
Also please note the template and jig are I always use when laying out pleats. My template lines and the chalk lines are thinner than one twill line of the fabric.
The fabric you are marking must also be straight. It cannot be skewed and the Tartan lines must be arrow straight. I use an aluminum straight edge and lead weights to hold the fabric straight while marking.
It is really hard to try and draw a line parallel to a curved line.
When pressing an edge, any edge, attention to detail is the key. You watch that the chalk line you have drawn goes right down the edge of your crease. It cannot waver even one twill line.
This is actually not as easy as it sounds. Not everyone can do it. I have had perhaps 10-11 people apply to work for me who just cannot work to this level of accuracy.
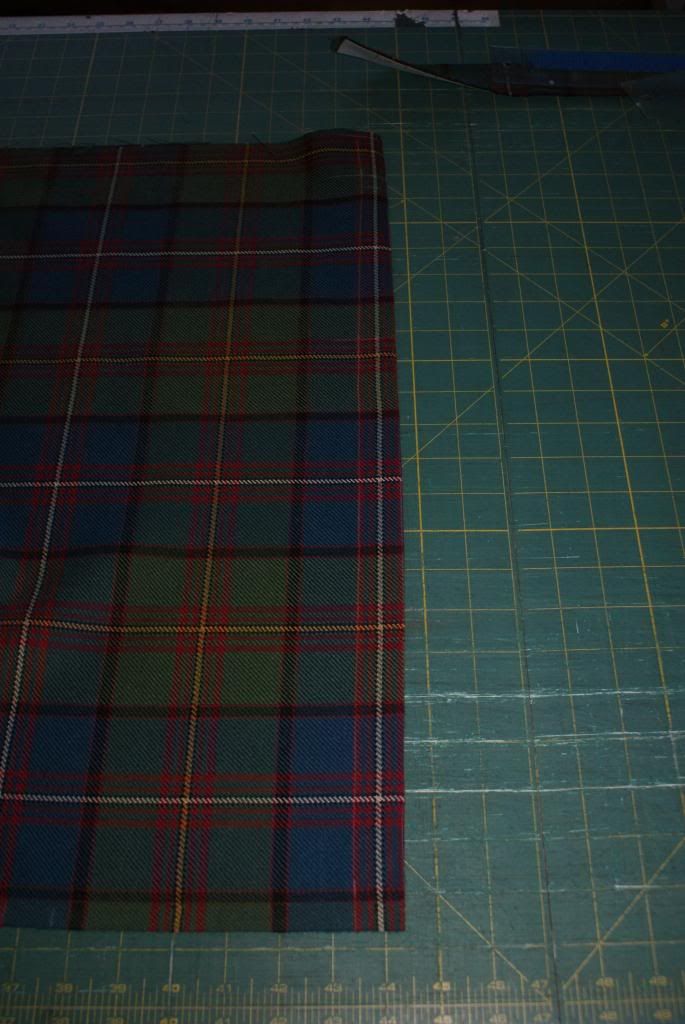
Here is an example of a pleat that is unacceptably wavering and will be re-done. To see what I am seeing look at the width of the red stripe down the edge of the pleat. Can you see how it is not the same width done the entire length?

After you have pressed the edge crease you must still sew that edge.
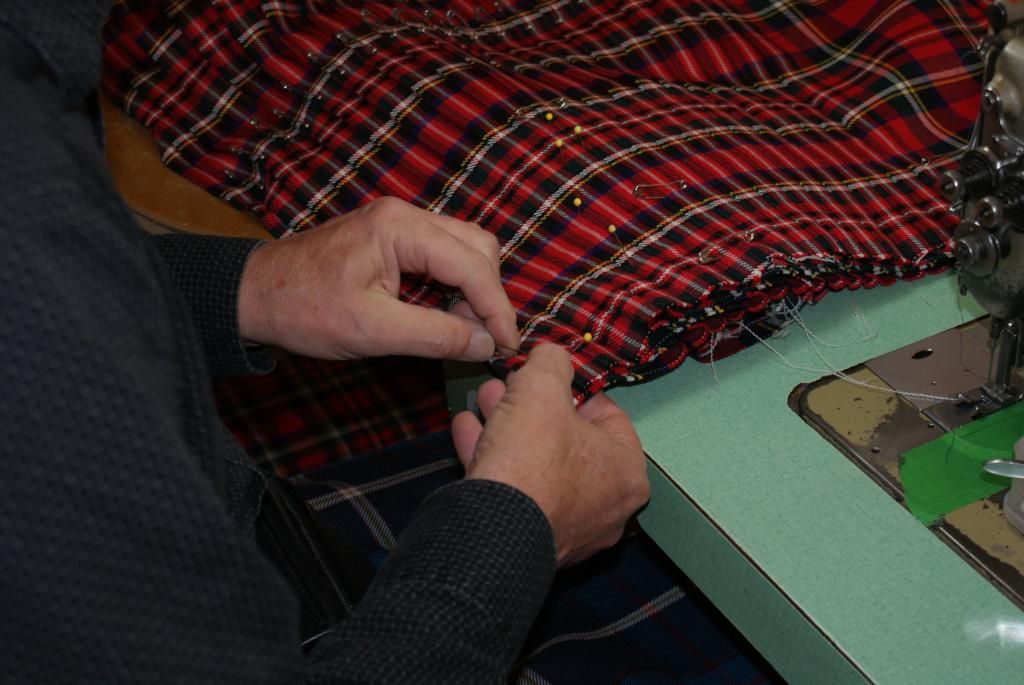
Here I am hand-stitching a kilt. (notice please that I stitch left handed)

Please notice how few pins I am using. Usually 4-5 per pleat to keep the horizontal alignment. I do not use pins to maintain the pleat width. That is done by eye. I gently pull some tension in both pleats that I am stitching together so they both have the same tension and there is no slack. The tension is what pulls the pleat edges straight.
I then stitch without disturbing the straight edge that the tension produced. So many people try to adjust the lay of a pleat with the needle or varying the stitch they make in hope of pulling the pleat into shape. In fact what you end up doing is introducing stress and un-evenness into the fabric.
And finally I guess that the most common thing people do is fight the fabric. They try to force it to do what they want and end up stressed and exhausted very quickly.
The fabric will try to lay flat. It will try to fold along a warp thread and it will try to be relaxed. In 9 times out of 10 it is us, the people pushing the needle, that cause it to go all wonky.
I can give hints and tips. I can show you the way that I do things but they are not the only way to do them. They are not the right or the wrong way. They are just my way. The way that works for me. They may not work for someone else.
I guess that in the end you have to remember - This should be fun and rewarding. If you are fighting the fabric, trying to force it to your will, it is not fun anymore and the result is not rewarding.
So take some of my hints and tips if you find they help you. Use some of Barb's hints and tips. And then practice, practice, practice. develop the muscle memory to do the job well without stress or effort.
No one makes a perfect kilt the first time. Well, I suspect that Barb's first kilt was pretty darn close to perfect. But for the rest of us mortals, we just try to make this kilt just a little bit better than the last kilt.
Last edited by The Wizard of BC; 25th February 17 at 12:07 PM.
Steve Ashton
www.freedomkilts.com
Skype (webcam enabled) thewizardofbc
I wear the kilt because: Swish + Swagger = Swoon.
-
-
26th February 17, 02:19 AM
#3
Thank you Steve for such a generously well-written answer.
I will be off to Spotlight (Australian sewing chain store) for chalk pencils in the next few days then. I have had trouble finding chalk that is not waxy, as per guidelines in TAoK, so hitherto I have been using blackboard chalk, which not only is too easy to remove just from folding the fabric, but also must be honed prior to marking.
-
-
26th February 17, 02:43 AM
#4
I actually use blackboard chalk too. I have a piece of sticky back sandpaper on the side of my table. Right over the trash can. I sharpen the chalk by rubbing it on the sandpaper after each line.
I don't try to make a two sided chisel edge just sharpen it on one side sort of like the point of a hypodermic needle.
-
The Following User Says 'Aye' to Steve Ashton For This Useful Post:
 Posting Permissions
- You may not post new threads
- You may not post replies
- You may not post attachments
- You may not edit your posts
-
Forum Rules
|
|


Bookmarks