|
-
31st January 14, 09:19 PM
#1
-
The Following User Says 'Aye' to The Wizard of BC For This Useful Post:
-
31st January 14, 09:58 PM
#2
Now, before I get too far into this tutorial I need to explain a bit about how this system came about and why it is so different from that explained in "The Art of Kiltmaking".
When I first started making kilts I worked with solid colored fabrics. This allows me to make each pleat exactly the same size regardless of the fabric I was working with. So I picked 1inch wide pleats for my Dress Model and 1 1/2 inch wide pleats for my Cargo Model.
This is easy to lay out but does cause one difference from how a traditional kilt is made. If I use the same pleat width all the time, to make a bigger kilt I need more pleats, hence more fabric. For a smaller kilt I use fewer pleats and need less fabric. All told my kilts use more fabric that what is in a traditional kilt. This worked quite well for me as the fabrics I was using were about 13 oz but because there was more fabric felt like a 16 oz kilt.
Well I was so used to this idea of standard width pleats that when I started making Tartan kilts I kept the same thinking. To me Tartan was just fabric with lines already on it.
And my Engineer mind said to me that Tartan patterns, or Setts, were mathematical. So to me laying out pleats was a mathematical process.
In a Traditional kilt you start with a known amount of fabric. You figure out how much is used by the aprons and what is left over is what you have available for the pleats.
In a Traditional kilt you also vary the width of individual pleats to work around the Tartan pattern. You do not want a line or element of the Tartan to disappear as the kilt tapers from the hips to the pleats.
This manually adjusting each pleat just sits wrong with my Engineer's brain. It took me a very long time to get that concept. To me it just wasn't natural.
OK, let me give you an example of why I like this system and why I continue to use it.
No. 1 - If you are making more than one kilt from the same Tartan this is a quick and easy way of saving the layout and duplicating it for the next kilt.
No. 2 - If you are making more than one kilt from the same Tartan but they are in different sizes, if you use this system all the kilts will look exactly the same from the back. Each one will have the exact same pleat width and the Tartan will look exactly the same. (larger kilts will just have more pleats on each side, and smaller kilts will have fewer pleats on each side.)
No. 3 - If for some reason you are making two kilts from the same Tartan but different weights of fabric the back of each kilt will look exactly the same. Size of Sett makes no difference when using this system.
No. 4 - If you are pleating a kilt to the stripe you may think it is easy. Just follow the lines, right? But how wide does each pleat need to be to fit the wearers size.? Using this system solves that question in one motion. No measuring in fractions of an inch, in fact no tape measure required at all.
No. 5 - If you are pleating a kilt to the Sett this system makes laying out a breeze. Again, no measuring or tape measure required at all. And because you have a marked pattern that you follow you never make a mistake and drop a Tartan element causing you to rip out pleats to correct the mistake.
No 6 - Did I mention that with this system there is no measuring required? That's right, no tape measure hanging around your neck and no math with fractions of inches or conversions to metric required at all. It is all visual. Line up the pattern, make some lines and your ready to start stitching.
Last edited by Steve Ashton; 31st January 14 at 10:10 PM.
Steve Ashton
www.freedomkilts.com
Skype (webcam enabled) thewizardofbc
I wear the kilt because: Swish + Swagger = Swoon.
-
-
31st January 14, 10:35 PM
#3
The next problem my mind just could not get around was the way "The Art of Kiltmaking" explains was how to figure out how wide your pleats needed to be. You need to measure the Sett size and know how many Setts of fabric you had to work with, and how big the hips of the kilt you were making was.
To me, who was already used to using a standard pleat width, it just comes as second nature to figure out pleat size based only on the Sett size of the particular Tartan I was working with.
Remember those lines you made on the table in the first step of this tutorial? Here they are again.
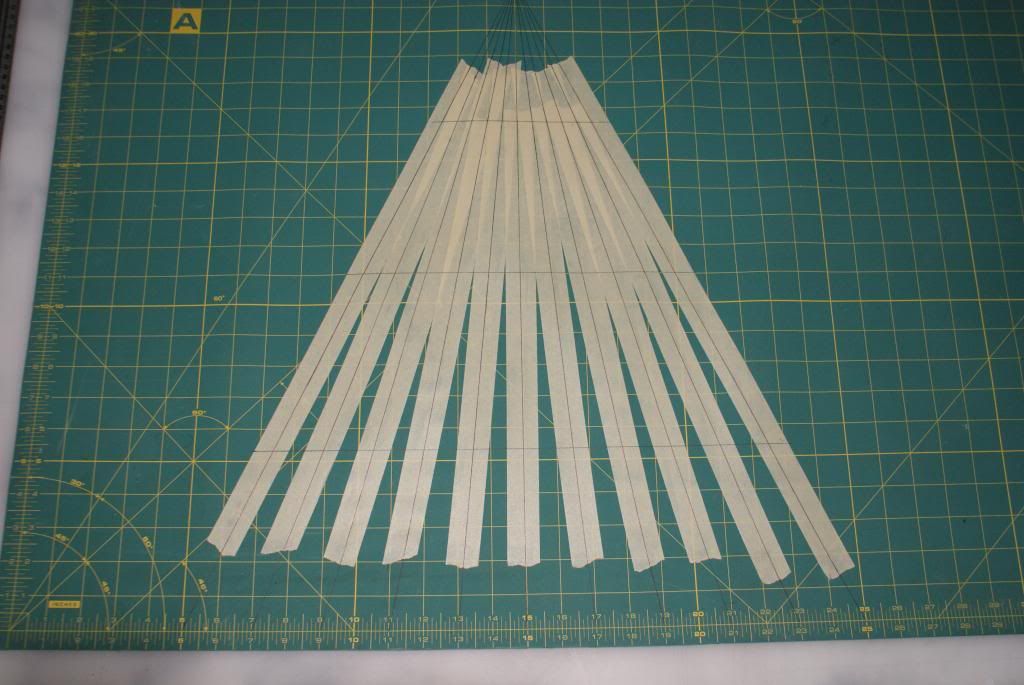
Can you see up near the top a horizontal line drawn? There is another near the middle and another down at the bottom. These lines are my pleat width limit lines. the horizontal line near the top tells me where the spacing is 1/2 inch apart. The horizontal line in the middle is where the spacing is exactly 1 inch apart, and the horizontal line near the bottom shows where the spacing is 1 1/4 inch apart.
This spacing is about the standard pleat width in a traditional kilt. Some kilts have pleats as narrow as 5/8 inch and some as wide as 1 1/4 inch. So the top and bottom horizontal lines are about as narrow or as wide as I want my pleats.
All you have to do to figure out pleat width is to lay your Tartan down on the lines. Then move the strip of fabric up and down till the Tartan aligns with the lines on the table.
Viola!!!
Well, not quite as simple as that, but almost. And here is where knowing a just a bit about Tartan and tapering your pleats comes in.
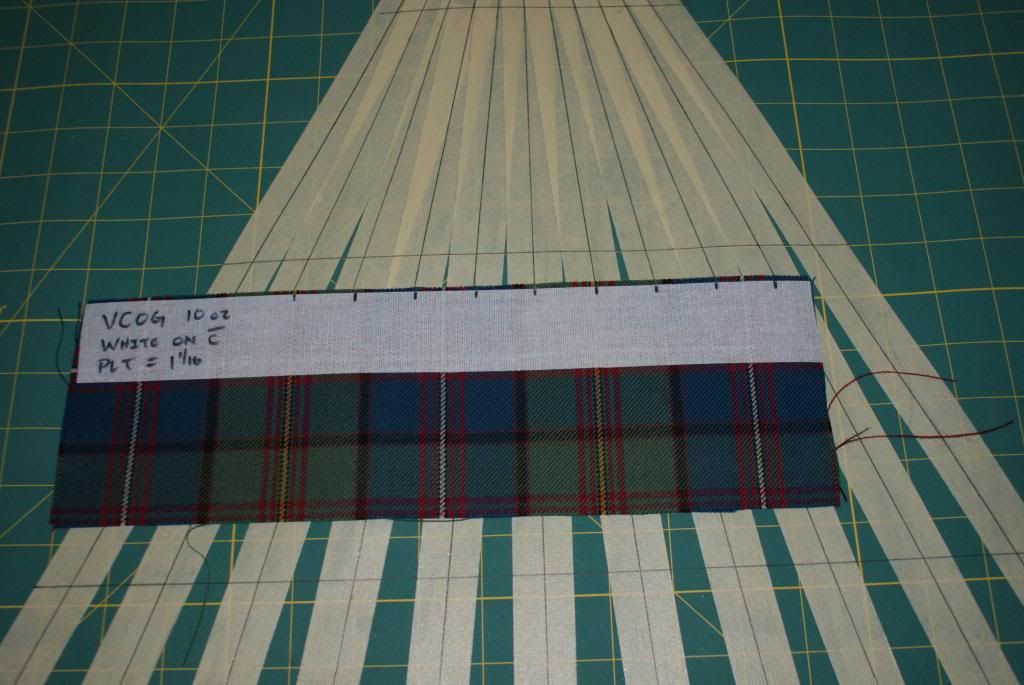
Here is my strip of Tartan laid out on the lines.
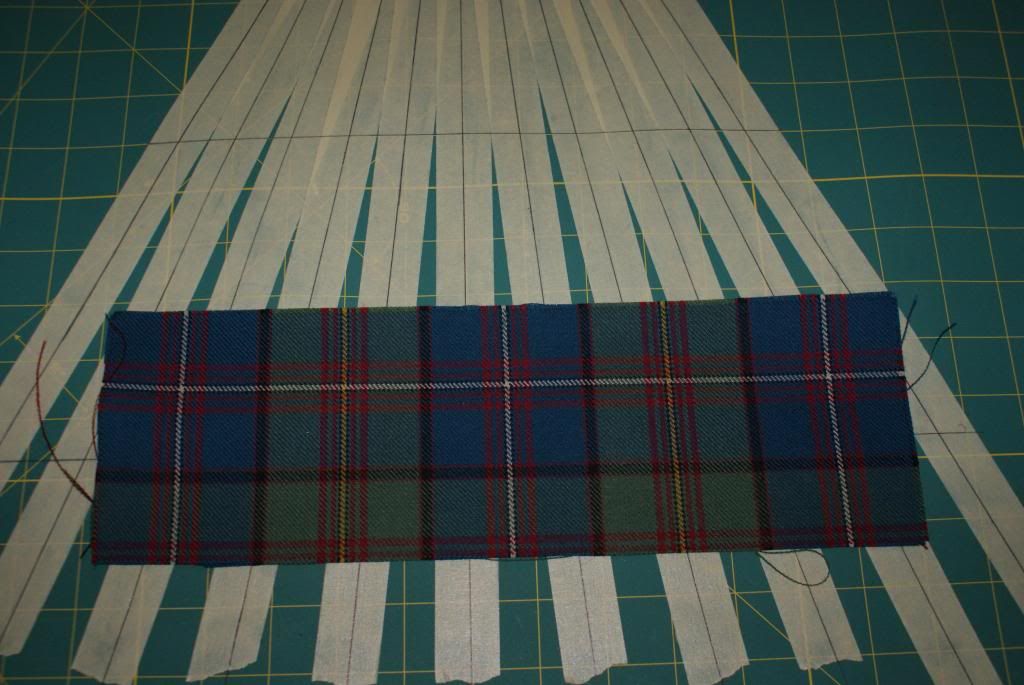
Can you see that I have moved the strip up and down until the Tartan pattern is aligned with the lines. Look closely at the small yellow and white lines in the Tartan. Can you see how each is in the center of the grid lines?
Now notice how wide each grid line is at this point on the grid. The spacing at this point on the grid is about 1 1/4 inch. Probably too wide for this Tartan and a traditional looking kilt.
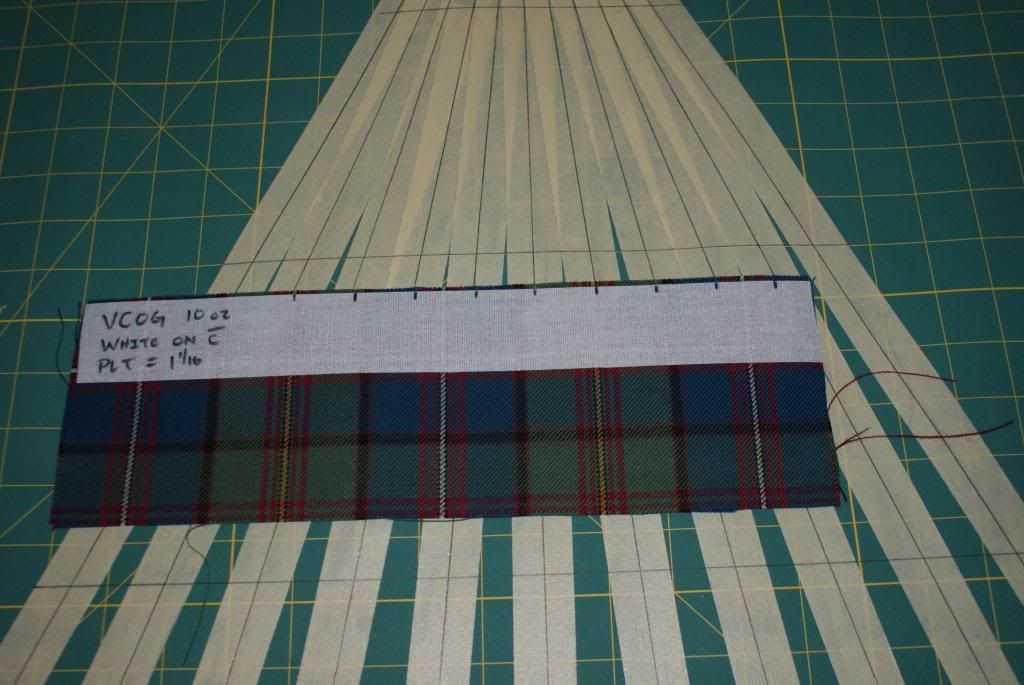
Now look again.
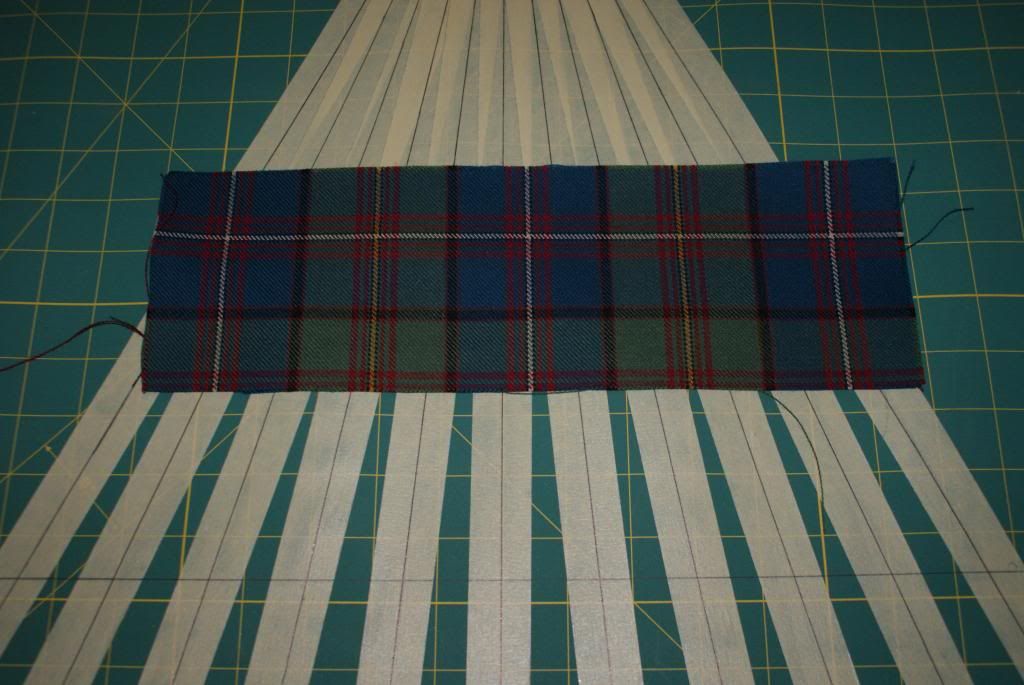
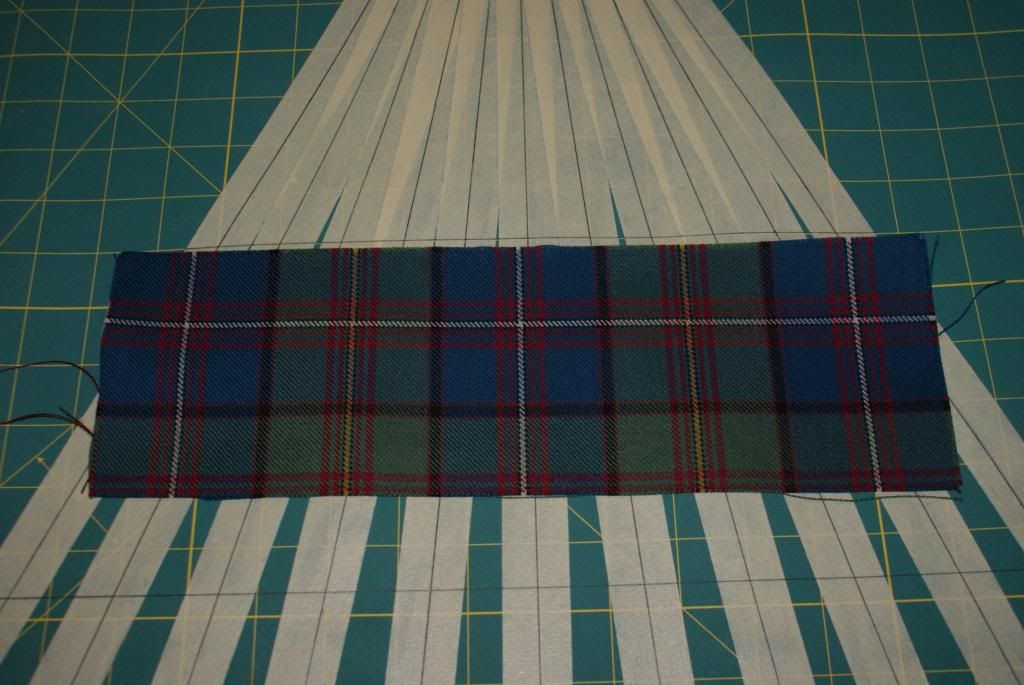
All I have done is carefully moved the fabric strip up until it lines up with the Tartan pattern again but now there are more divisions for each Sett. The spacing of the pleats if marked her will be right about 7/8 inch. Just about perfect.
The only difference is that in the first picture there will be 4 pleats to create one Sett and in the second picture it will be 6 pleats to create one Sett.
See, no scratch pad with arithmetic all over it, no tape measures laying around, a no fractions or decimal conversions. Just move the fabric strip up and down till the tartan pattern aligns with the lines on the table.
Now, here is the pop quiz!
Steve Ashton
www.freedomkilts.com
Skype (webcam enabled) thewizardofbc
I wear the kilt because: Swish + Swagger = Swoon.
-
-
1st February 14, 12:10 AM
#4
-
-
1st February 14, 06:35 AM
#5
Well!!
There must be a little engineer in my blood because this all kinda makes sense!! If everything pans out and I manage to attend Kilt Kamp 2014, I will make sure I am in attendance for this part of your lecture although I'd be in the traditional kilt making camp. I'm looking forward to your next installment!!
Stephane
-
-
1st February 14, 08:10 AM
#6
Really impressive Steve, does it work for assymetric as well.
I have never made a kilt, but its quite a good way to spacing out the pleats, thank you for sharing your hints and tips.
What about where the kilt gets tighter at the buckles and flares out at the rise, is the size of the rise equal to the fell (seat) or not.
You have two bits of fused material on the kilt is from the fell down or fell to the waist.
-
-
1st February 14, 12:36 PM
#7
Not only don't I understand the solution - I don't understand the problem.
I guess I am neither engineer or artist.
I do like micrometers though.
And slide rules - slide rules are good.
Maybe I'm a mathematician.
Anne the Pleater :ootd:
-
The Following 2 Users say 'Aye' to Pleater For This Useful Post:
-
1st February 14, 01:34 PM
#8
Steve,
I showed this to my wife a few minutes ago. She made my kilt using Barb's book, and she is interested in this 'scientific' method of laying-out the pleats. She may try it when she makes my next kilt. We are eagerly awaiting the rest of the tutorial. Thanks!
Allen Sinclair, FSA Scot
Eastern Region Vice President
North Carolina Commissioner
Clan Sinclair Association (USA)
-
-
1st February 14, 06:58 PM
#9
I'm really sorry folks but I'm not going to be able to get part two up for you today.
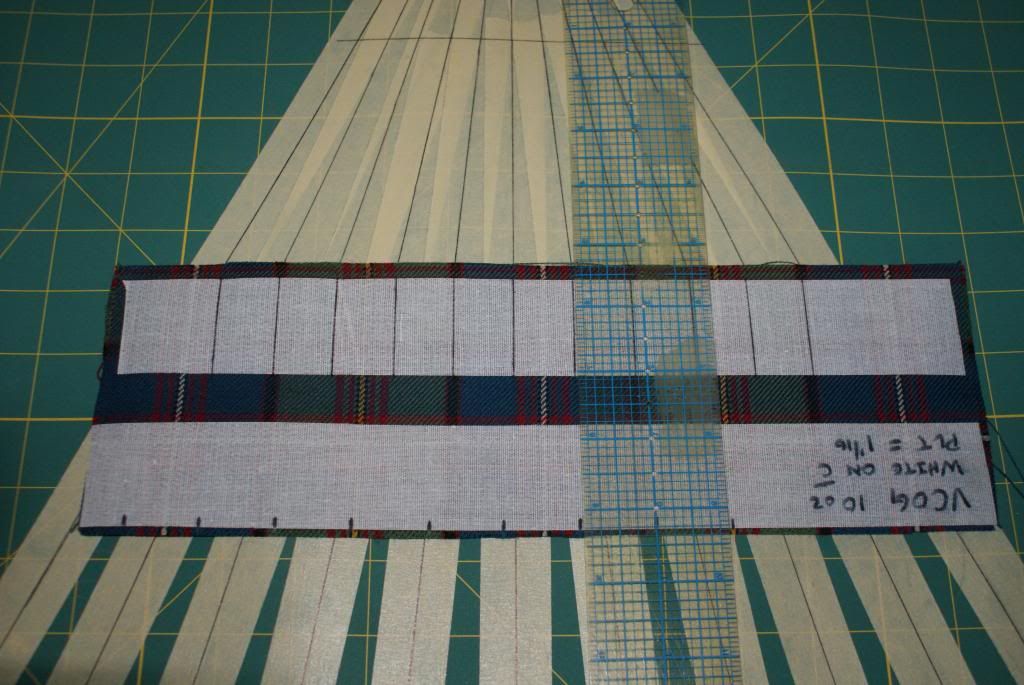
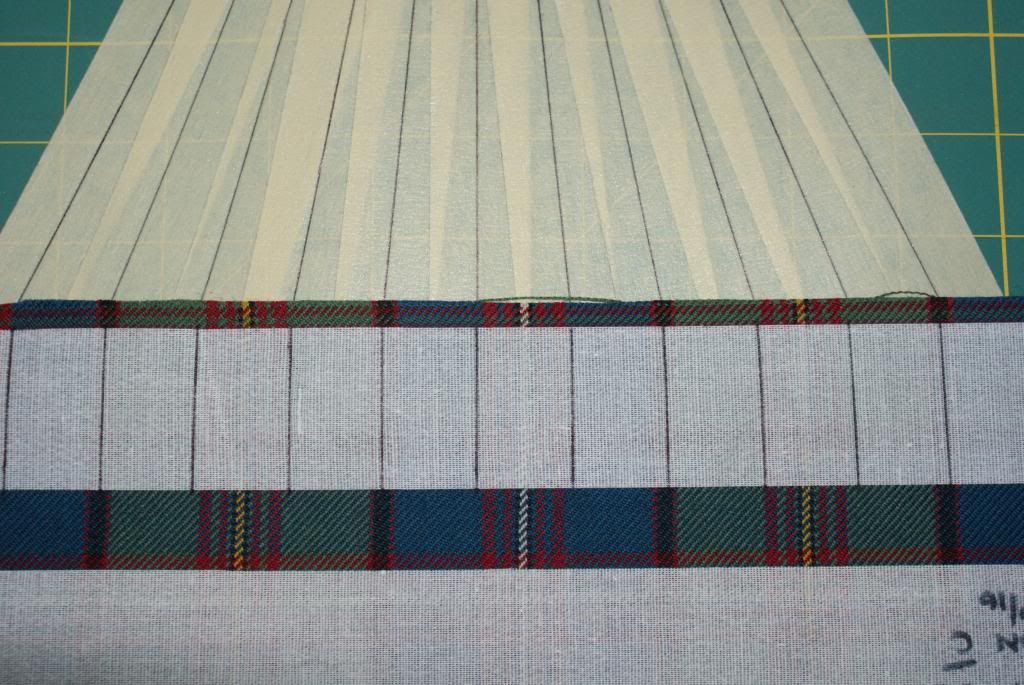
I have been having a heck of a time getting the photos to look good using the 10 oz Tartan fabric. You can't see any detail at all in the photos.
So I have marked a piece of 16 oz the same way I did the 10 and will see if I can't get this up for you in the next day or two.
I'm really sorry about this.
Steve Ashton
www.freedomkilts.com
Skype (webcam enabled) thewizardofbc
I wear the kilt because: Swish + Swagger = Swoon.
-
-
2nd February 14, 01:36 AM
#10
Steve ,
I am not a kilt maker , but I am an engineer . It would appear that you have taken the mathematics for kilt making and created a template through the use of a bit of geometry . Well done !
There may be a tartan that doesn't fit this method , but I can't think of one . Even if a tartan is of a large sett or asymmetrical , I can still see this method working .
Mike Montgomery
Clan Montgomery Society , International
-
 Posting Permissions
- You may not post new threads
- You may not post replies
- You may not post attachments
- You may not edit your posts
-
Forum Rules
|
|






Bookmarks