|
-
4th November 09, 05:28 PM
#1
Sheriffmuir Jacket from scratch (a DIY project)
I am embarking on the dangerous waters of making a jacket (doublet) completely from scratch.
I'll be posting pics of my progress and what I have done here.
I'd like to ask a few questions of people who own these jackets as well so I can make it as nice and accurate as possible.
I started with these pics
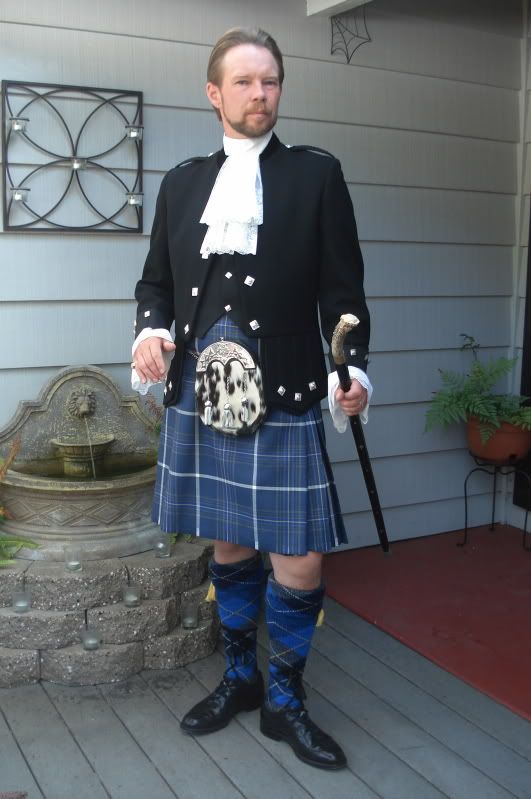
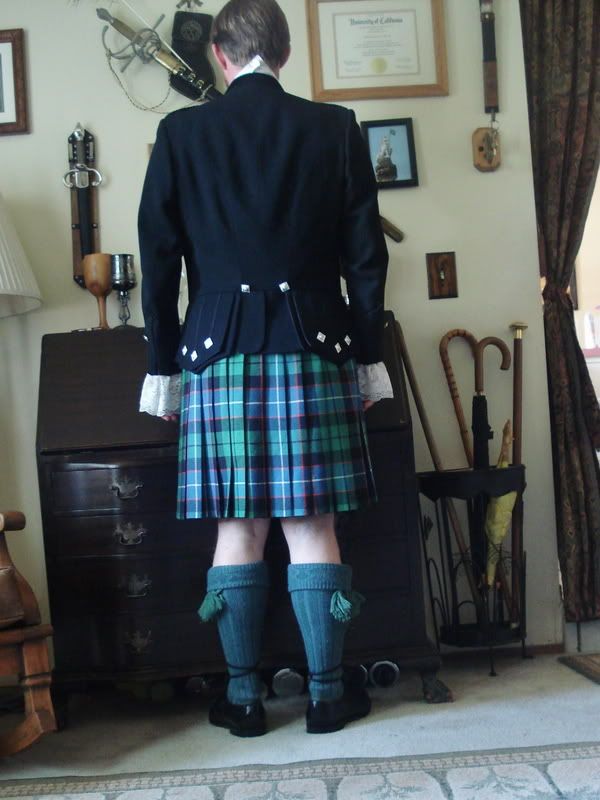
Thanks Panache for posting them earlier...
and this as a pattern

And so far I have made a cheap broadcloth mock-up to do some adjusting to the pattern until it fits correctly. Here is a requisite picture. I am wearing a SWK thrifty kilt in the Wallace tartan so I can fit it to a real waistline rather than a low trousers one.
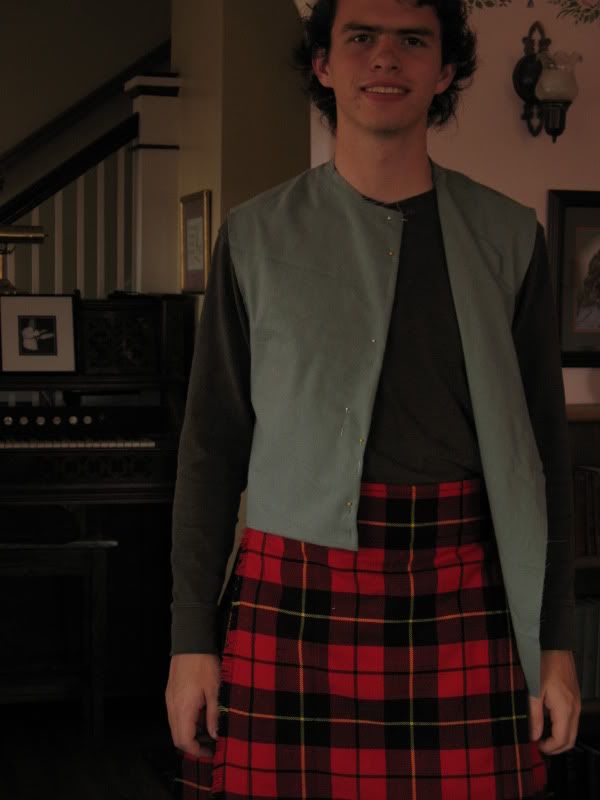
And this brings me to the first question. How is the Sheriffmuir attached at the top or is it? If someone who has one could help me out with a picture or description I'll be better able to adjust the front "lapel" to the proper size before cutting into a more expensive fabric.
Last edited by Hothir Ethelnor; 26th November 09 at 10:03 PM.
-
-
4th November 09, 10:37 PM
#2
I might not be understanding your question about how the jacket is attached at the top, but it is my understanding that the top of the jacket is often closed with a cord-like loop between the buttons. The top two sets of buttons, if I understand correctly.
Good Luck.
I tried to ask my inner curmudgeon before posting, but he sprayed me with the garden hose
Yes, I have squirrels in my brain
-
-
5th November 09, 07:27 AM
#3
Ok, that makes sense according to pictures I have seen.
I know that the buttons don't ever actually button I was wondering though if a hook and eye or something of that sort was hidden under the jabot.
Most pictures that show the top of the jacket worn without a jabot show nothing holding it together.
Question #2 (not so urgent as I can do alot before this comes up.) what do the pocket flaps (skirts) look like from the side. Is it two distinct pieces with a gap in the middle or is there another flap of fabric spanning the gap between them, or is there no gap at all?
BTW if your skirts don't have pockets I was planning on having them in mine. When watching Tunes of Glory I noticed in an early scene, that the skirts on the piper's doublets, which are a very similar style, had pockets in them beneath the decorative outside flap of the skirt.
-
-
5th November 09, 07:55 AM
#4
The gap between the flaps and how the flaps are constructed will probably differ depending on who made the doublet and when the doublet was made. Your pattern looks to show that there is an underflap cover the gaps of the over flap. But I've seen other photos that look the flaps are flush to one another without any visible gap. I would say though that all the flaps are connected independently to allow free-er(?) movement.
I would advise against pockets. It would tempt you to put something in there and that would cause unsightly buldges.
-
-
5th November 09, 11:40 AM
#5
Nice job on the sewing. Good idea for the mock-up first. Some advice:
-try the mock-up on inside out so that your seams are facing outwards, pin any adjustments to the seams and mark this on your pattern, of course this will switch things from left to right, so I always sew mock-ups matching wrong sides instead of right sides
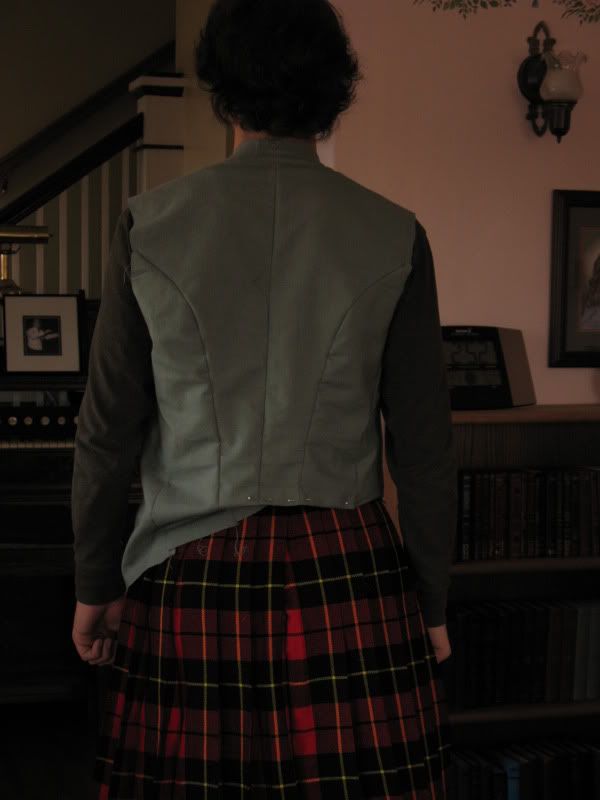
-when sewing princess seams which is what you have on your back, sew a line of stay-stitching on both pieces just inside the seam line and on the piece straight piece, clip into the seam allowance right up to the stay-stitching. This is done to 'stretch' the straight piece to allow the rounded piece to fit in.
You see the 'puckering' on those rounded pieces in your picture? Not enough stretching on the long straight piece.
-you also have one shoulder lower than the other, you can see the back center line swung over to the back left with a pucker up on your shoulder. You'll need to either build up the lower shoulder with shoulder pads to match your higher shoulder (very common solution) or fit the front and back shoulders separately. It's hard to say as you didn't use any shoulder padding in your fitting which you really should do to see exactly how things will fit you.
Otherwise, awesome job working from a drawing and pictures!
-
-
5th November 09, 12:15 PM
#6
 Originally Posted by HeathBar

I would advise against pockets. It would tempt you to put something in there and that would cause unsightly buldges.
Au contraire... Those pockets in the flaps are very useful, and really don't cause any bulges when smaller items are placed therein.
-
-
5th November 09, 01:17 PM
#7
Originally Posted by JSFMACLJR
Au contraire... Those pockets in the flaps are very useful, and really don't cause any bulges when smaller items are placed therein.
Touche'
-
-
5th November 09, 06:48 PM
#8
Thanks for the tips, I'll talk to my sister about the princess seams. (if I can drag her away from a number of bridesmaids dresses she is making...)
I don't believe I have one shoulder lower than the other (though a precise test could be in order) the angle of the picture as well as the fact that fitting adjustments had only been applied to one half of the mockup could result in your hypothesis.
I am also following general instructions found in Classic Tailoring Techniques. (hence the mockup.)
The pattern did not specify pads and I don't think they were used in the original garment so in my fitting and testing of the mockup I noted to extend the shoulder parts of the pattern to accommodate that.
(now to go finish fitting the collar and adjusting the front "lapel"...)
-
-
6th November 09, 12:48 AM
#9
Hothir Ethelnor, are you using some kind of tailor's dummy, or something like that for tweeking the shape? (Can't look at the pictures...)
I was just thinking of a contraption one of my family members has that's like a torso made of adjustable and removable bars and rods that make up a grid or scaffold, but I've also seen a pillow-ish type dummy torso being used.
Look forward to following the thread as it develops.
I tried to ask my inner curmudgeon before posting, but he sprayed me with the garden hose
Yes, I have squirrels in my brain
-
-
6th November 09, 07:09 AM
#10
No I am having my sister and mother assist me with fitting it to myself. I may use a form for a few different parts of the work where it would be helpful but I have not yet done so.
-
Similar Threads
-
By A Hay in forum How to Accessorize your Kilt
Replies: 32
Last Post: 21st February 09, 01:40 AM
-
By airforcedave72 in forum DIY Showroom
Replies: 11
Last Post: 30th March 08, 08:04 AM
-
By irishrob in forum Contemporary Kilt Wear
Replies: 6
Last Post: 2nd October 06, 06:02 PM
-
By Mike1 in forum Show us your pics
Replies: 4
Last Post: 24th May 06, 07:50 AM
-
By Mike1 in forum Miscellaneous Forum
Replies: 1
Last Post: 12th November 05, 05:55 PM
Tags for this Thread
 Posting Permissions
- You may not post new threads
- You may not post replies
- You may not post attachments
- You may not edit your posts
-
Forum Rules
|
|


Bookmarks