|
-
27th June 10, 06:51 PM
#14
 Originally Posted by Downunder Kilt

Artificer, you were absolutely correct in relation to exhibit 3 becoming more "alive" with the ring of stitches. I can also see why you would have thought exhibit 1 would have been too busy. Everytime you post new pics my jaw drops a little more. Congratulations on the work thus far. 
Thanks Downunder Kilt, Stuff like this can be a real cr@pshoot. Leaps of faith in my own abilities certainly DON'T always work out.  Luckily, there are few witnesses to my "monsters". Luckily, there are few witnesses to my "monsters".
Originally Posted by longhuntr74
Wouldn't that be slightly contradictory? The beauty of this work is that it's hand made and one of a kind (though I agree...I want one too!).
Artificer....I just went through this entire thread for the first time this morning. As a novice leatherworker myself...I have to say you are a master craftsman! I'm thoroughly impressed and can't wait to see the further progress.
Thank you for the very kind words. Progress follows below.
BTW: It probably won't exactly be one of a kind, but it is handmade.
A few interesting facts from the construction so far;
I've consumed over 12yds (36' / 11m) of waxed thread so far,
I've also broken no fewer than 12 stitching needles (my prior record was 2).
Both of these numbers are due to the tremendous number of layers to stitch through (8 max), even hand punching each hole with an awl there is still such thickness and pressure from the leather that the needle can come out the other side hot to the touch. When stitching leather, the average length of thread is just over double the length of the stitch, with this sporran there are areas that require 6 times the length, again due to the multiple layers.
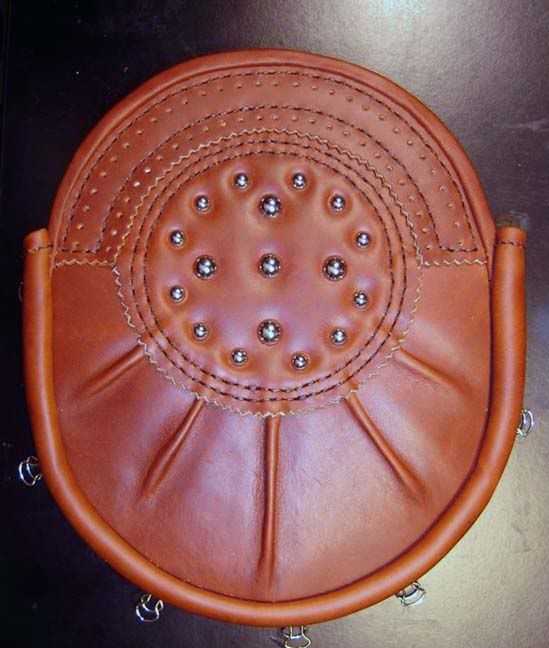
Now, to the progress.
As it sits right now the front gusset has just been stitched, but hasn't been 'final formed' and glued yet. I'm letting the leather stretch a bit to aid the final step.
After gluing and final shaping the front 'roll' of the gusset will be somewhat reduced in size, especially up near the top edge.
I should also note that none of the cut edges have yet been dyed or waxed... I JUST finished the testing on the custom dye colour.
I am working on the snap-closure strap right now, and will hopefully be in a position to complete the bag tomorrow.
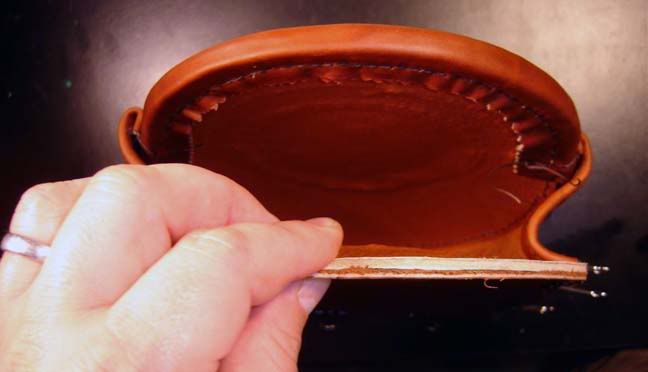
Below, you can see the bag top-down with it's mouth open. Visible are both the inner pinked edge (yet to be dyed and glued down) and the pigskin lining.
This bag isn't going to hold the tremendous amount of stuff that a Rob Roy will.
Again, please excuse the slight asymmetry due to my camera's fish-eyeing.
EDIT: I'm not sure why the bag looks so tiny in this shot, it's 8" across the widest point, and roughly 9.5" tall.
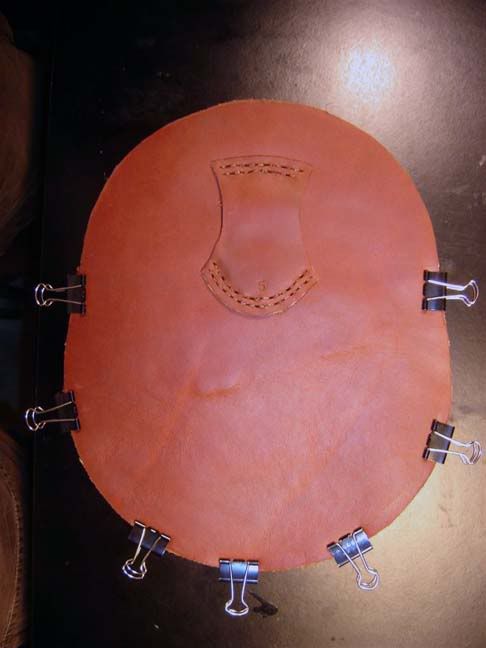
Lastly is the plain back. This will only have two more stages until completion. First is the gusset glued and clamped to the inner side of this panel, and then stitched along with the covering trim piece. Last will be the snap closure. Then... completion.
Thanks all again for the many excellent, helpful, and inspirational comments and PMs. It's always wonderful to know that one's work is appreciated.
With luck, I'll be posting final pix tomorrow night or Tues mid-day.
Last edited by artificer; 27th June 10 at 07:46 PM.
Reason: speeelin' eRorz
-
Similar Threads
-
By CMcG in forum How to Accessorize your Kilt
Replies: 10
Last Post: 4th June 10, 10:46 AM
-
By Dall_Piobaire in forum How to Accessorize your Kilt
Replies: 11
Last Post: 28th June 09, 12:14 PM
-
By KiltedSurveyor in forum DIY Showroom
Replies: 19
Last Post: 7th May 09, 03:50 AM
-
By Joe Gondek in forum DIY Showroom
Replies: 14
Last Post: 20th August 08, 02:20 AM
 Posting Permissions
- You may not post new threads
- You may not post replies
- You may not post attachments
- You may not edit your posts
-
Forum Rules
|
|


Bookmarks