-
Converting a tweed sport coat to a Braemar jacket
Originally posted by: The F-H.C.A.G. 9/14/07
We have finally convinced my father-in-law to allow us to outfit him in un-bifurcated splendour for this year's Burns Night supper. We have not yet purchased his kilt (I still don't feel up to a traditional tartan kilt for an adult), but we received a generous gift from bunchdescendent and his lovely wife Chris at the Pleasanton Highland Games this month. It was a thrift store tweed jacket, that was apparently bought for 50 cents.
My mother-in-law is an avid garage sale and thrift store shopper, so when she found out the jacket was free to us, and originally only 50 cents, she was impressed. Given that she has been a bit negative about her son's kilt wearing in the past and pretty strongly opposed to her husband wearing a kilt, it was good to get her approval at last! She has actually begun to get almost enthusiastic about choosing a kilt for him.
Alright, enough preamble. As most of you know, I do photo "travelogues" of my projects, so here goes....
First, the original jacket, roughly marked in chalk (just regular school chalkboard white chalk) for the eventual sporran cutaway.
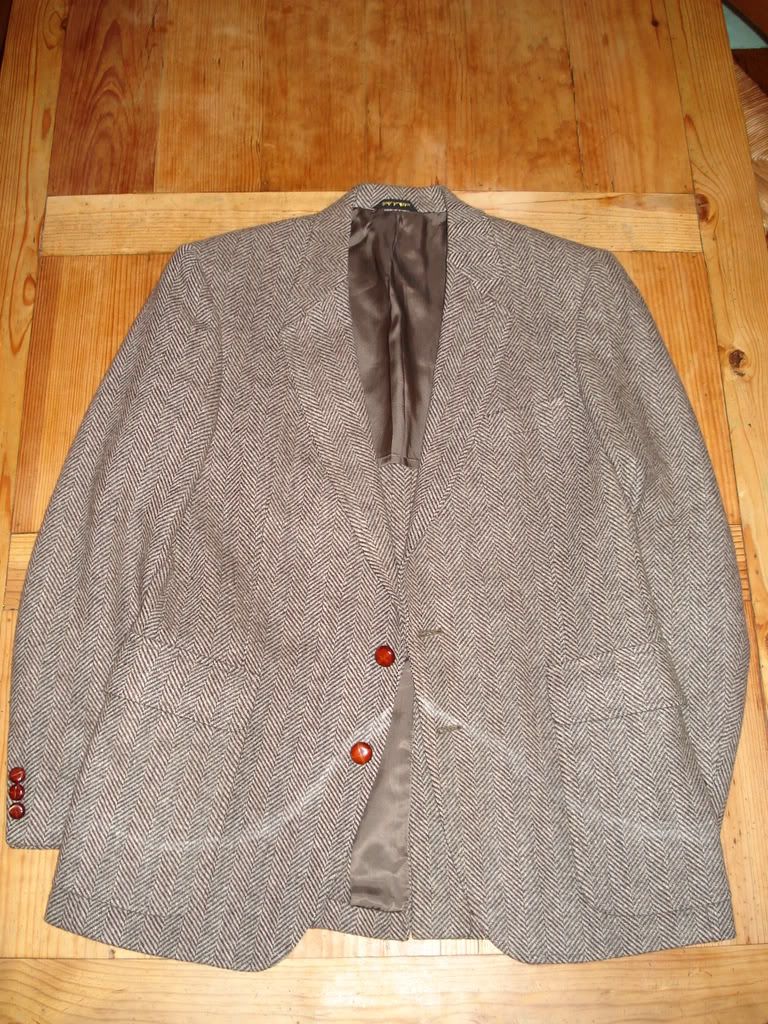
There are big flap pockets on this jacket. They have to go. But don't throw away those pockets! They'll be useful later. One option is to just cut them down and put them back on after removing the bottom of the jacket. That was my first intention, but it turned out not to be practical for 2 reasons (to be revealed when we get there).
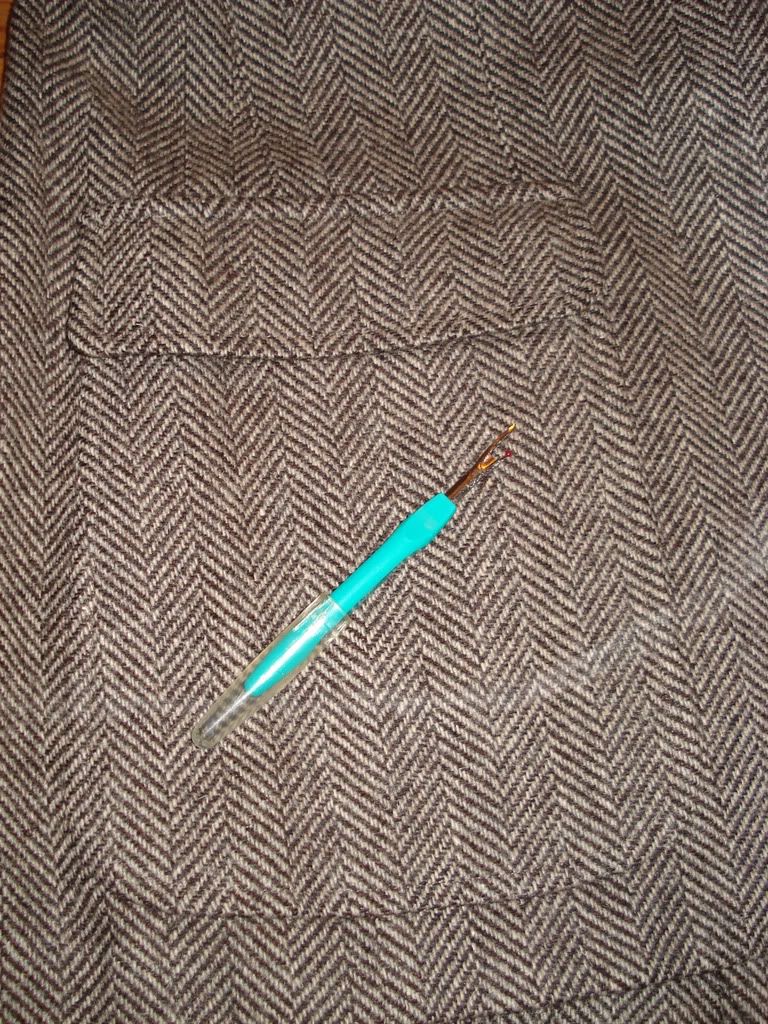
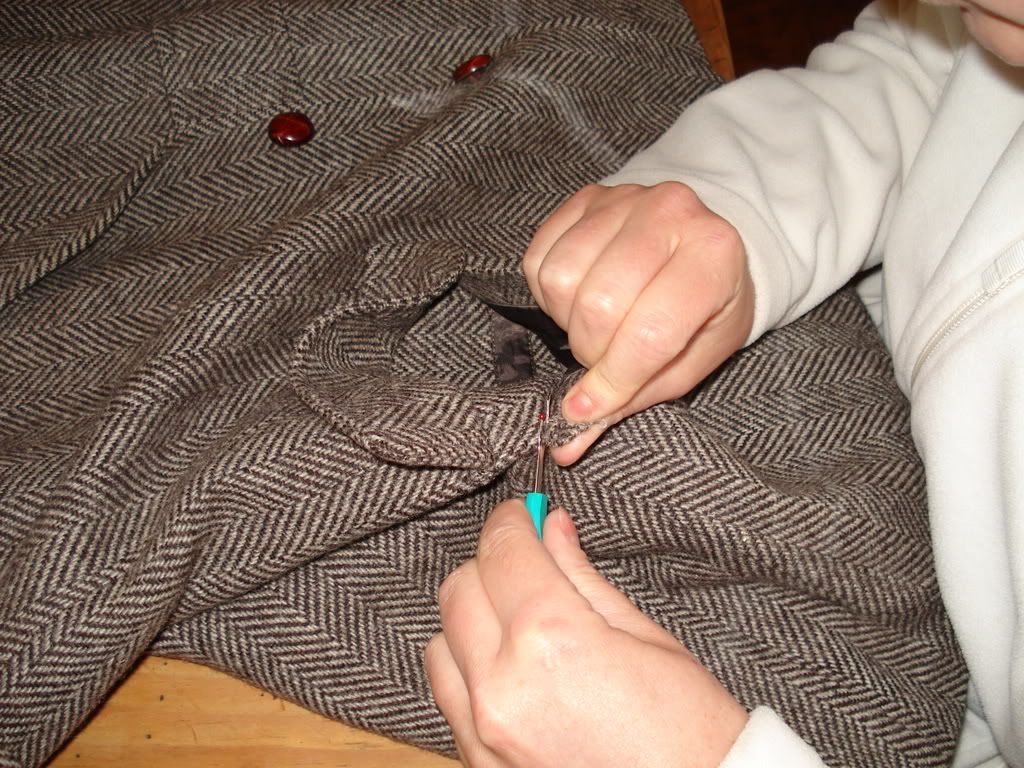
Gently seam ripping the pockets off.
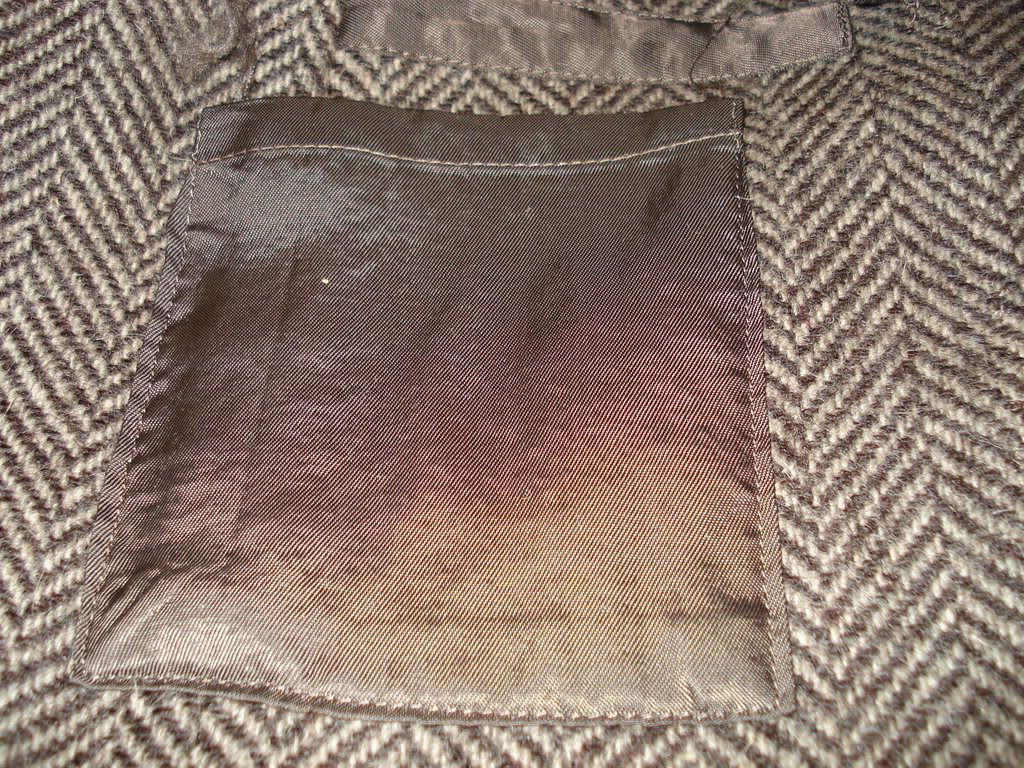
One of the pockets had an additional hidden pocket (made out of the same material as the liner) which also was removed. Note the strip of protective liner fabric under the pocket flap. Originally this was not a problem, but now that I have decided not to replace the pockets, I will have to remove this.
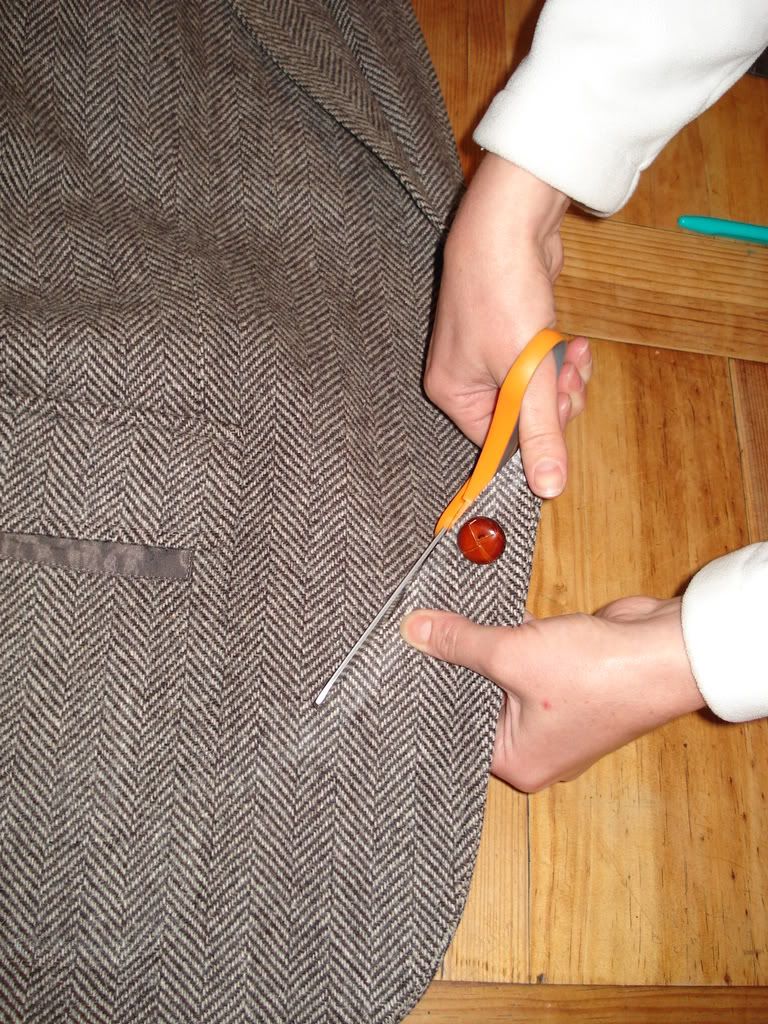
With the pockets out of the way, I can now boldly chop off the bottom of the jacket. My cautious husband was shocked at how casually I did this-he thought I should be measuring a few dozen more times before irrevocably removing the bottom of the jacket. I figured, shucks, this jacket only cost $0, so what if I screw it up! And by the way, isn't that a dreadful button?
Last edited by Panache; 9th May 09 at 08:12 AM.
-See it there, a white plume
Over the battle - A diamond in the ash
Of the ultimate combustion-My panache
Edmond Rostand
-
-
Moving on, we need to finish the bottom edge of the jacket. This jacket is only partially lined-the sleeves, the front panels and the upper 1/3. Therefore only the front part involves a lining when re-doing the hem. The original jacket has a blind hem all the way around, but I noted that on Panache's Braemar and on his converted day jacket (done by a tailor because I was too chickens***), the front of the jacket has a visible hem, carrying on the line of the front lapels. I decided I would copy this and do the front (where the lining is) as a visible hem and the back as a blind hem. Here is the front, pinned up to see how it looks.
I replaced the pins with basting stitches (less deformation of the material this way). And by the way, until about 8-9 months ago, I didn't even know what basting was!
In the above picture, note that there is an unnatractive sharp edge where there should be a graceful curve. I removed the basting stitches at this point and re-pressed, to smooth things out. Note that there is still a little divot on the curve-I couldn't avoid this, as it is where the second button was.
Next, we are going to work on the sleeves...
-See it there, a white plume
Over the battle - A diamond in the ash
Of the ultimate combustion-My panache
Edmond Rostand
-
-
The sleeves of the Braemar have patches attached to the inside seam, with buttons on the patch. Here's where the pockets I removed come in handy.
First, I have to mention that my father-in-law is a small man. He has been described as a gnome (which, perhaps, explains Panache's elvish look ). Therefore, he has short arms, and the sleeves needed shortening. So, I had to rip out the blind hem of the sleeve, remove one button...
And cut the sleeves down...
In order to place the patches within the inner seam, I had to open up the inner seam high enough to place the patch...
Making the patches was actually very easy. Remember the pockets I had to remove? Well, they had a very attractive curve, already nicely pressed in, so one was easily converted to patches as seen here (pocket on the right, patches on the left)...
Here, I've pinned the patch into place. Note plenty of hem to turn up when I am done with the patch.
Next, the placement of the patches and starting to actually sew some stuff!
-See it there, a white plume
Over the battle - A diamond in the ash
Of the ultimate combustion-My panache
Edmond Rostand
-
-
Fisrt, I sewed the raw edge of the patch (the side where I cut the pocket in half) into the inside seam of the sleeve and sewed all around the patch (when I have finished, the inside seams will be covered again with the lining of the sleeve).
Then, I had to sew up the seam again. This was a bit challenging, as there is a liner, and I'm trying to sew from the inside, so the seam is hidden. This involves turning the sleeve inside-out and sewing up the seam, making sure to catch the pach in it. I tried to take a picture, but I'm not sure how illustrative this is.
But, it worked! Here's the finished sleeve (still needs a blind hem, which will happen later).
Next, I am going to prep the epaulettes (sp?) and sew the bottom edge of the jacket...
-See it there, a white plume
Over the battle - A diamond in the ash
Of the ultimate combustion-My panache
Edmond Rostand
-
-
Today, the last thing I did was to prep the epaulettes (again, sp? as my French is poor). I flattened out some scraps from the bottom of the jacket...
I sewed them into a tapered/rounded shape...
Cut off the excess material...
Ironed the seam flat...
Turned them inside out (sorry, no picture, as I was alone and turning them inside out takes two hands), and ironed them flat, as so....
Today, I also sewed the front edge of the bottom hem, but, sadly, forgot to take a picture of this process.
My next available spare time will be spent ripping out the seam of the outer shell and the lining in the shoulders so as to insert the epaulettes (I give up on the sp? thing, somebody, please tell me, am I spelling epaulettes right?) and sewing on the buttons (3 on each sleeve patch, one to close the jacket and one on each epaulette).
Then, I will be done, and will try to post pictures of the actual father-in-law, at which point you can all tell me if he is indeed gnome-like!
-See it there, a white plume
Over the battle - A diamond in the ash
Of the ultimate combustion-My panache
Edmond Rostand
-
-
I have been asked if I could do this project sewing it completely by hand.
You know, it's not really all that involved. I just have a tendency to post a LOT of pictures. I am a very visual person, and cannot follow along with written instructions, so I post my projects in nauseating detail in order to be helpful to other people like me.
I did the handsewing bits today, posts to follow as soon as the pictures upload. Honestly though, things just take longer without a sewing machine, but, if you're careful, they often look much better. Most would agree that a hand sewn kilt is of higher quality than a machine sewn one (I believe that they are just different, not better/worse).
If you are afraid of the sewing machine, just buy a reasonable model at your local fabric shop-most come with several, free, hands-on lessons. I learned the basics of sewing machines when I was in college and my roommate taught me to make renaissance faire costumes on her machine. I bought my machine shortly thereafter. It is now 17-18 years old and still going strong. By the way, I don't REALLY know how to use it either-there are attachments and stitches that I have never used (AlanH and way2fractious are now sniggering at me behind their hands!).
Something I have learned in the process of taking this jacket apart is that I know next to NOTHING about sewing/tailoring. The construction of this relatively cheap/unsophisticated jacket is COMPLETELY beyond me. It terrifies me when people on this forum point to me to answer their sewing questions-I feel like such a poseur! Ask me about vaccination recommendations for your pet, or how one performs a spay surgery. I know these things (NEVER MIND, I come here to get away from my daily grind, ask your own vet! ).
-See it there, a white plume
Over the battle - A diamond in the ash
Of the ultimate combustion-My panache
Edmond Rostand
-
-
Today, I finished the jacket, except for one unexpected setback.
First, I finished the bottom hem-remember (or not, if you're not that dedicated to following my threads in detail ), I forgot to post the pictures of sewing the front part on the machine. The back does not need to continue the visible seam of the lapels, and on the original jacket this seam was a blind hem stitch (a la "Sewing for Dummies"-look it up!). Therefore, I copied this on the altered jacket.
Then, I decided to work on the epaulettes (thanks for the spelling help Brian and James!). I figured I needed to seam rip the outer shell AND lining, then insert the epaulette like so...
I discovered during this process that it really wasn't necessary to do this, and it made for a rather unkempt looking lining, when resewn. I guess this doesn't really matter, but as some may recall, I'm a bit of an anal retentive perfectionist, therefore this bothered me.
On the other side, I just seam ripped the OUTER seam of the sleeve...
And inserted the epaulatte.
I just sewed through the epaulette while sewing the seam back together. I couldn't get a good picture of EXACTLY how I did this-if you want to know, ask me to show you when you're in this neck of the woods. Tweed is VERY forgiving of stitching (in other words, you can do a lot of stitching without it showing-it just buries itself in the thickness of the fabric and the pattern).
-See it there, a white plume
Over the battle - A diamond in the ash
Of the ultimate combustion-My panache
Edmond Rostand
-
-
-
-
-
-
So, last post for the night. The pockets. Initially, I was going to cut down the original pockets and just sew them right back on, but I then cut one of the pockets in half for the sleeve patches-it was just too perfect a curve to have to try to create myself. So, I decided I would just leave the flaps and not bother to replace the pockets-people would then just assume there were slash pockets underneath those flaps.
There was this little strip of lining material, just visible under the flap, which needed to be removed...
Unfortunately, this little strip of material was not just put there to protect the underlying tweed from pens and such. It was actually there to cover up an unfinished cut in the fabric (purpose unknown, but probably some tailoring trick)...
So, I sewed the strip of material back on...
And managed to make my first blood sacrifice (probably because of the vodka tonic I had been drinking)...
So, I decided I was done for this session. I've looked over my scraps and am pretty sure I'll be able to piece together some reduced size patch pockets, but here's the almost finished piece of work. Remember that Panache's father has shorter arms and torso than he does.
-See it there, a white plume
Over the battle - A diamond in the ash
Of the ultimate combustion-My panache
Edmond Rostand
-
Similar Threads
-
By The F-H.C.A.G. in forum DIY Showroom
Replies: 95
Last Post: 16th June 11, 05:45 PM
-
By Rob Wright in forum How to Accessorize your Kilt
Replies: 10
Last Post: 8th April 09, 01:50 PM
-
By Farlander in forum DIY Showroom
Replies: 19
Last Post: 6th June 08, 08:06 AM
-
By Jerry in forum Professional Kiltmakers Hints and Tips
Replies: 3
Last Post: 16th October 06, 09:47 AM
Tags for this Thread
Posting Permissions
- You may not post new threads
- You may not post replies
- You may not post attachments
- You may not edit your posts
-
Forum Rules
|
|
Bookmarks