|
-
13th January 09, 06:19 PM
#11
I'm at work right now, and the computer ain't the best, so I can't post pics right now. I figure you can just go to my threads anyway, right Alan? I'll post links later, or pictures-let me know which you want.
Be well,
Star
-
-
14th January 09, 11:15 AM
#12
-
-
17th January 09, 07:21 PM
#13
Sorry Alan. I only have pics of the completed kilts. I have a hard time sewing, measuring, and taking pics all at the same time. I guess I'm not multi-talented. ;)
Jake
-
-
18th January 09, 11:46 AM
#14
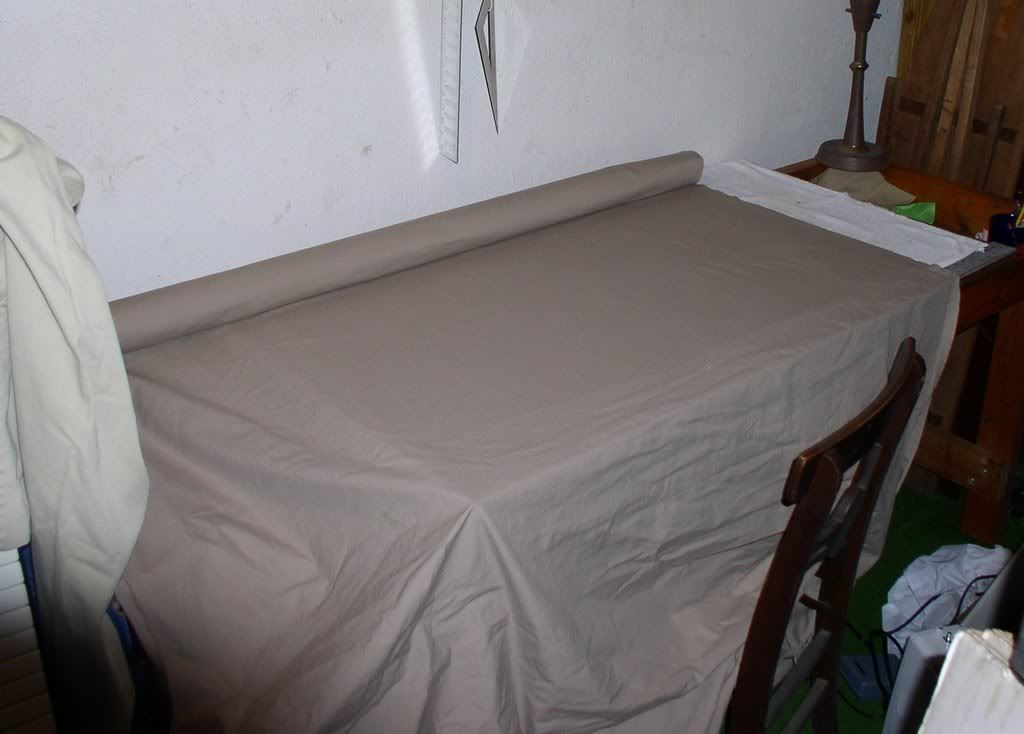
Four yards of double-width fabric is quite a handful:
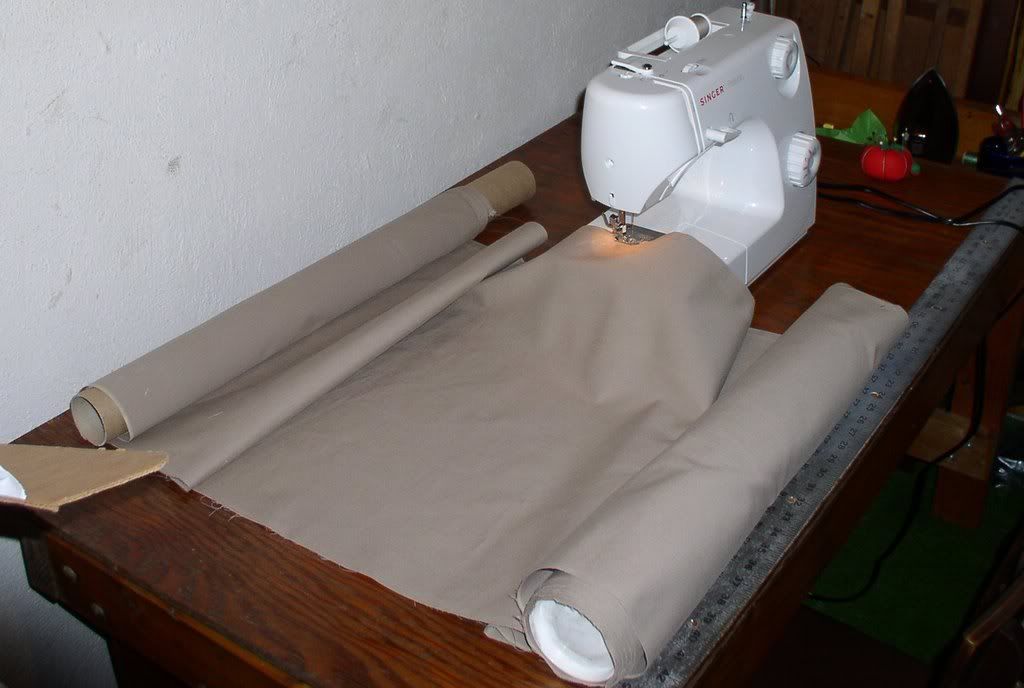
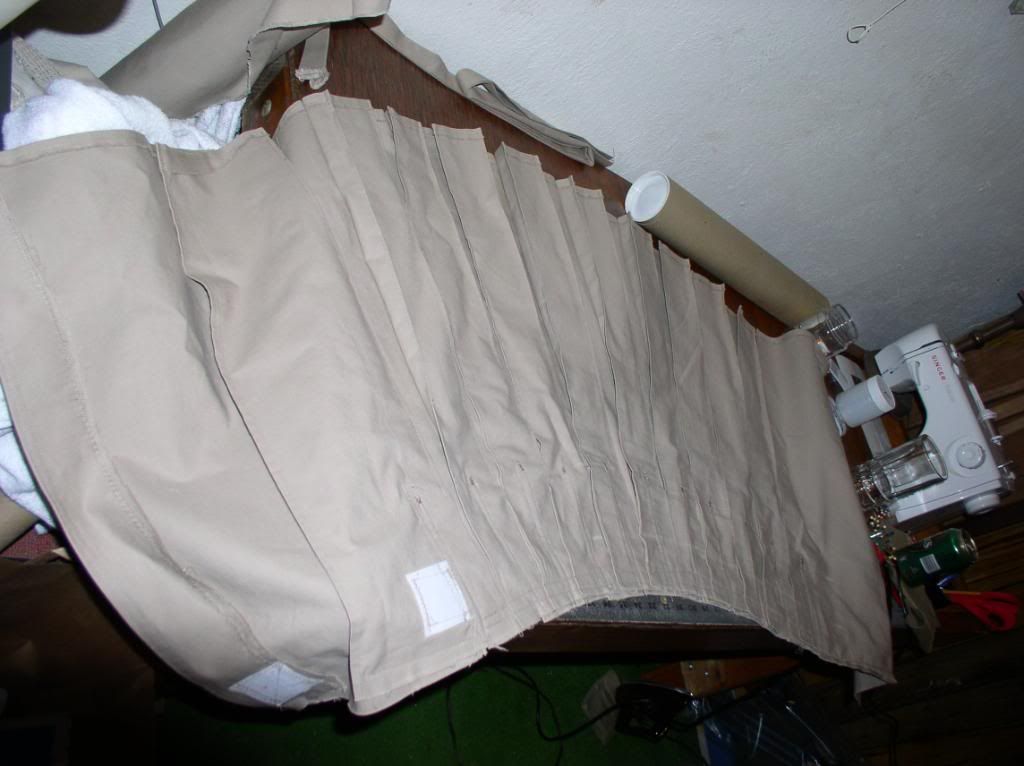
Once it is cut to length, it's more tractable---but still 12 feet long. I like to roll up each end on a tube (cardboard mailing tube, PVC pipe scrap, ...). Hemming the cut piece of fabric:
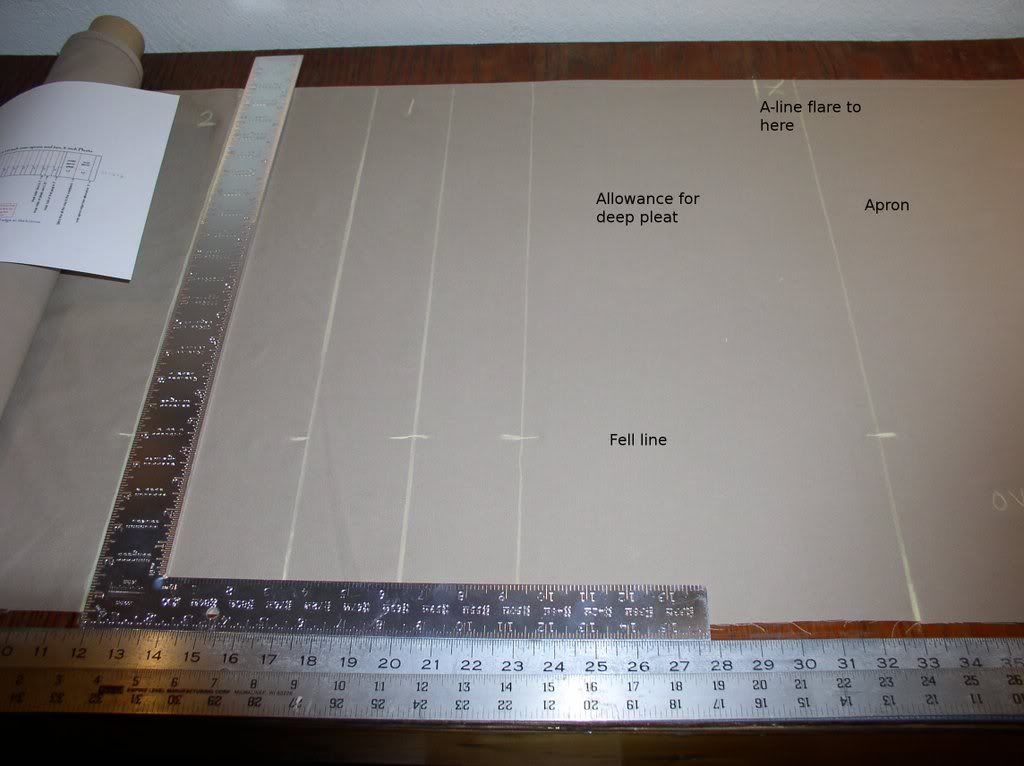
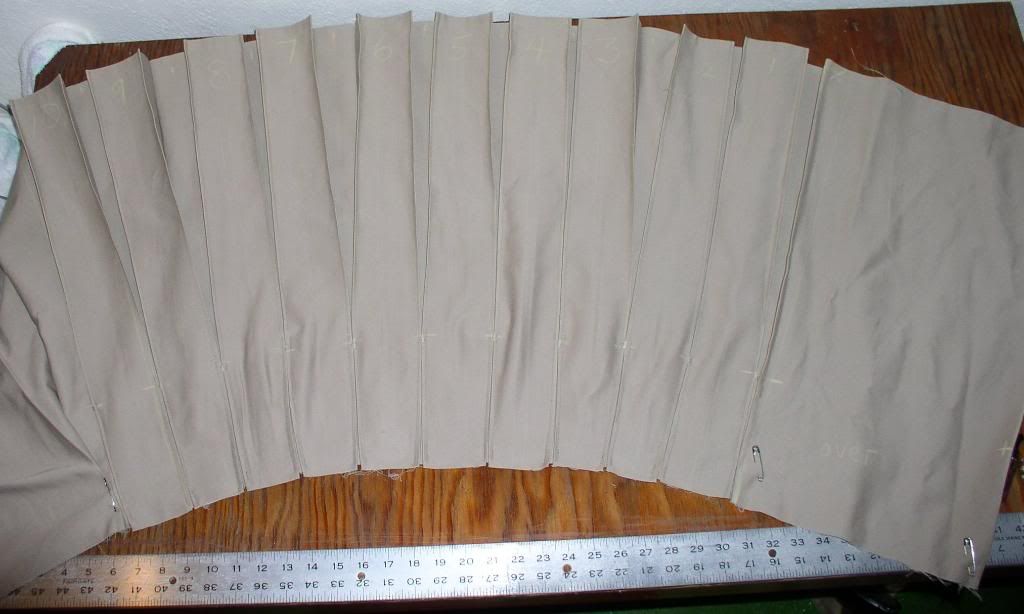
Marking (right to left) the apron, A-shaping (x), deep pleat, pleats 1 and 2.
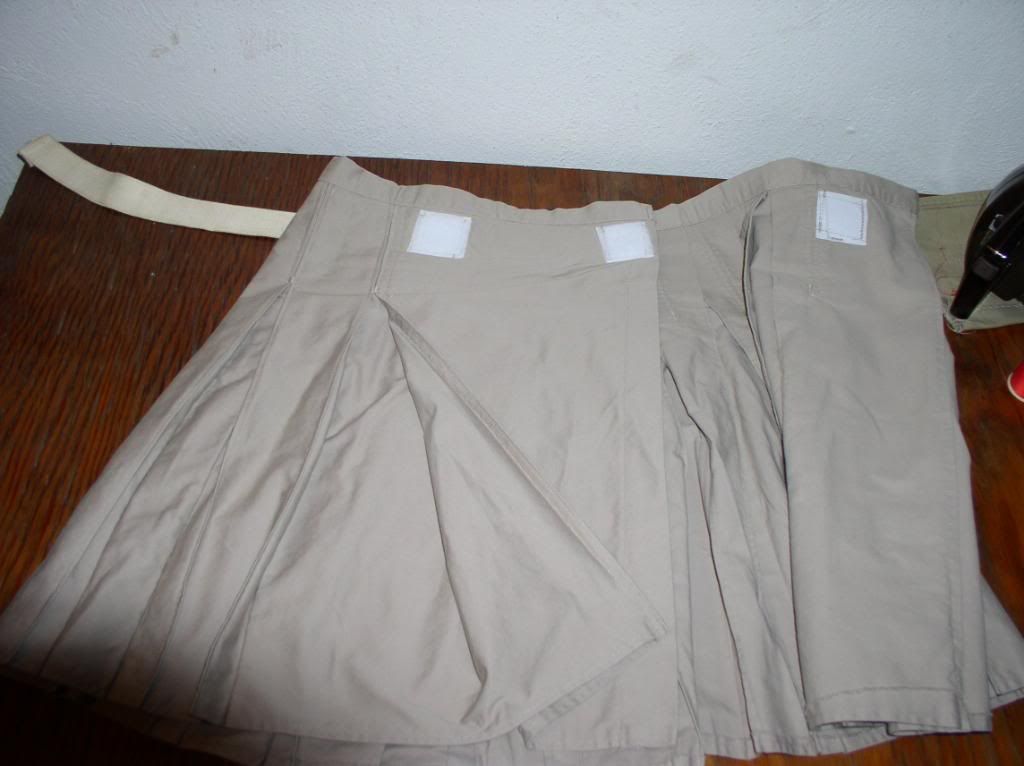
Finished kilt, showing the deep pleat:

Sewing the pleat edges: as fabric is all-cotton, it's especially helpful to define the pleat edges with a line of stitching. I pressed the right-hand edges from hem to fell, sewed along the edges; then rotated the work and did the left-hand edges from fell to hem. Hint: as noted elsewhere, don't press above the fell if there is taper from fell to waist. It will be easier to pin the tapered edges if they are not already pressed in the wrong place.
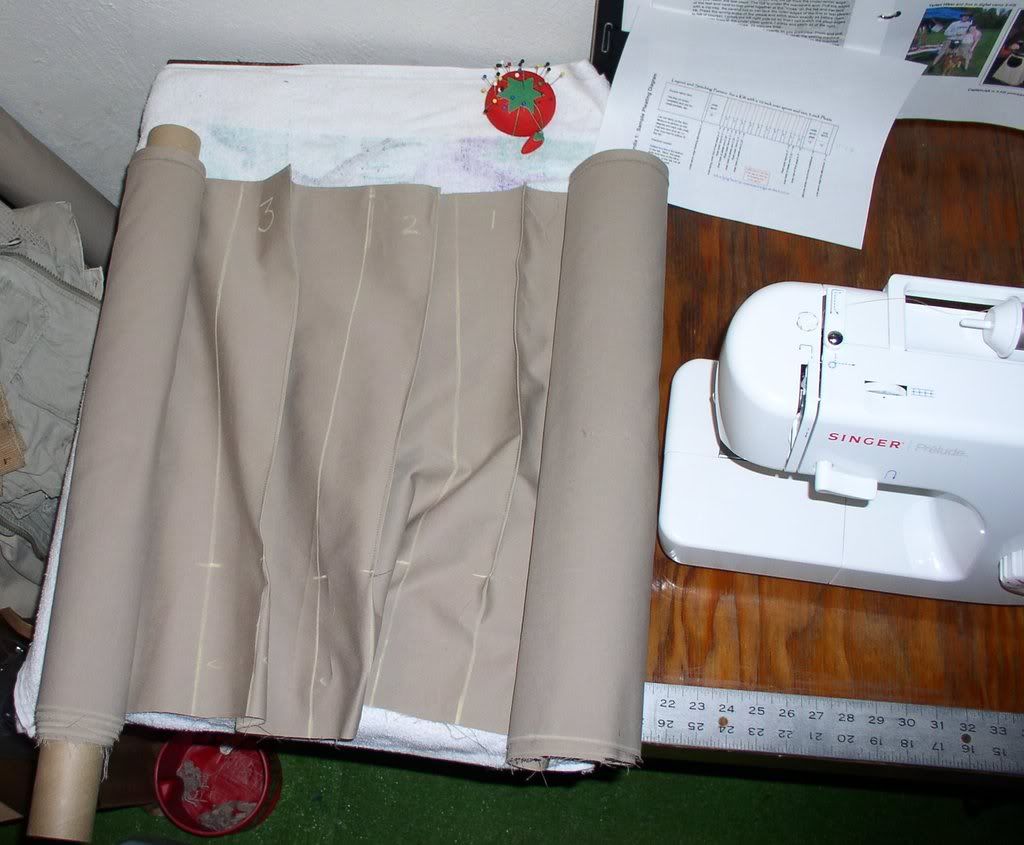
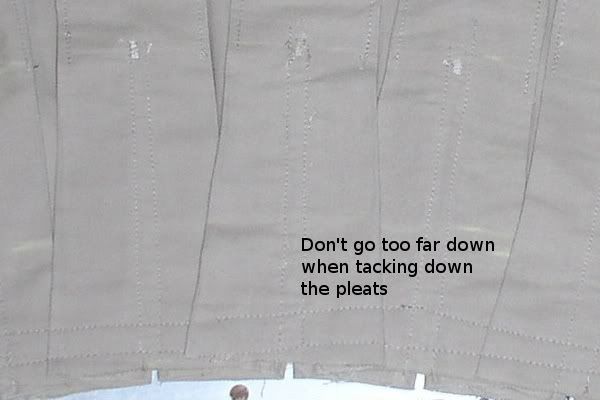
Close-up of pleats after top-stitching the tapered fell area:
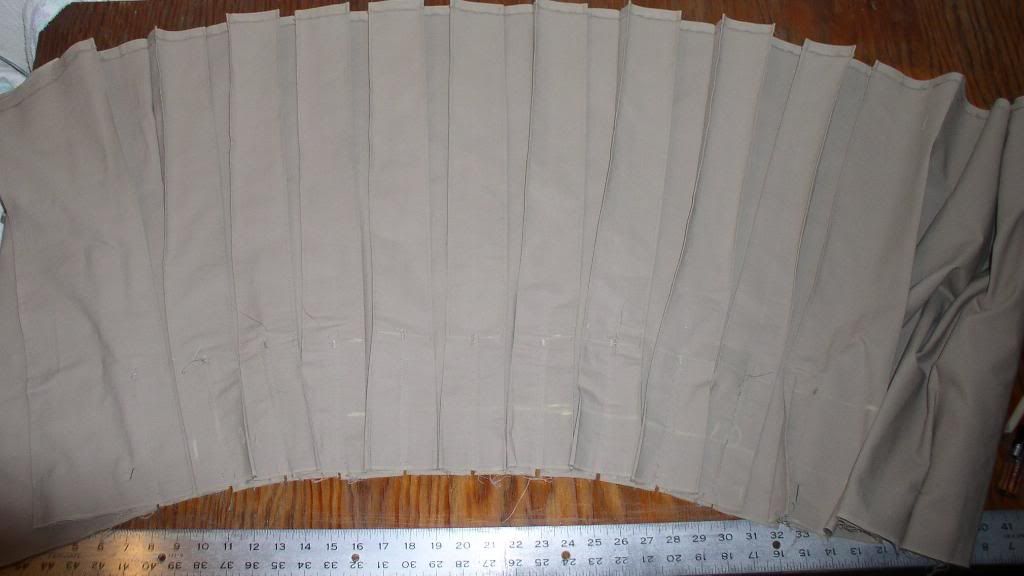
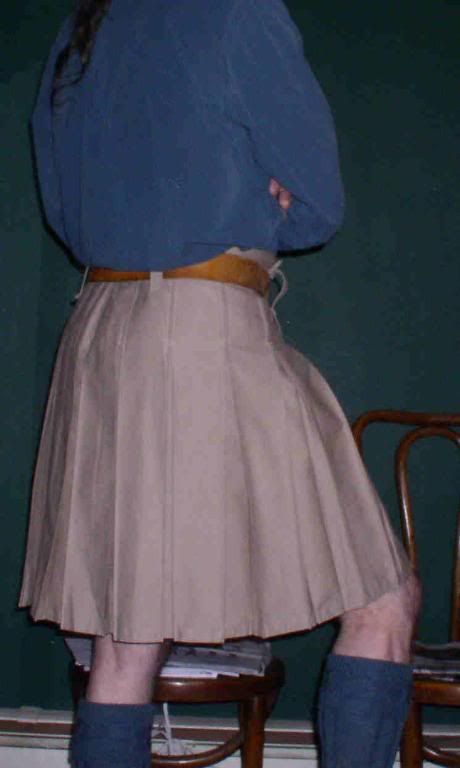
Overview of the pleats. The aprons are pinned so that we can try it on!
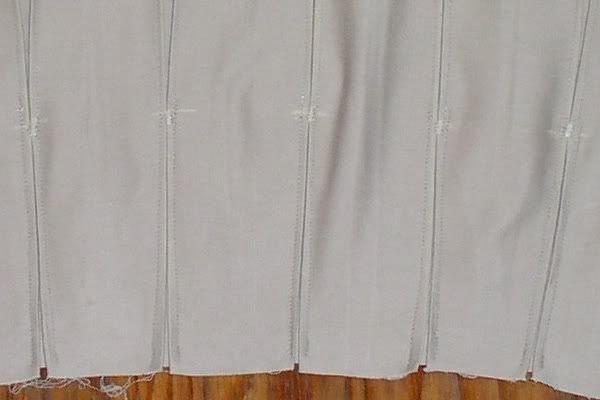
Pleats from the wrong side (inside of the kilt):
Close-up from the wrong side after pleats were tapered and stitched. As the taper is moderate, I overlapped the excess material and tacked it along the waistband area.
Last edited by fluter; 18th January 09 at 11:51 AM.
Reason: Correct an image link
Ken Sallenger - apprentice kiltmaker, journeyman curmudgeon,
gainfully unemployed systems programmer
-
-
18th January 09, 11:47 AM
#15
-
-
19th January 09, 04:24 AM
#16
OK - try to get photos from camera to X marks - begin
It seems to have worked -
This is a reverse Kingussie style kilt in the design stage. It is made from four strips of fabric cut selvage to selvage. The pattern is not rotatable, which makes some difficulties.
First the removal of the white and orange selvage to make a fringe on the apron. Fortunatly there is no need to remove any fabric to have the apron with the light stripe in the centre and the edges on the same stripe.

The shaped edge of the apron.

The large under apron pleat

One possible pleating - will not work as the joins in the strips are not well placed, and to move them would mean losing too much fabric.

This will possibly work. Pleated to the stripe but in all three colours. Eight or nine pleats each side of the centre back.

Now to do the maths and press in the folds.
Anne the Pleater
Last edited by Pleater; 19th January 09 at 04:47 AM.
-
-
19th January 09, 06:31 PM
#17
 Originally Posted by fluter

Almost done: adding the hook and loop patches at the waist.
Dude. You rule. I'm using ALL of these!!!!
THANK YOU!
-
-
19th January 09, 06:32 PM
#18
Originally Posted by Pleater
OK - try to get photos from camera to X marks - begin
It seems to have worked -
This is a reverse Kingussie style kilt in the design stage.
Now to do the maths and press in the folds.
Anne the Pleater
Anne, that's a really pretty tartan! What is it?
-
-
20th January 09, 12:16 PM
#19
OK, between pictures gathered from:
New York Ben
the F-H.C.A.G.
smayniac
sydnie7
fluter
Livingston
I think I've got enough to forge ahead. The 2nd edition should have between 20-30 pictures added to increase the understandability of the text.
-
-
20th January 09, 02:14 PM
#20
Originally Posted by Alan H
OK, between pictures gathered from:
New York Ben
the F-H.C.A.G.
smayniac
sydnie7
fluter
Livingston
I think I've got enough to forge ahead. The 2nd edition should have between 20-30 pictures added to increase the understandability of the text.
Alan - do you know when the new manual might be available? I have fabric sitting on the table waiting to be man-handled, but want to wait for the new instructions. Until then, I have a tweed jacket to convert.
Thanks!
-
Similar Threads
-
By Mr.Charles Anthony in forum Professional Kiltmakers Hints and Tips
Replies: 7
Last Post: 10th September 08, 01:26 PM
-
By Jimmy in forum General Kilt Talk
Replies: 3
Last Post: 6th June 08, 01:39 PM
-
By PiobBear in forum DIY Showroom
Replies: 10
Last Post: 15th January 07, 09:29 AM
-
By Irish in Tacoma in forum How to Accessorize your Kilt
Replies: 6
Last Post: 20th July 06, 11:18 PM
-
By beerbecue in forum General Kilt Talk
Replies: 3
Last Post: 2nd January 05, 11:01 AM
 Posting Permissions
- You may not post new threads
- You may not post replies
- You may not post attachments
- You may not edit your posts
-
Forum Rules
|
|


Bookmarks